Collect Datafresco
Vercel Deployment Guide
Take Care!
This is a legacy deployment guide. It is kept for researchers who already have a Fresco instance deployed on Vercel, and it is no longer updated. For new deployments, follow the supported Deployment Guide, which deploys Fresco using Netlify.
Summary:
This guide will walk you through the process of deploying your instance of Fresco.Prerequisites:
Before you get started, you should:- Read the about Fresco article to understand what Fresco is and how it works.
- Create an account on GitHub if you do not already have one.
- Set aside enough time to complete the deployment process in one sitting.
Duration:
60 minutes
Thank you for taking the time to deploy Fresco! We hope you find it a valuable tool for your research and data collection. This guide will walk you through the process of deploying your instance of Fresco.
Fresco is different from other software that you may have installed previously. It is a web application, meaning that you do not install it on a laptop or desktop. Instead, you "deploy" it to one or more servers (your "infrastructure"), which you can then access from your web browser.
This approach allows researchers to manage their own data and customize the nature of their infrastructure to suit their needs.
This also means that you are responsible for the security and maintenance of your own deployment! The Network Canvas project team by design has no access to your data or infrastructure.
To deploy Fresco, we will use the following services and technologies:
- GitHub: A platform for hosting and sharing code owned and operated by Microsoft. The Fresco code is shared via GitHub, and you will need a GitHub account to deploy it. If you do not have a GitHub account, you can create one for free at github.com.
- PostgreSQL: A powerful, open-source relational database system. Fresco uses PostgreSQL to store data about your study, participants, and responses.
- Object storage: Fresco stores protocol assets (such as media files) in an S3-compatible object store. You can use UploadThing — a managed service that is the simplest option — or bring your own S3-compatible bucket (AWS S3, Cloudflare R2, MinIO, or Backblaze B2).
To make the deployment process as simple as possible, we designed Fresco to be deployed using Vercel, which is a cloud platform that specializes in deploying web applications. It is designed to be easy to use and has a generous free tier that is suitable for most research projects. It is not a requirement to use Vercel to host Fresco, but it is the simplest way to get started and is the method we will be using in this guide.
How much does deploying Fresco cost?
Deploying Fresco for your study can be achieved entirely for free using the steps detailed in this guide. We built it this way to allow the broadest possible access to the software. The free deployment method does come with some limitations, such as the amount of data you can store and transfer, and the overall performance of the application.
If you are running a large study, require guaranteed levels of performance, or have special requirements imposed by your IRB regarding participant data, you may wish to use a paid plan or a different approach to deployment. Consult the cloud pricing page for more information. Please note that the Network Canvas team does not benefit financially in any way from your choice of cloud provider.
It is also possible to use whatever infrastructure you may have access to in order to deploy Fresco. For information on this, see our advanced deployment guide.
Create a fork of Fresco
Deploying Fresco involves setting up your own unique version of the project, which we refer to as your instance. The first step in creating this instance is to create a copy (or "fork") of the Fresco code on GitHub.
To do this, ensure you have a GitHub account and are signed in, and then:
-
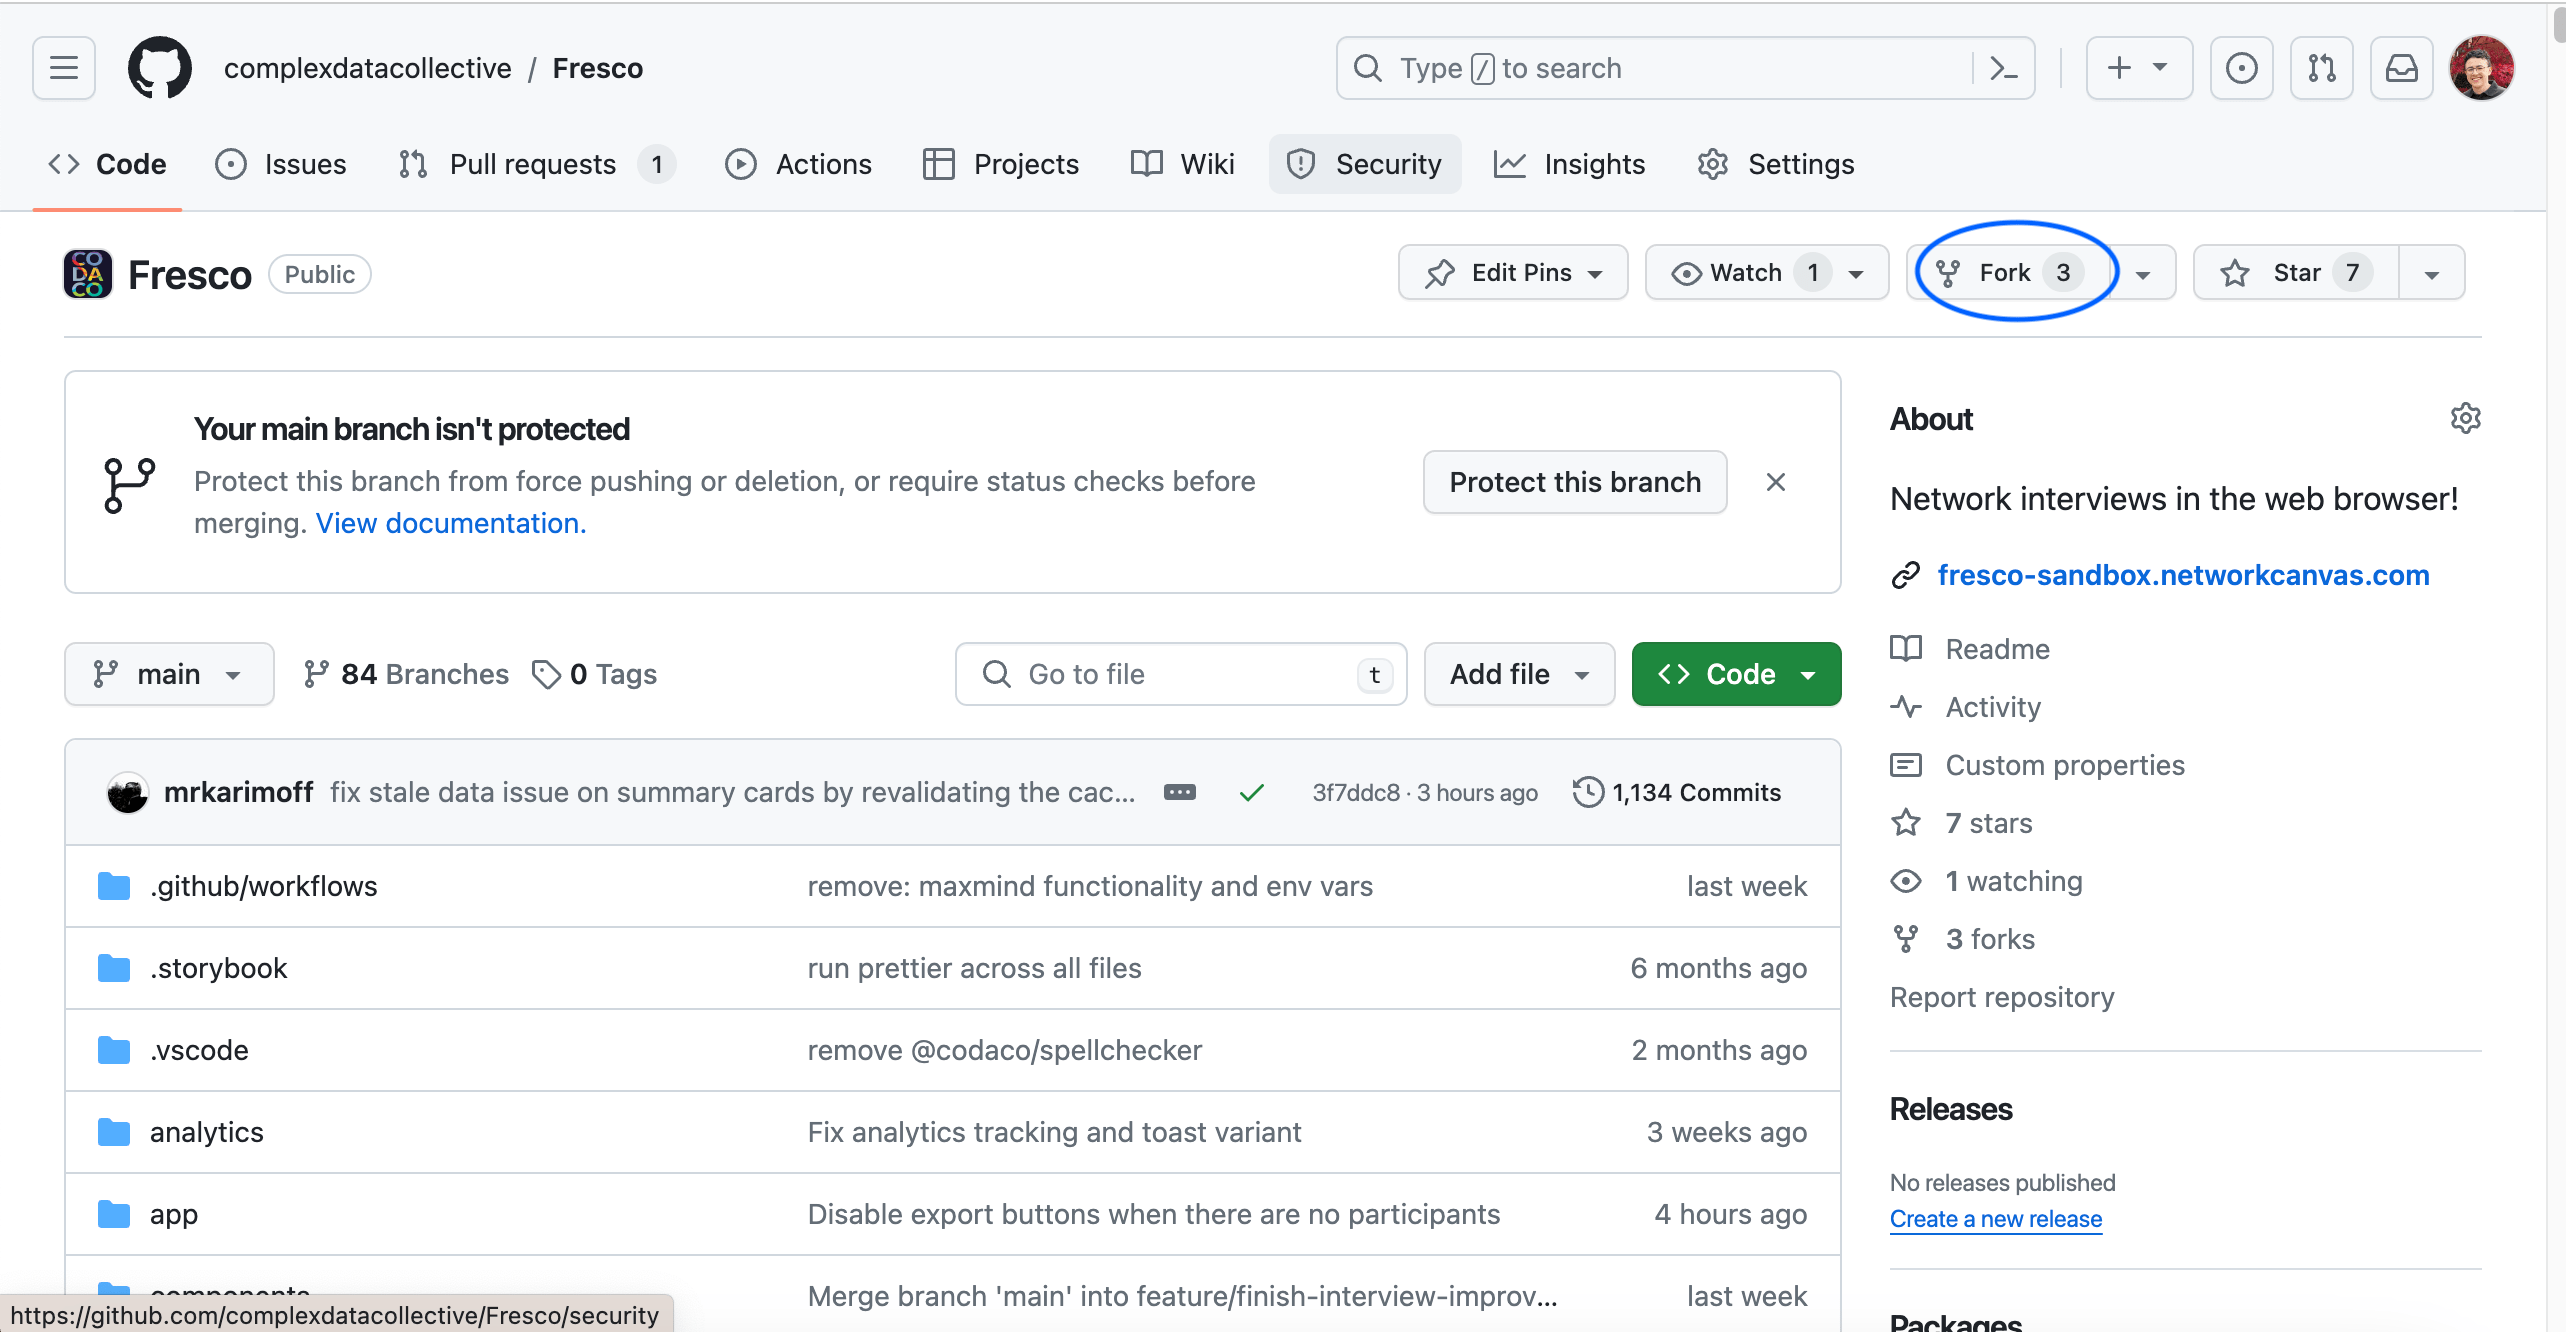
Visit the Fresco repository on GitHub, and click "Fork".
-
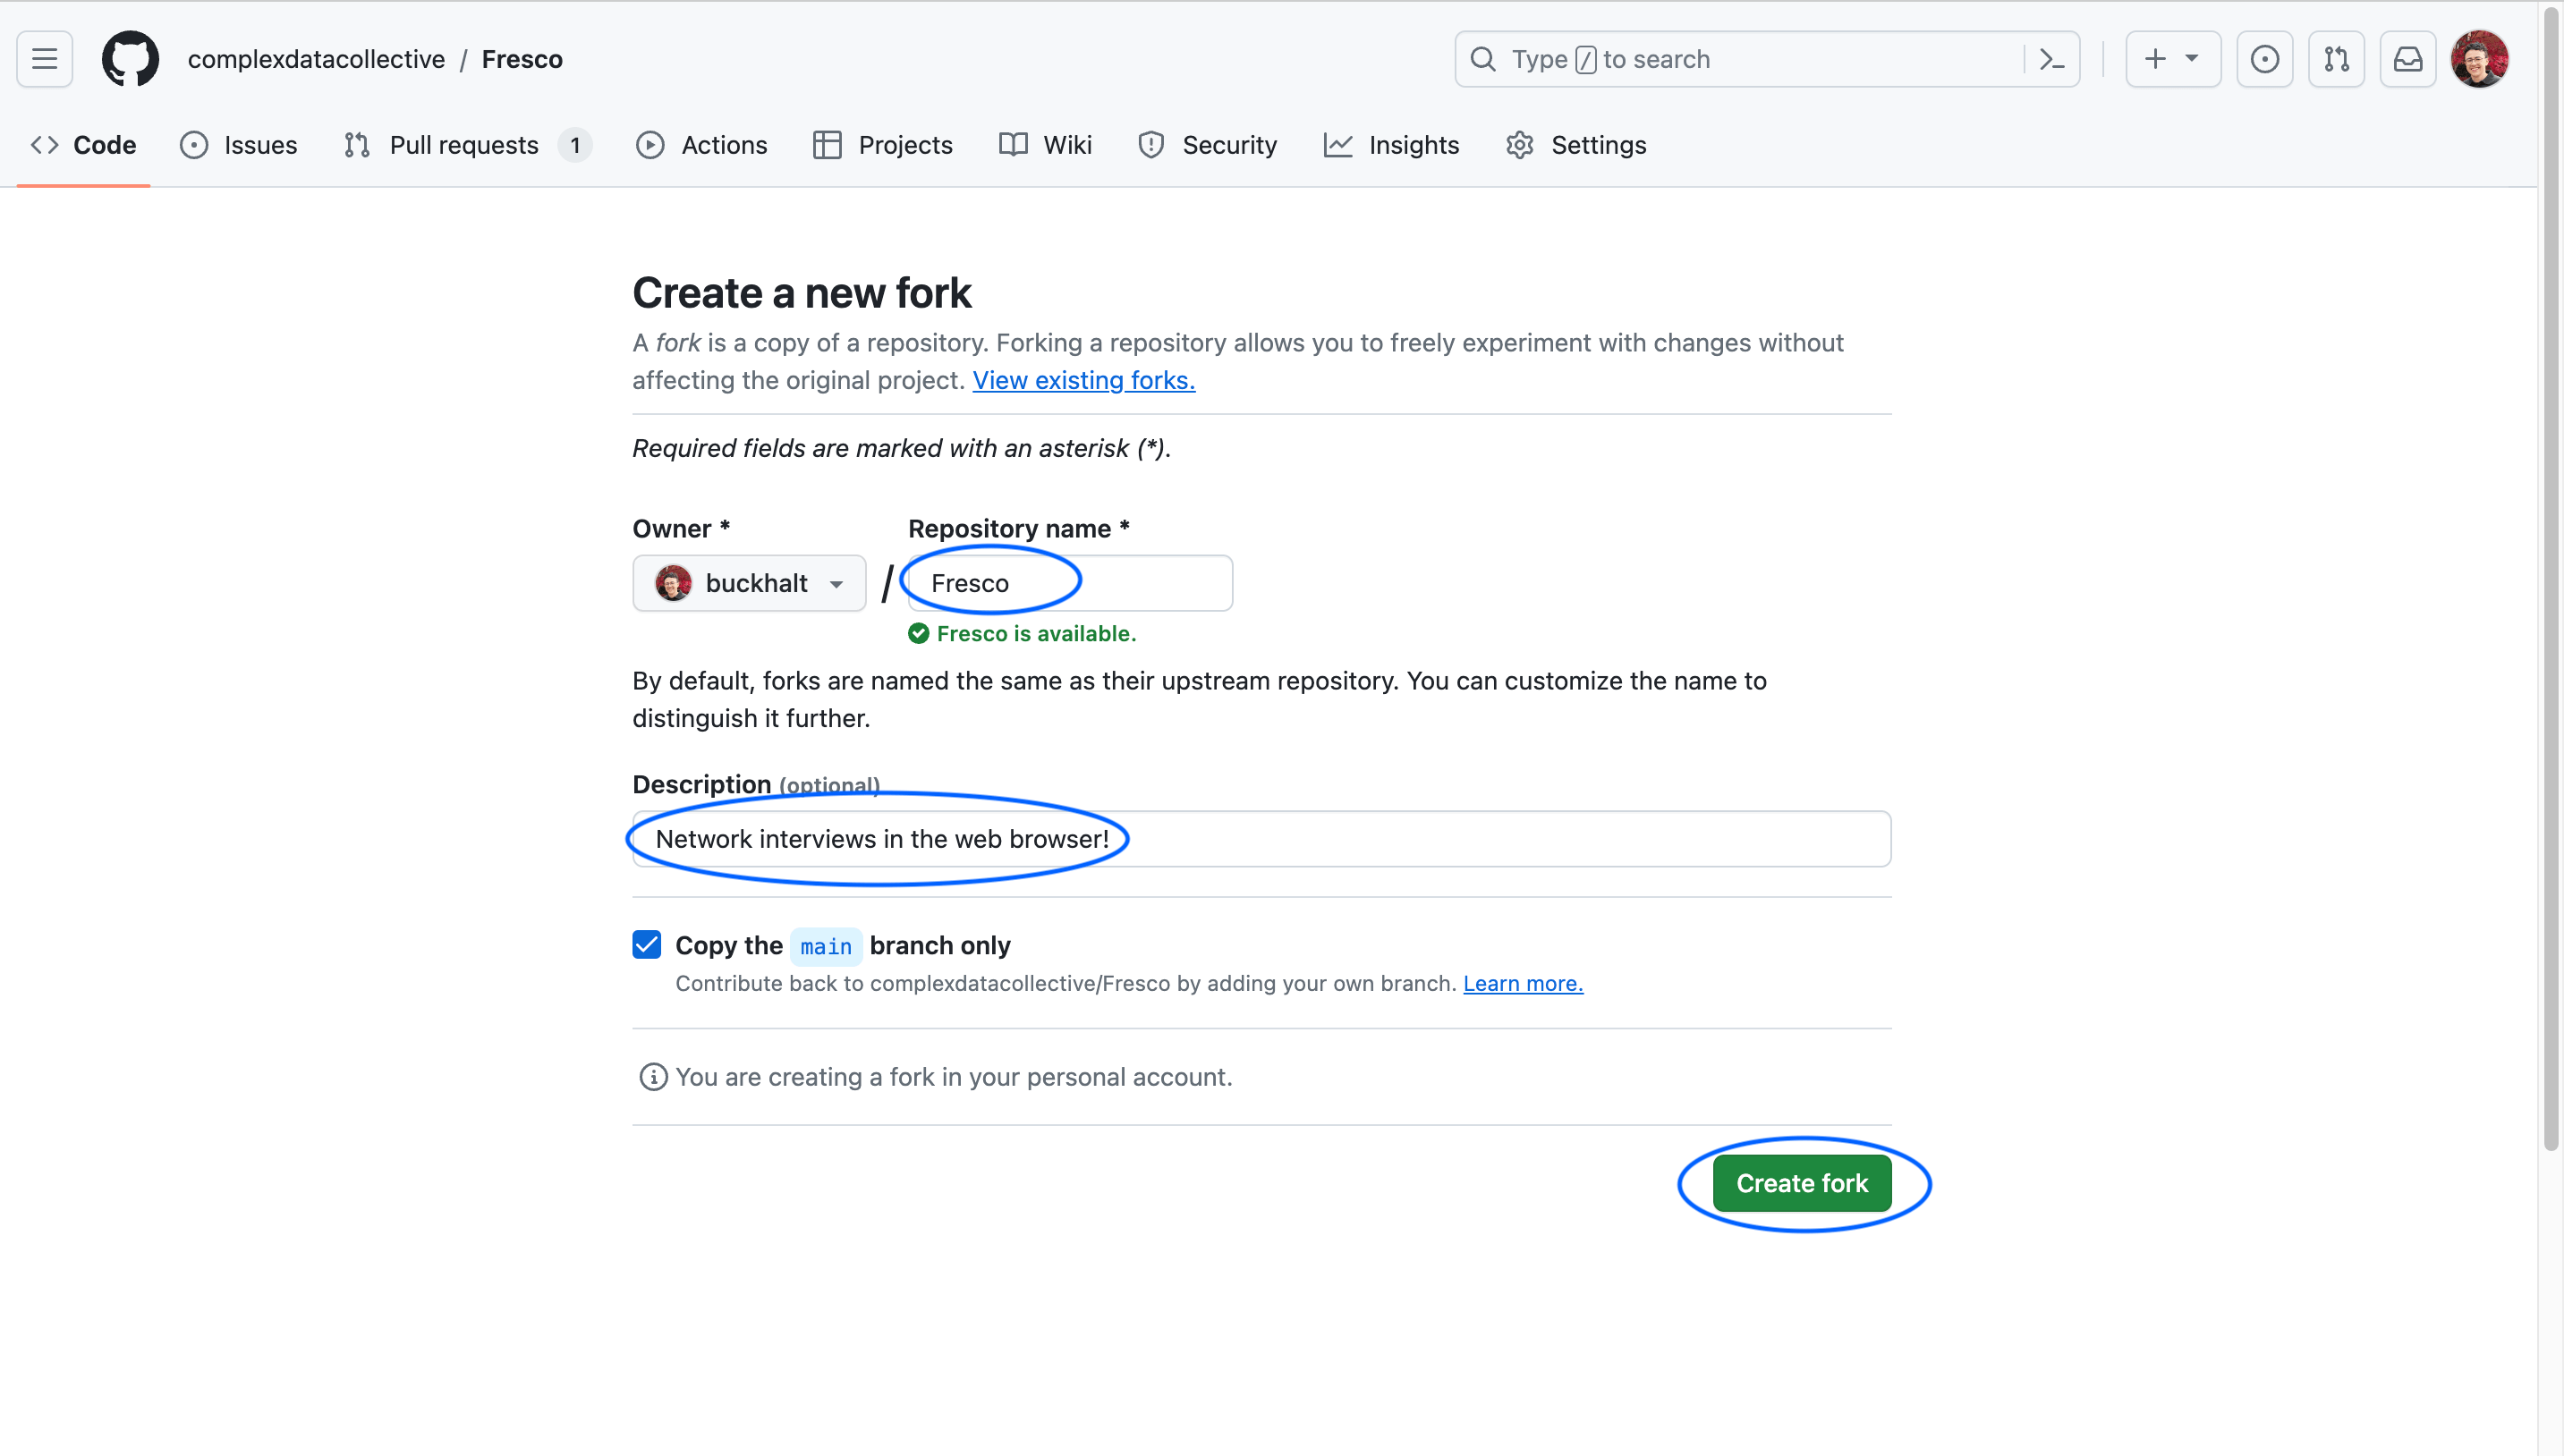
Enter a repository name (this will be your Fresco instance name, so you may wish to use your study name or the name of your project), along with a description, and click "Create Fork". Leave the "copy main branch" option selected.
Once you have completed this step, you will be redirected to your forked repository on GitHub. This copy of the Fresco code is now yours to deploy or modify as you wish. ``
Create a database
Fresco uses a PostgreSQL database to store data about your study, participants, and responses. We will next create a new database using the Vercel platform.
-
Visit the Vercel website and click Continue with GitHub to sign in. You will be redirected to the Vercel dashboard.
-
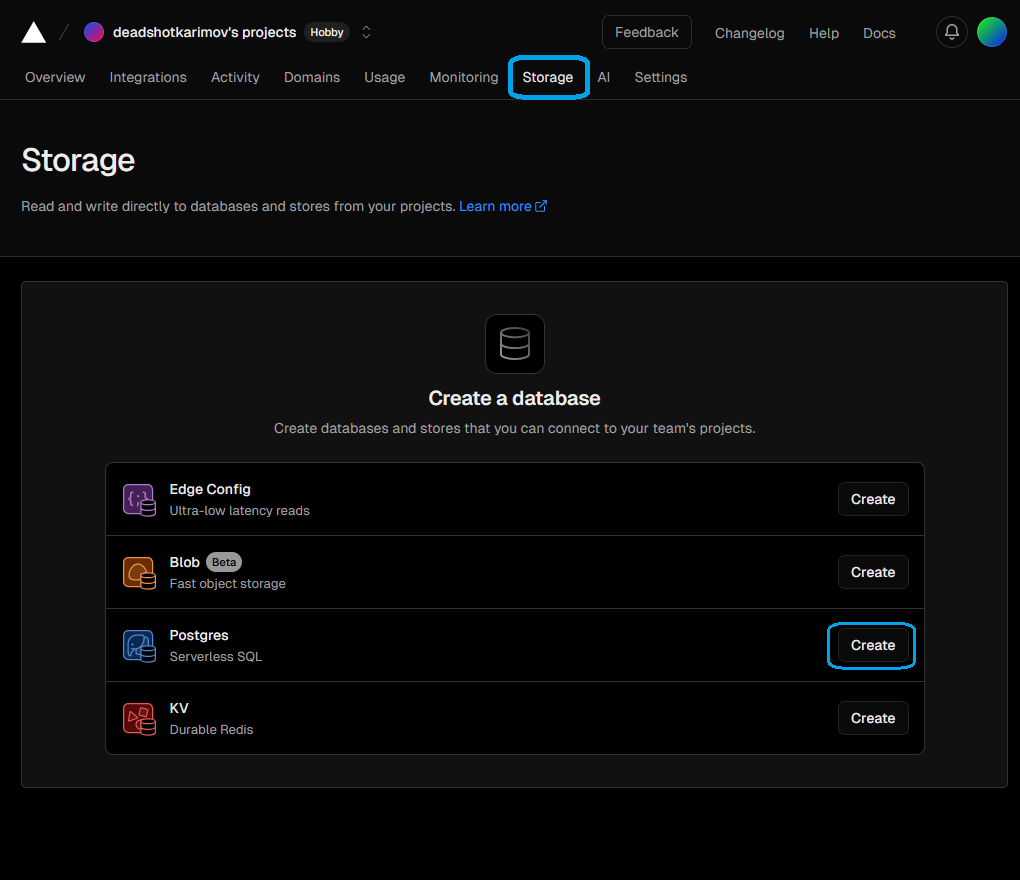
From your dashboard, select Storage from the top navigation bar. Then, select the Neon Serverless Postgres option.
Create a Neon database -
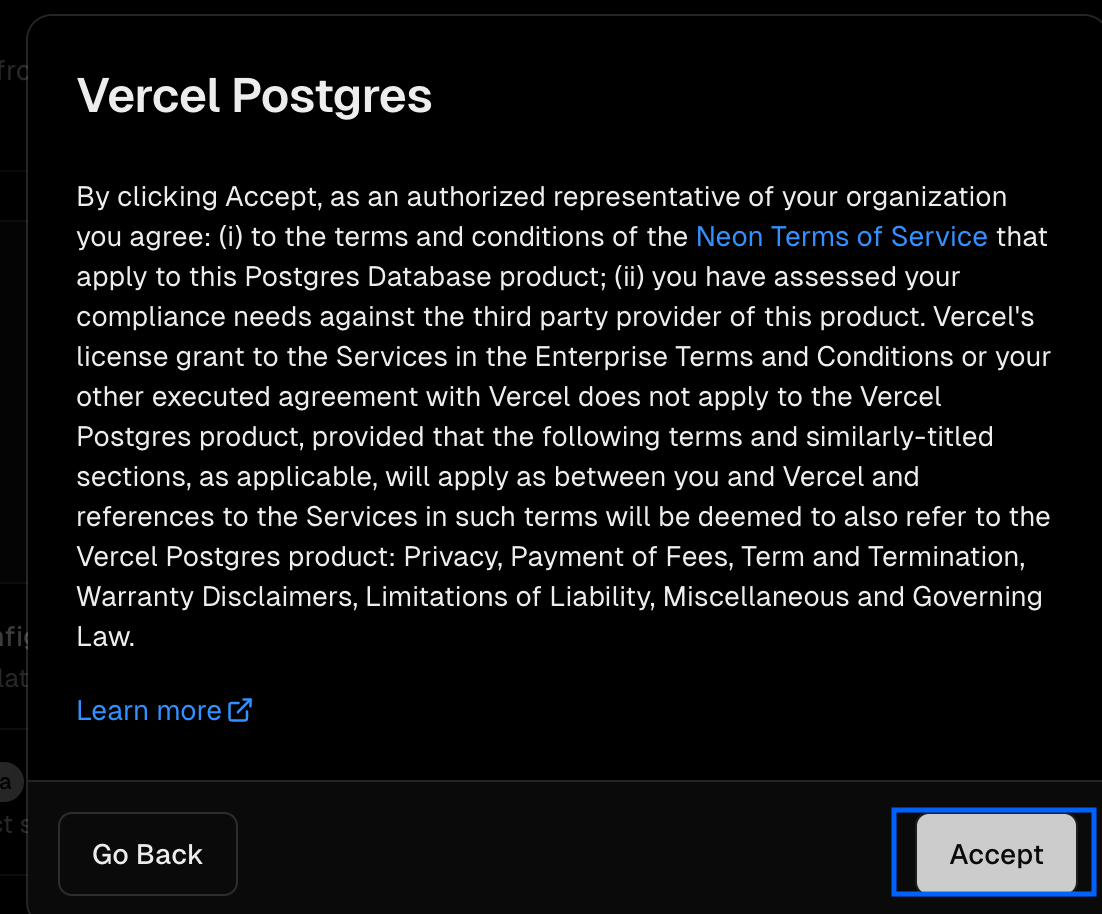
Choose a region from the dropdown. We recommend choosing the region nearest to you. By default, the database will be created on the Free tier. For more information on database tier pricing, consult the cloud pricing page. Then, click Continue.
Choose a region and installation plan -
Give your database a name and then click Create. Your database will be generated. Click Done to return to the database dashboard.
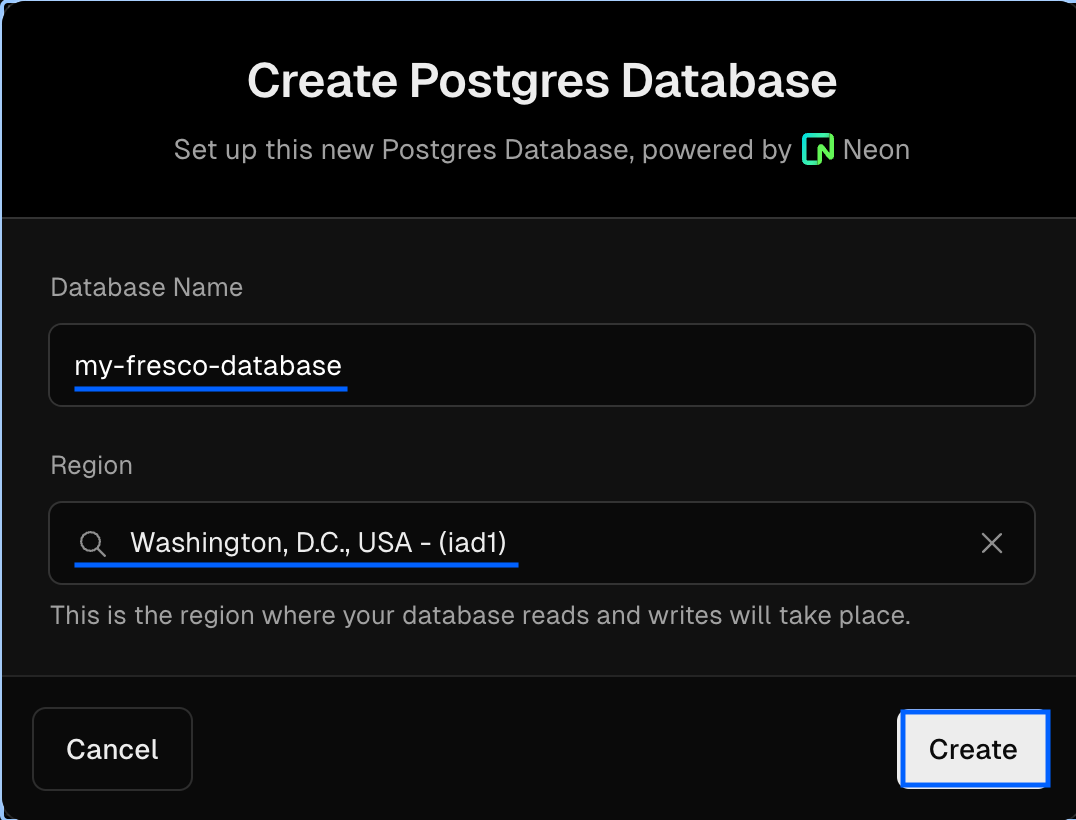
Create database -
Under the heading 'quickstart' you will see a connection string for the database. Click the
.env.localtab, and then click "Copy Snippet" to copy the environment variables to your clipboard.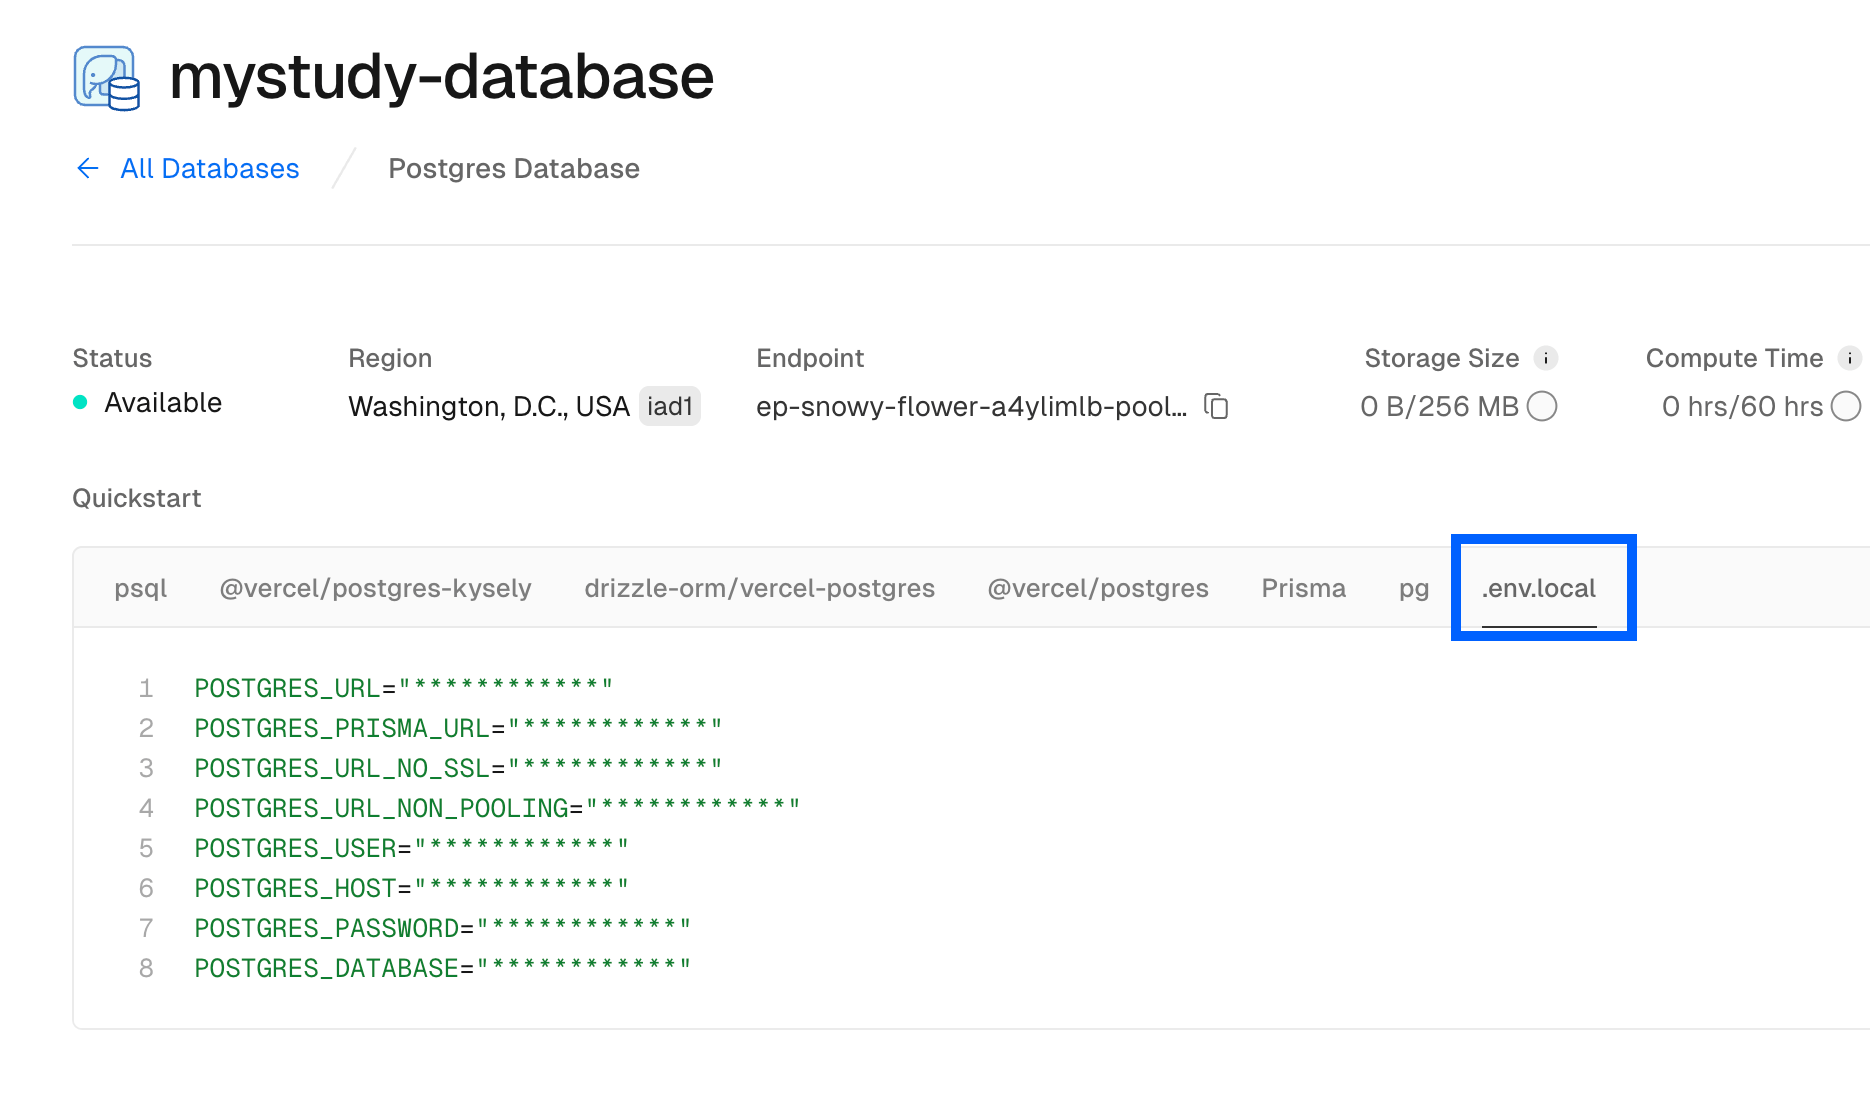
Click the .env.local tab, and copy the environment variables -
Paste the environment variables into a text file or notes app for safekeeping. You will need these environment variables later in the deployment process. The file should look something like this:
# Recommended for most uses
DATABASE_URL=******************

# For uses requiring a connection without pgbouncer
DATABASE_URL_UNPOOLED=******************

# Parameters for constructing your own connection string
PGHOST=******************
PGHOST_UNPOOLED=******************
PGUSER=default
PGDATABASE=******************
PGPASSWORD******************

# Parameters for Vercel Postgres Templates
POSTGRES_URL=******************
POSTGRES_URL_NON_POOLING=******************
POSTGRES_USER=******************
POSTGRES_HOST=******************
POSTGRES_PASSWORD=******************
POSTGRES_DATABASE=******************
POSTGRES_URL_NO_SSL=******************
POSTGRES_PRISMA_URL=******************

# Neon Auth environment variables for Next.js
NEXT_PUBLIC_STACK_PROJECT_ID=****************************
NEXT_PUBLIC_STACK_PUBLISHABLE_CLIENT_KEY=****************************************
STACK_SECRET_SERVER_KEY=***********************
Create a project on Vercel
Next, we will deploy your fork to the Vercel platform, using the services we created previously. You can use the "hobby" tier (which is free) or paid plan (for more information about cloud pricing, read our cloud pricing documentation), but for the purposes of this guide, we will use the free tier.
Good to know:
Should you run into any issues, please consult the troubleshooting guide or reach out to the user community.
-
Click here to create a new project on Vercel. Sign in using GitHub, if you are not already signed in.
-
Find the name of your Fresco instance from the list of your git repositories and click "Import". You will be taken to the "Configure Project" screen.
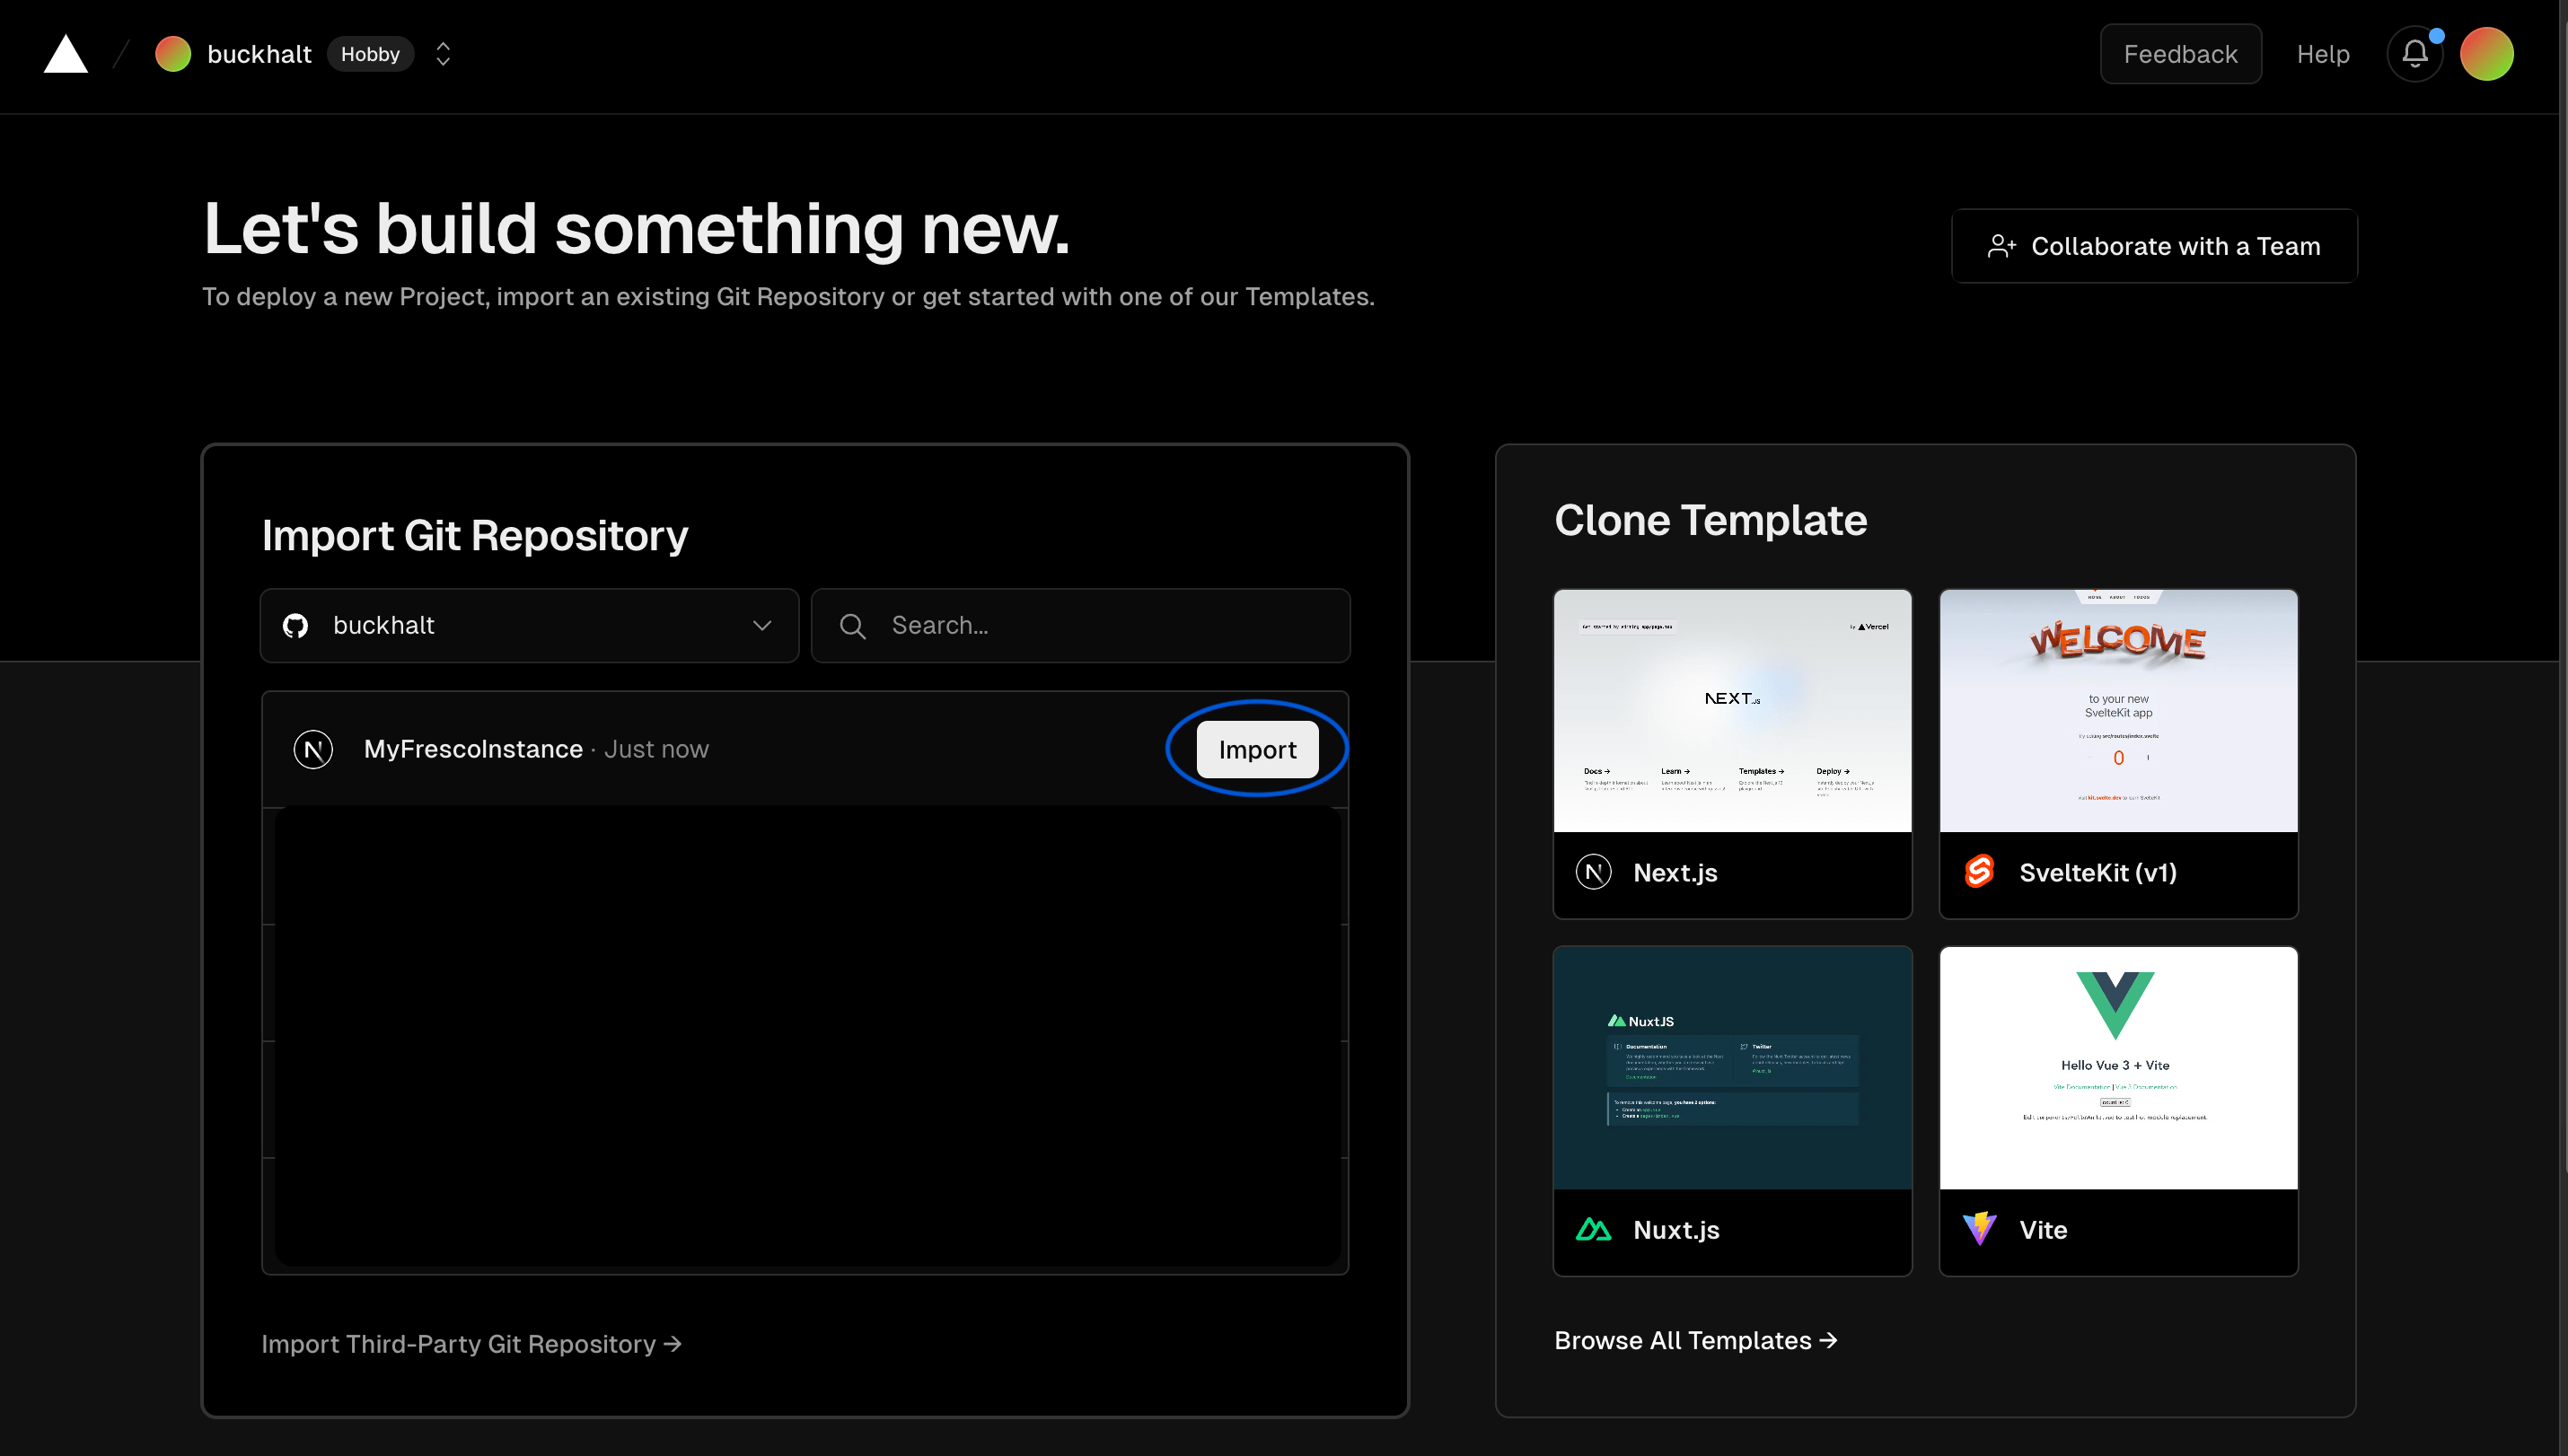
Import Git Repository -
Open the text editor or notes app where you stored your environment variables from UploadThing and the database. Select all of the text, and copy it to your clipboard.
-
On the "Configure Project" screen, expand the "Environment Variables" section. Paste your variables into the "key" text box (with the
EXAMPLE_NAMEplaceholder). Your variables will be automatically added below.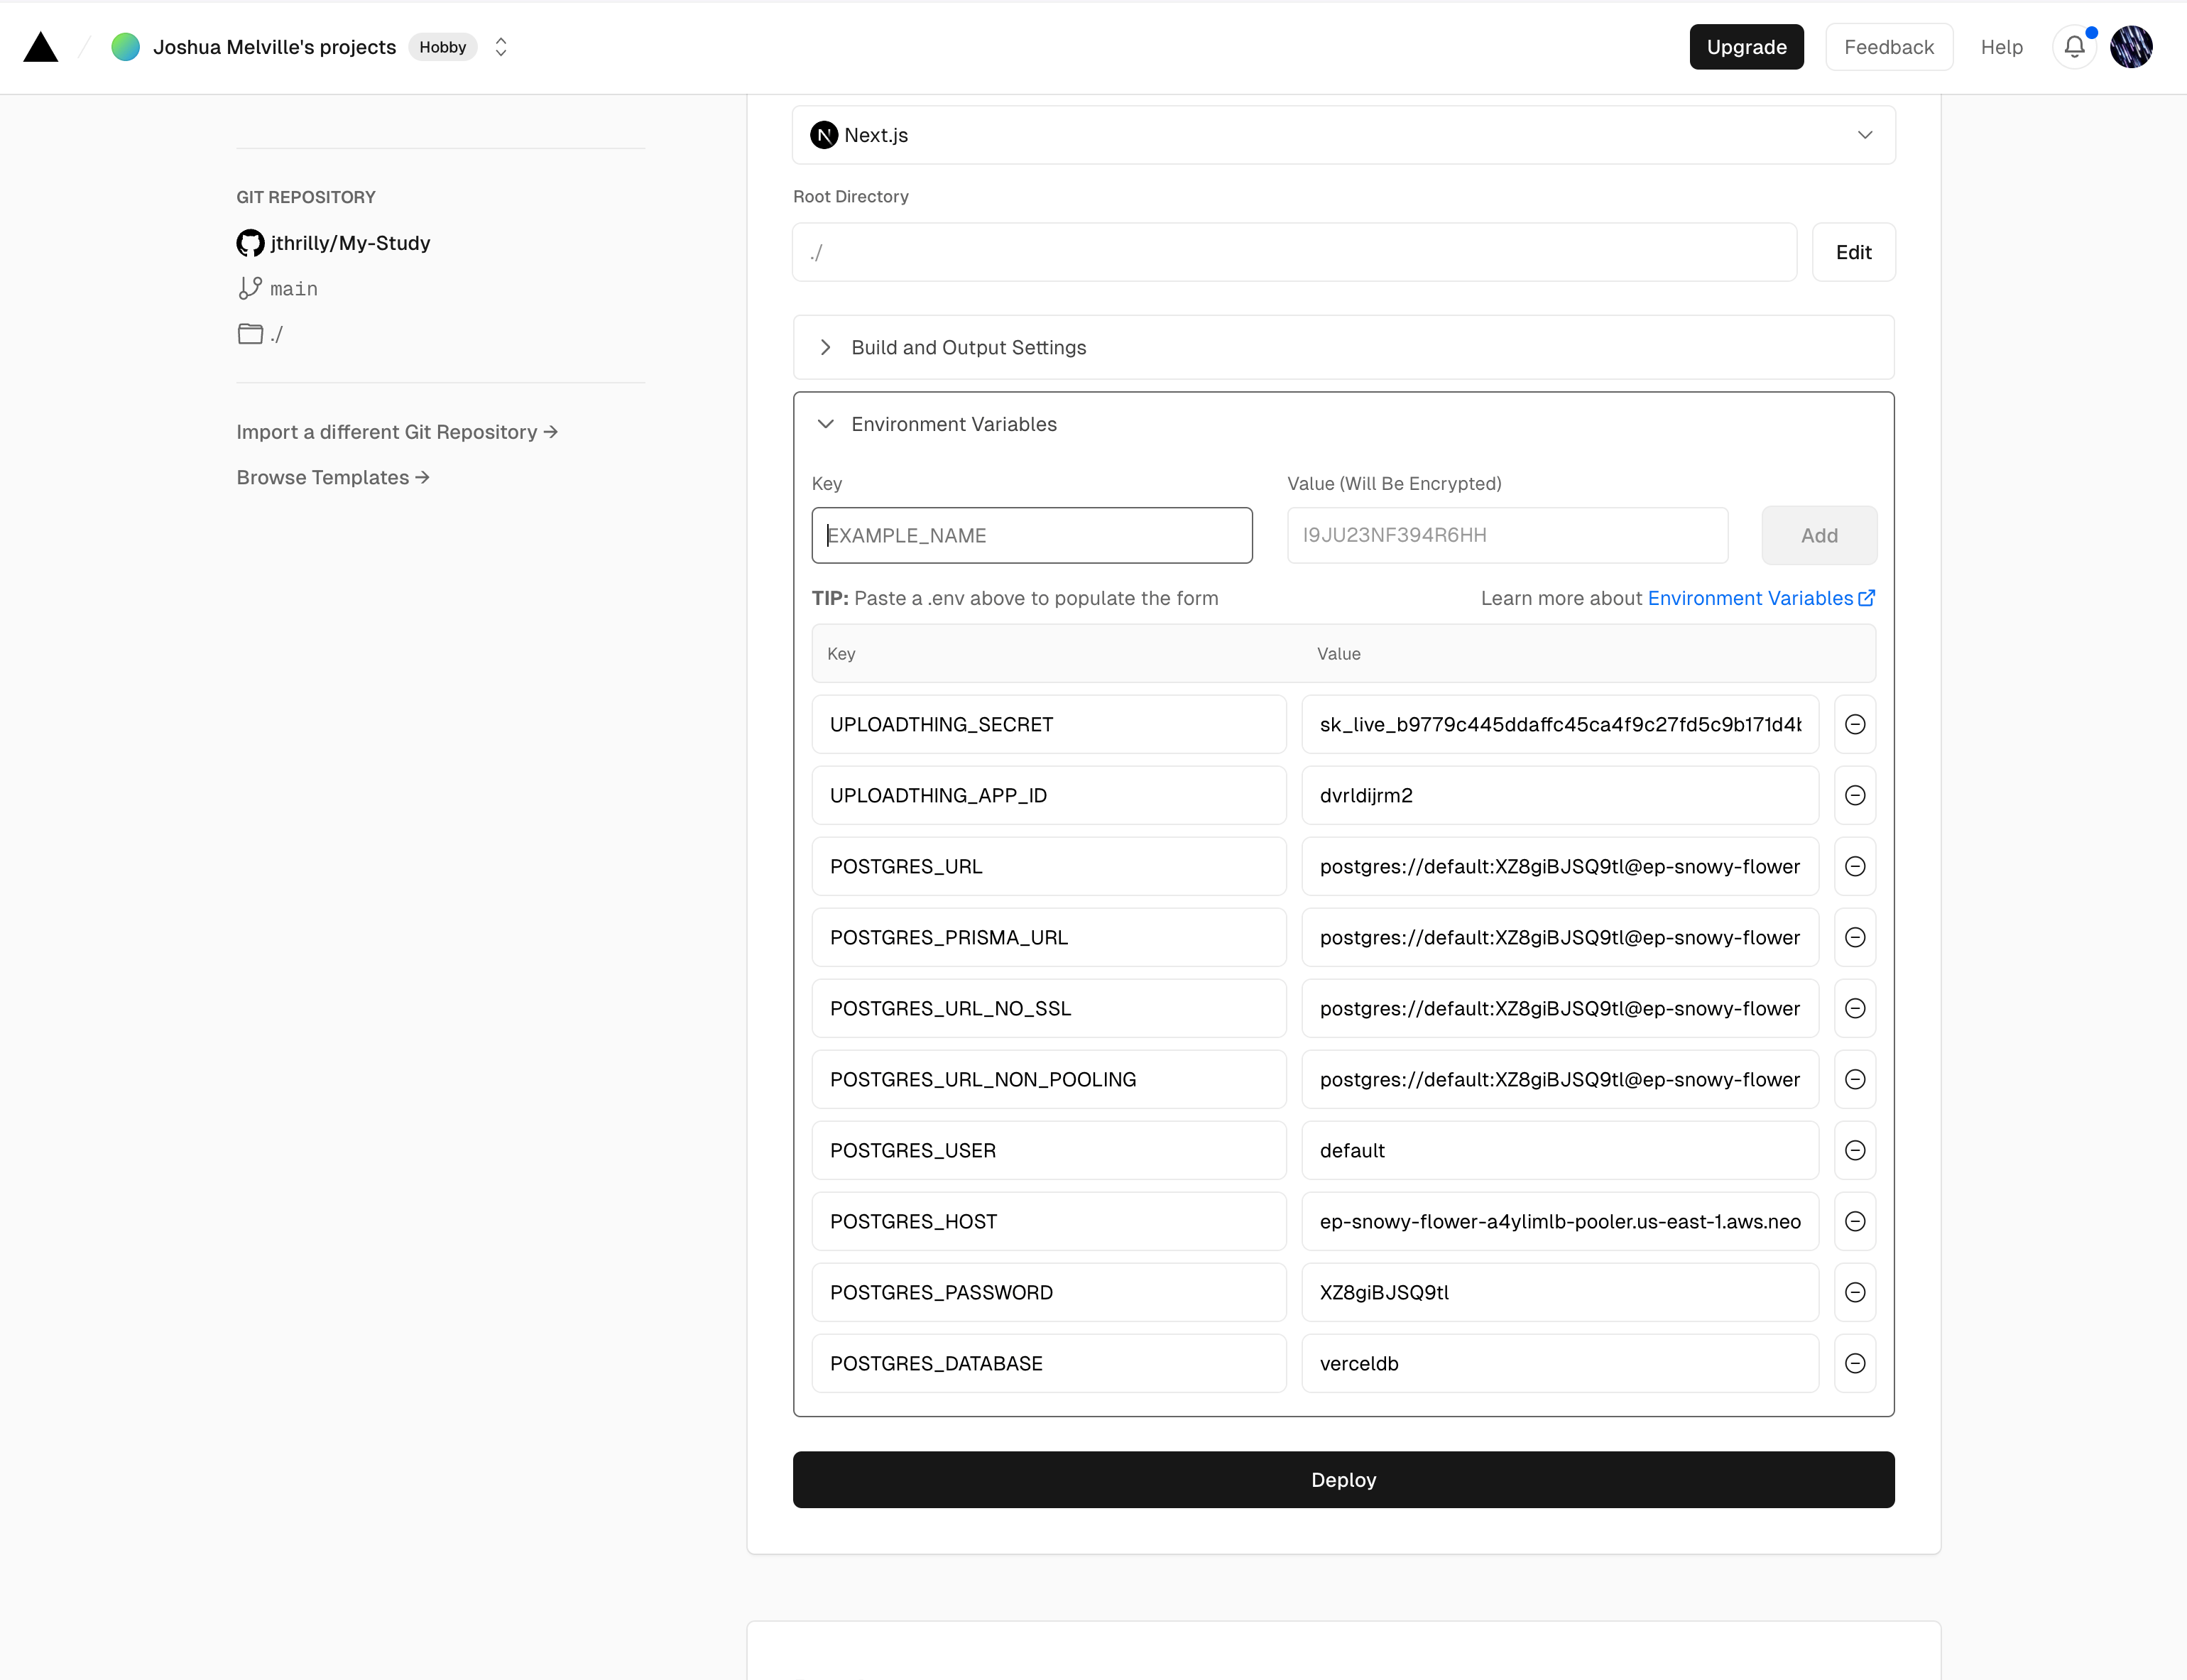
When you paste your variables, they will be added automatically -
Click the "Deploy" button, and wait for the deployment to finish. Vercel is now building your Fresco instance! This will take 2-5 minutes.
-
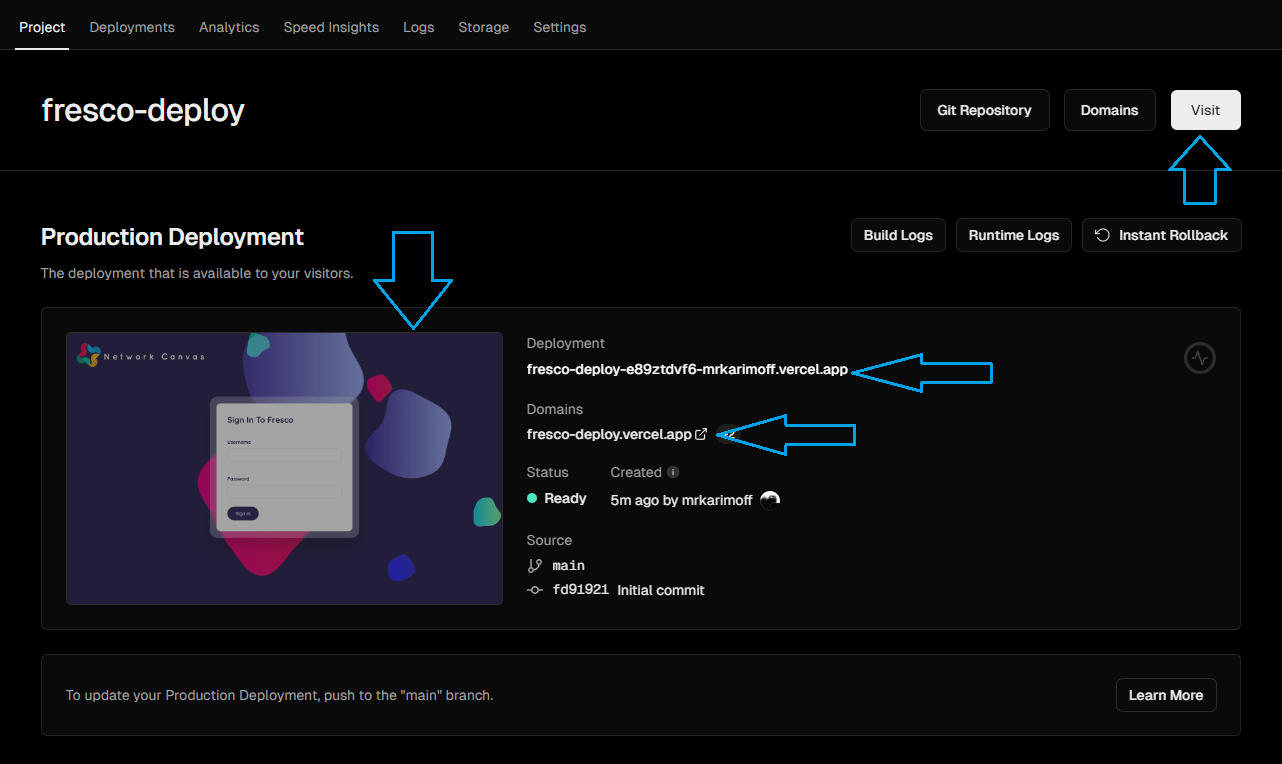
Click "Continue to Dashboard", and then click on one of the domain names or the "Visit" button.
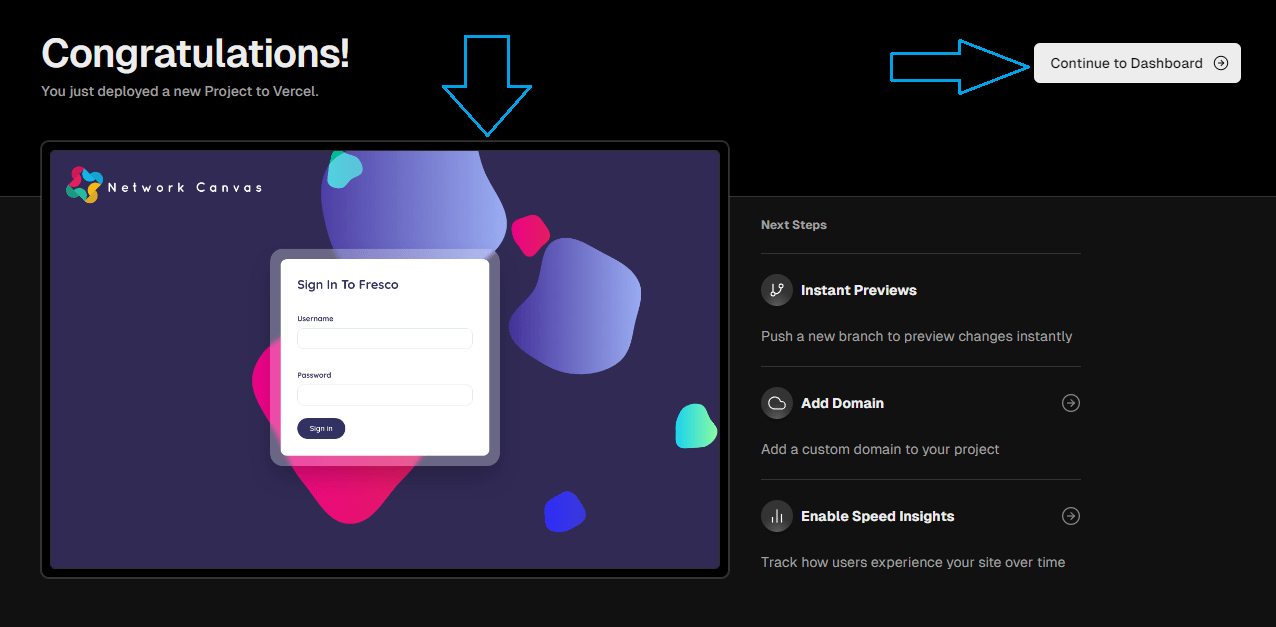
Continue to dashboard
Then, click on the "Visit" button or the domain.
Configuration and setup
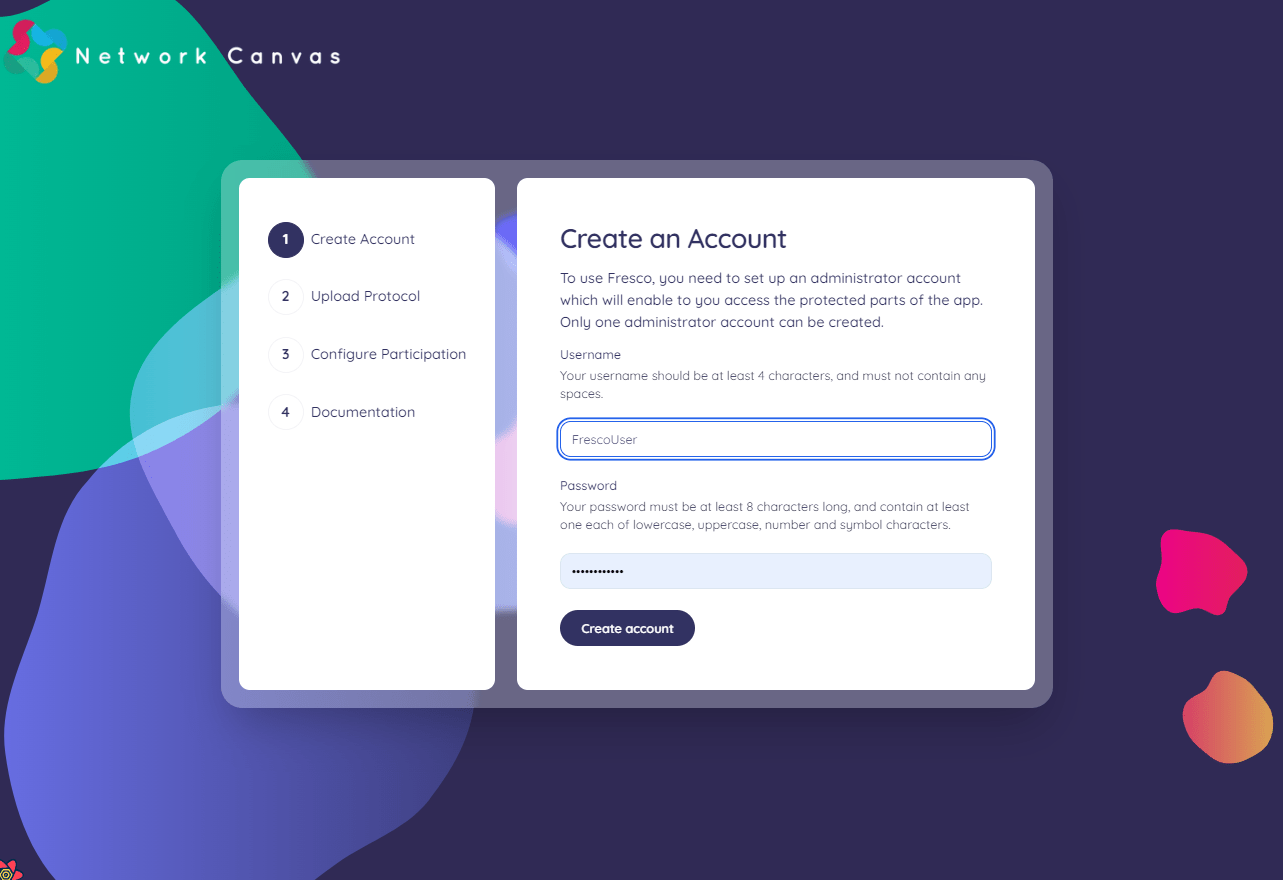
To use Fresco, you need to set up an administrator account which will enable you to access the protected parts of the app for study management. This is the first account for your instance; you can add further accounts later from the dashboard.
Take Care!
To ensure the security of your deployment, you have 2 hours from when the app is deployed to complete the configuration and setup. If this time elapses before completing all setup steps, your configuration will expire. To redeploy, follow our guide to reset your database.
Create a user account
Visit your deployed app and create your first account. You can secure it with a username and password (make the password as strong as possible), or with a passkey instead. In Fresco v4 and later you can add more accounts, enable two-factor authentication, and register passkeys later from the dashboard. See Accounts & security.
Good to know:
In Fresco v4 and later, if multiple team members need access, give each person their own account from Settings → User Management rather than sharing one set of credentials. Note that all accounts are equal administrators with full access to the study.
Take Care!
Fresco has no email-based password reset. If you forget your password, you can recover access using a recovery code, by having another administrator reset your account's authentication, or, as a last resort, by resetting the database (which destroys all data). Keep your credentials in a secure location and enroll more than one administrator. See Accounts & security for details.
Configure storage
Fresco stores protocol assets — such as images, audio, video, and network files — in an S3-compatible object store. You can use one of two storage providers:
- UploadThing — a managed storage service. This is the simplest option and what we recommend for most studies: you create an account, generate a token, and paste it in.
- An S3-compatible bucket — AWS S3, Cloudflare R2, MinIO, Backblaze B2, or any S3-compatible endpoint. Consider this if you need control over the storage region and data residency, want to keep all components within your own infrastructure, or already have S3 storage available.
Take Care!
Choose your storage provider carefully during setup. Afterward, the dashboard lets you update the credentials for your chosen provider, but it does not let you switch the provider type.
Good to know:
The maximum size for a single uploaded protocol .netcanvas file is 256 MB, regardless of which storage provider you choose.
Create a storage bucket using UploadThing
Fresco can use a third-party service called 'UploadThing' to store media files, including protocol assets. To use this service, you create an account with UploadThing that lets you generate an API token that Fresco uses to securely communicate with it.
Good to know:
Your UploadThing account is unique to you, meaning that no one else will have access to the files stored in your instance of Fresco. For more information about UploadThing, please review the UploadThing Docs.
To create an app on UploadThing:
-
Go to uploadthing.com.
-
Click "Get started".
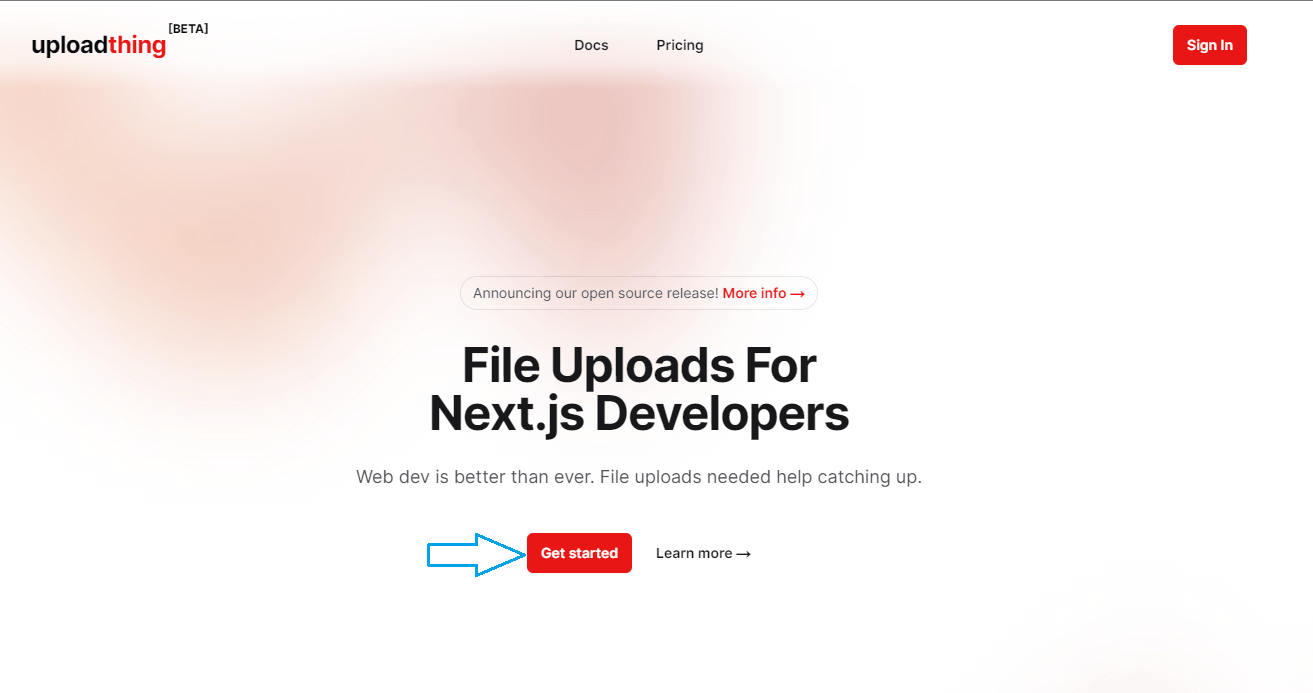
Select "Get Started" -
Sign in with Github.
-
Authorize UploadThing by clicking "Authorize pingdotgg".
-
You will be prompted to navigate to your dashboard. From the dashboard Click "Create a new app".
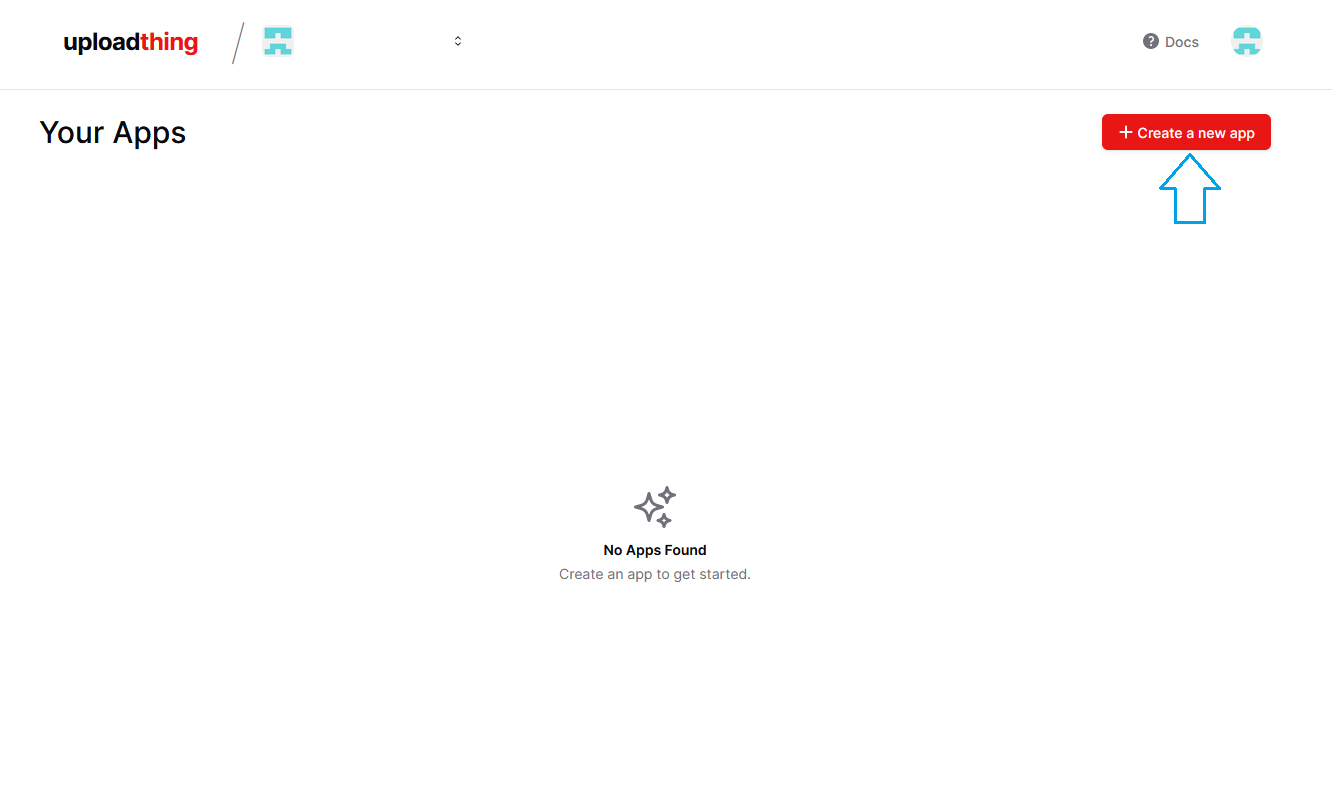
Create a new app -
Give your app a name and click "Create App". Do not change the region.
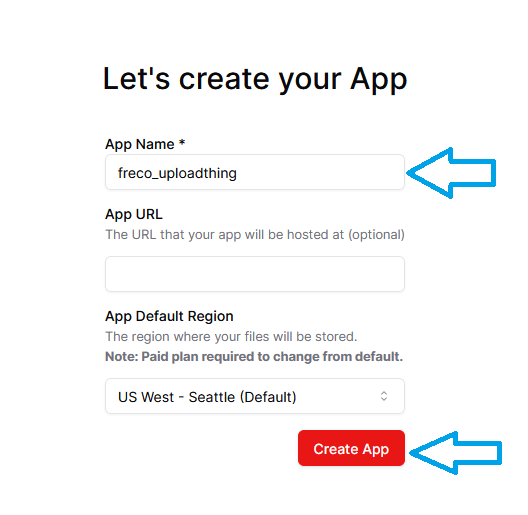
Create app -
From your dashboard, navigate to the "API Keys" section from the sidebar and copy your environment variable using the copy button.
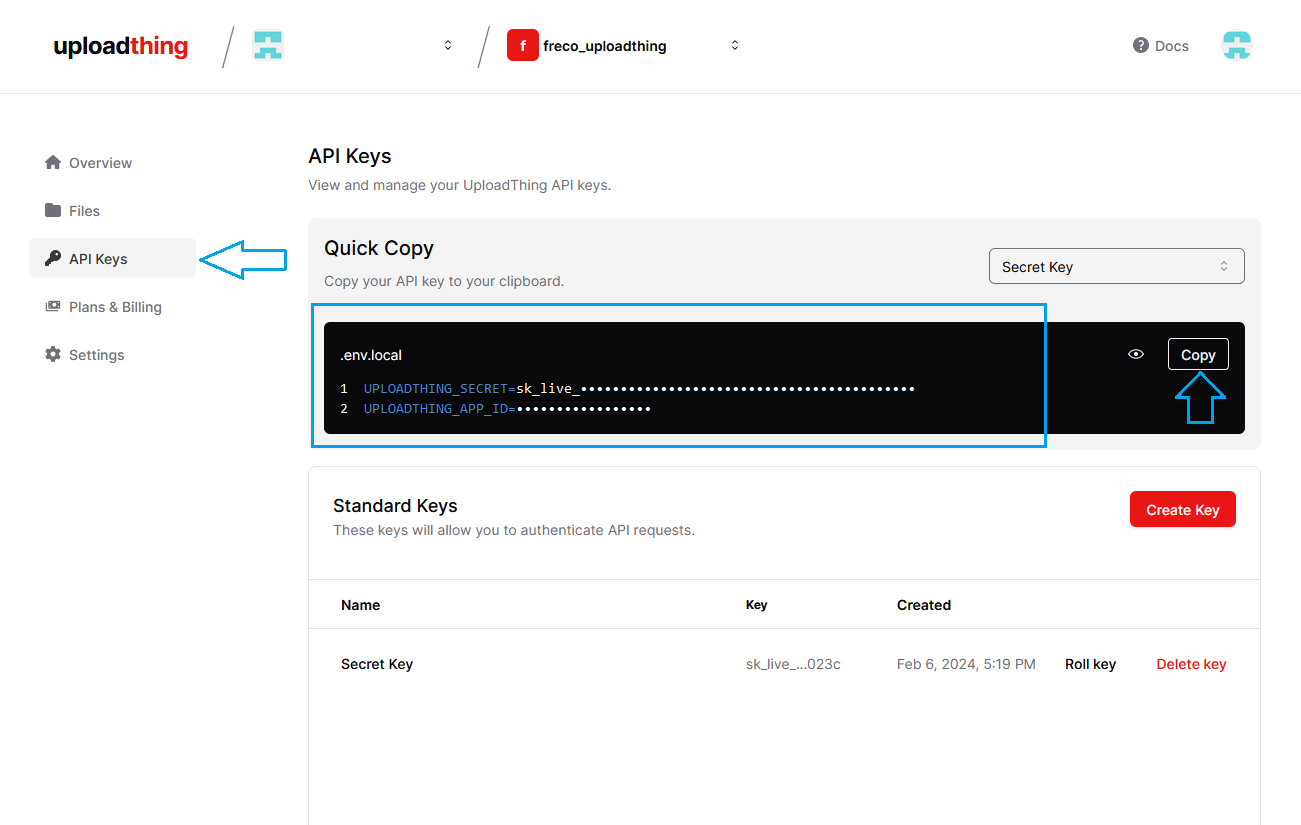
Copy your API keys -
Paste your environment variable into the UPLOADTHING_TOKEN field on the form. It should look something like this:
UPLOADTHING_TOKEN='abCdefGHiJkLmNopQrsTuvWxYz.......'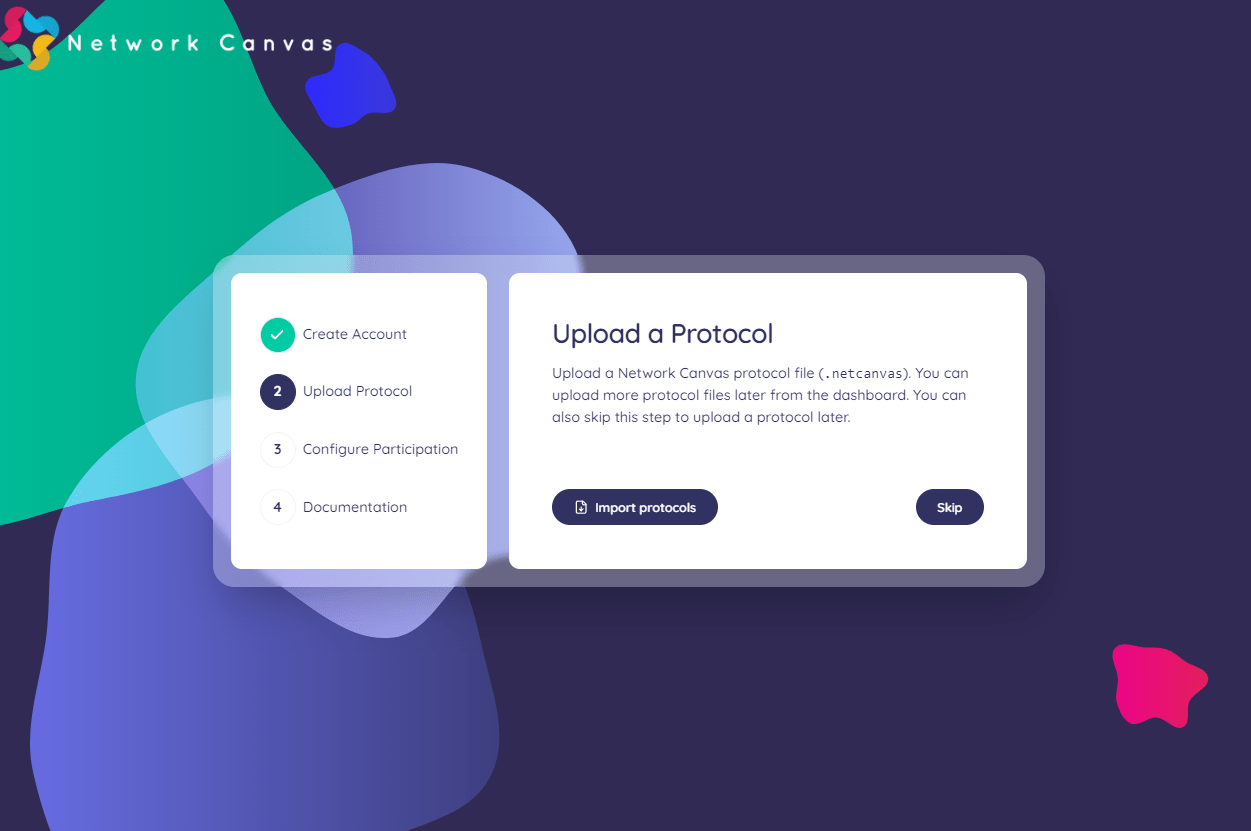
Paste your environment variable into the form
Use an S3-compatible bucket
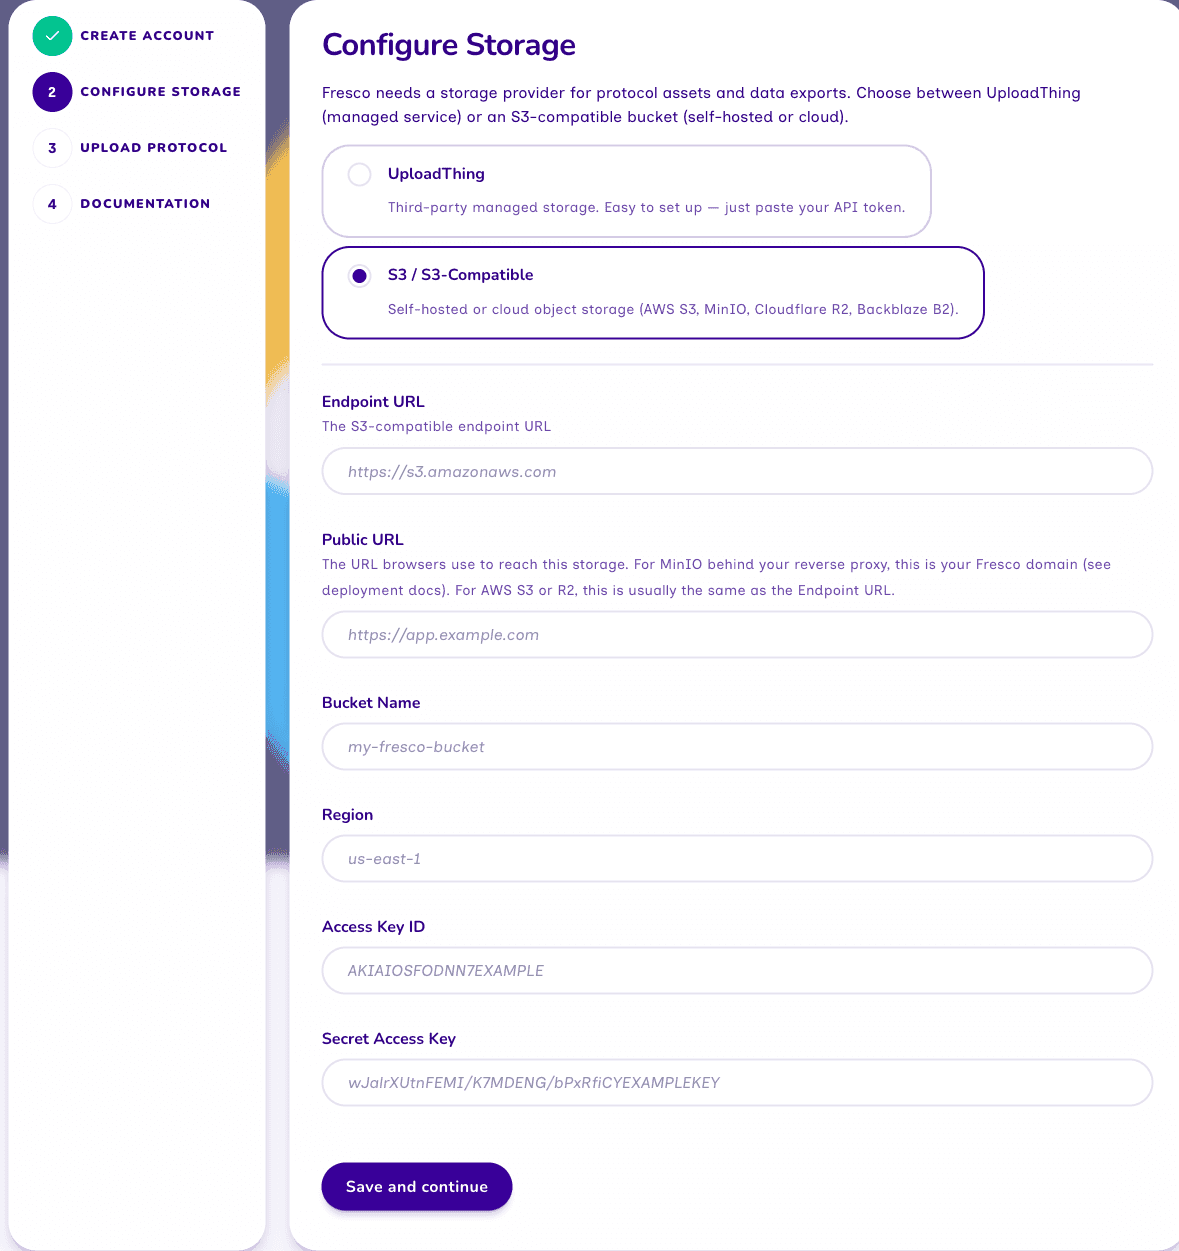
If you would rather use your own storage, select S3 / S3-Compatible on the storage step instead of UploadThing.
Before you start, create a bucket with your S3 provider (AWS S3, Cloudflare R2, MinIO, Backblaze B2, etc.), generate an access key and secret with read and write access to it, and set the bucket's CORS policy to allow requests from your Fresco domain.
Then complete the form:
- Endpoint URL — your provider's S3 endpoint (for example
https://s3.amazonaws.com). - Public URL — the URL browsers use to reach the storage. For AWS S3 or Cloudflare R2 this is usually the same as the endpoint URL.
- Bucket Name, Region, Access Key ID, and Secret Access Key for your bucket.
Click Save and continue. Fresco verifies the connection before moving on.
Upload a protocol
You can optionally upload a protocol. Protocols can also be uploaded from the protocols page once the setup steps are completed.
Finish setup
The final step of the wizard confirms that your instance is ready and links to documentation. Click Go to the dashboard! to begin using Fresco.
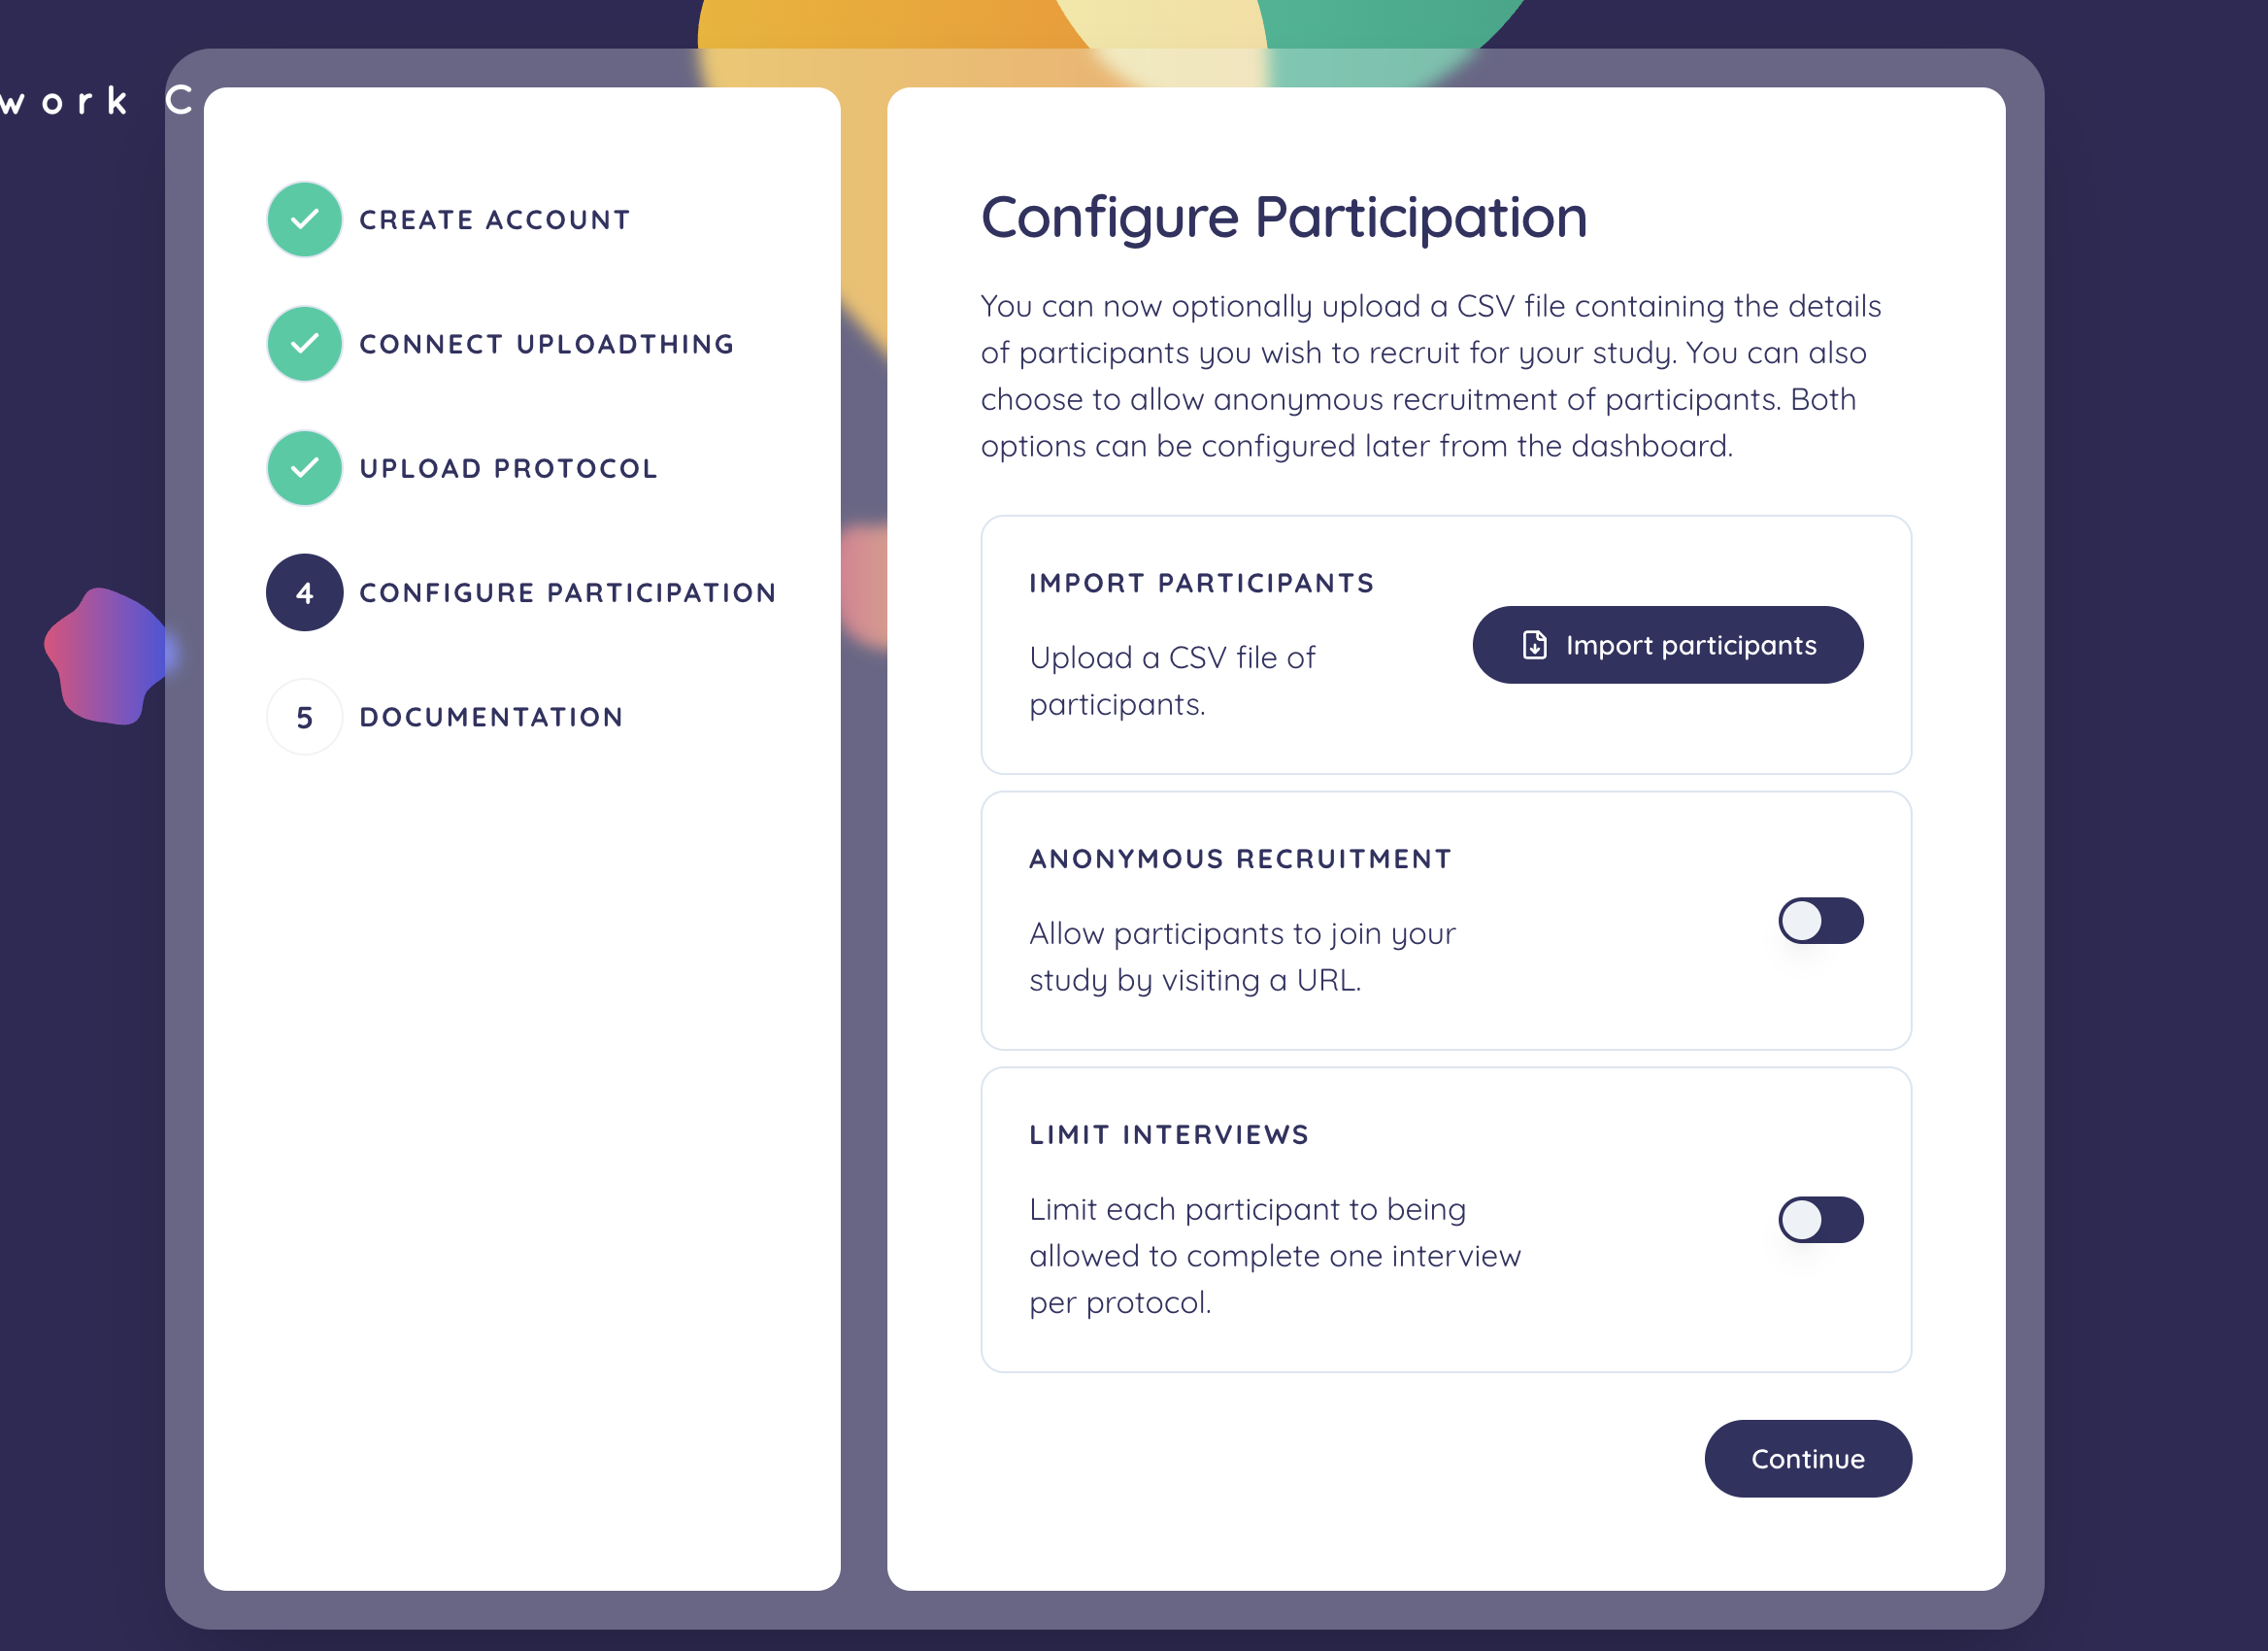
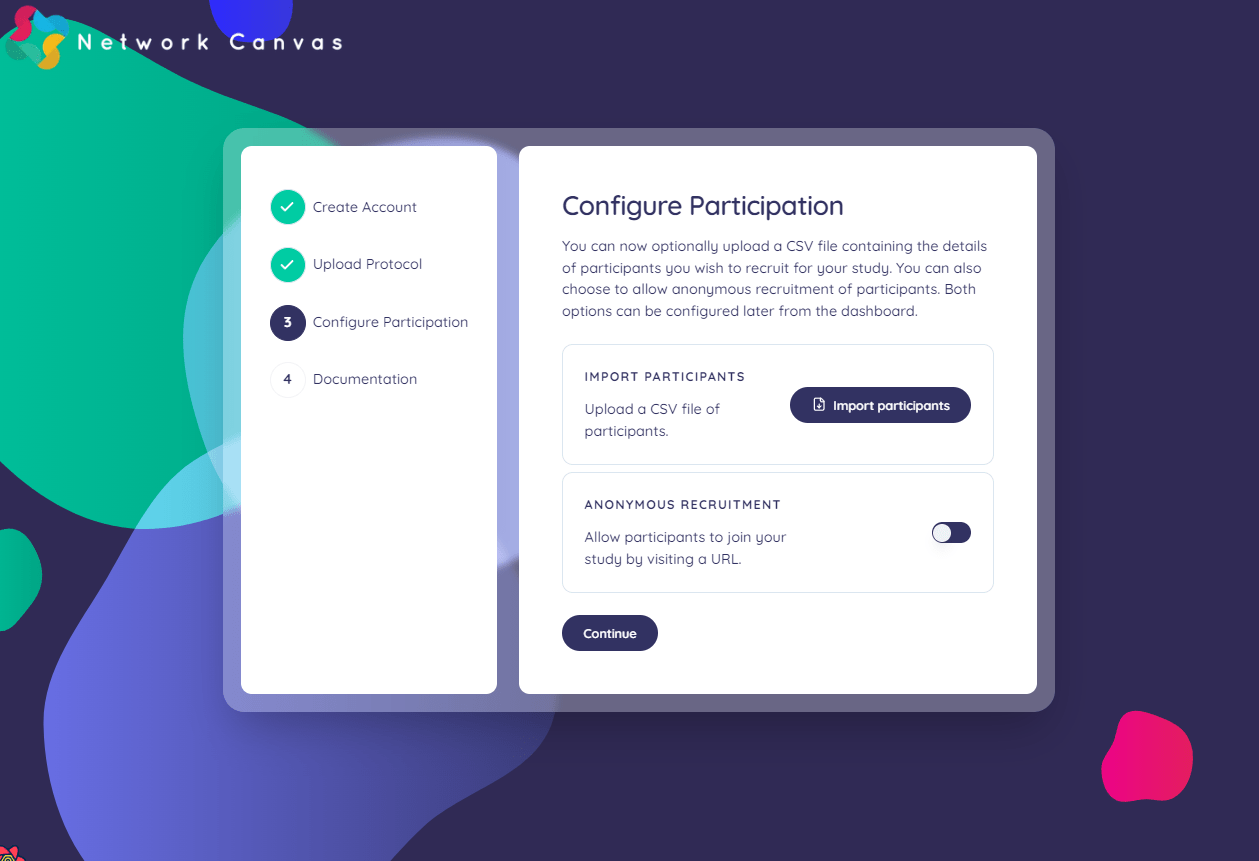
Everything else is managed from the dashboard. In particular, add participants from the Participants page — individually or by importing a CSV — and enable anonymous recruitment, which lets participants join your study by visiting a URL, from Settings. See the Using Fresco guide for both.
Good to know:
We use anonymous analytics to gather usage and error data from instances of Fresco to troubleshoot issues. Fresco's own events carry no participant data or interview identifiers. The one thing that can reach us is a dashboard search term: searching the participants, interviews or activity-feed table puts what you typed in the page address, and the analytics library's page-view events carry that address. See Does Fresco send data to third parties? for the full picture, and turn analytics off in Settings → Privacy or with DISABLE_ANALYTICS if that is a problem for your deployment.
If you would like to disable all analytics, turn on Disable Analytics in the Privacy section of the settings page. Alternatively, add a DISABLE_ANALYTICS environment variable set to true to your Vercel project's environment variables and redeploy; this disables analytics and locks the setting.
By leaving Disable Analytics set to false (the default) you will help us identify bugs and improve the app.
Set up a custom domain (optional)
If you prefer to use a custom domain for your Fresco instance, you can configure this in the Vercel dashboard by following these steps:
-
Navigate to your project dashboard. Here, locate and click on the "Domains" button.
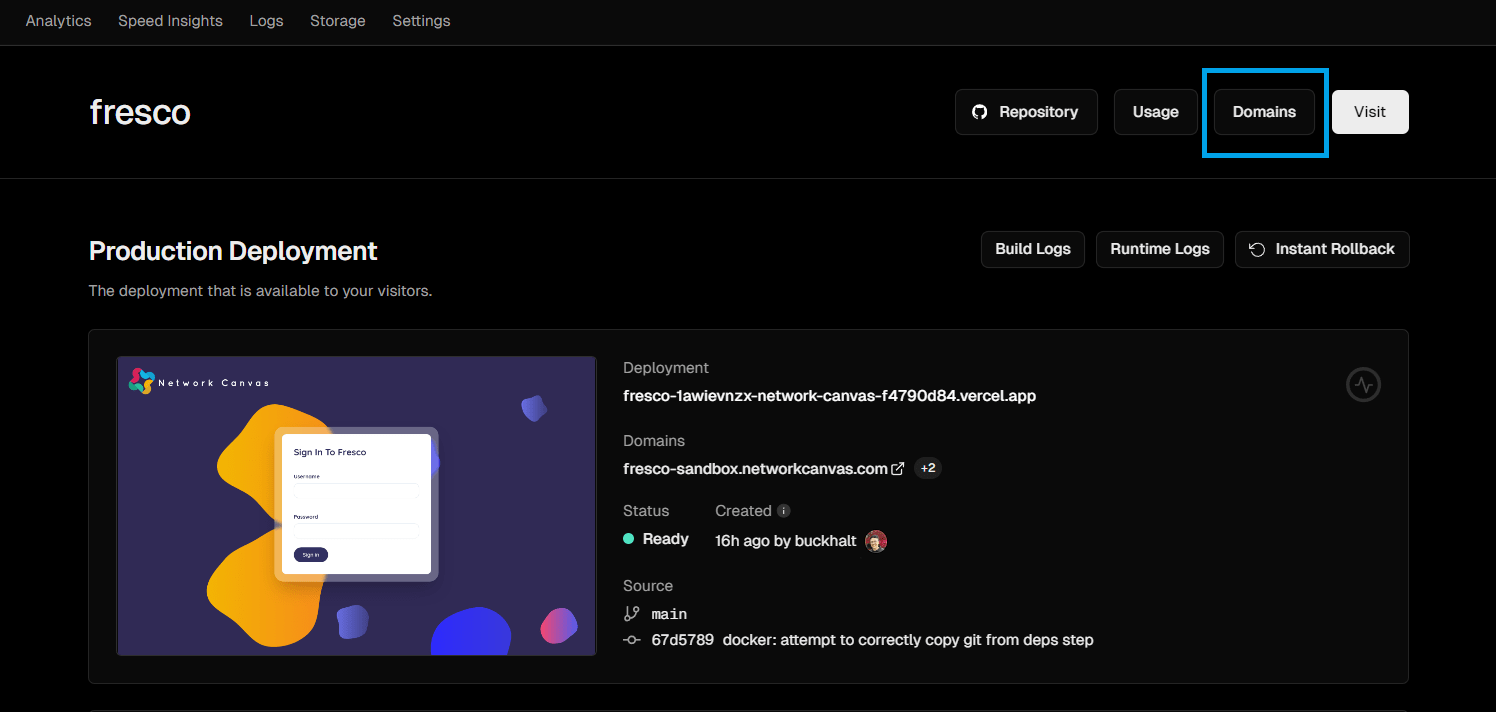
Navigate to domains section -
In the Domains section, you have two options:
- If you have a purchased domain, you can add it here.
- Alternatively, you can modify the default Vercel domain to suit your needs.
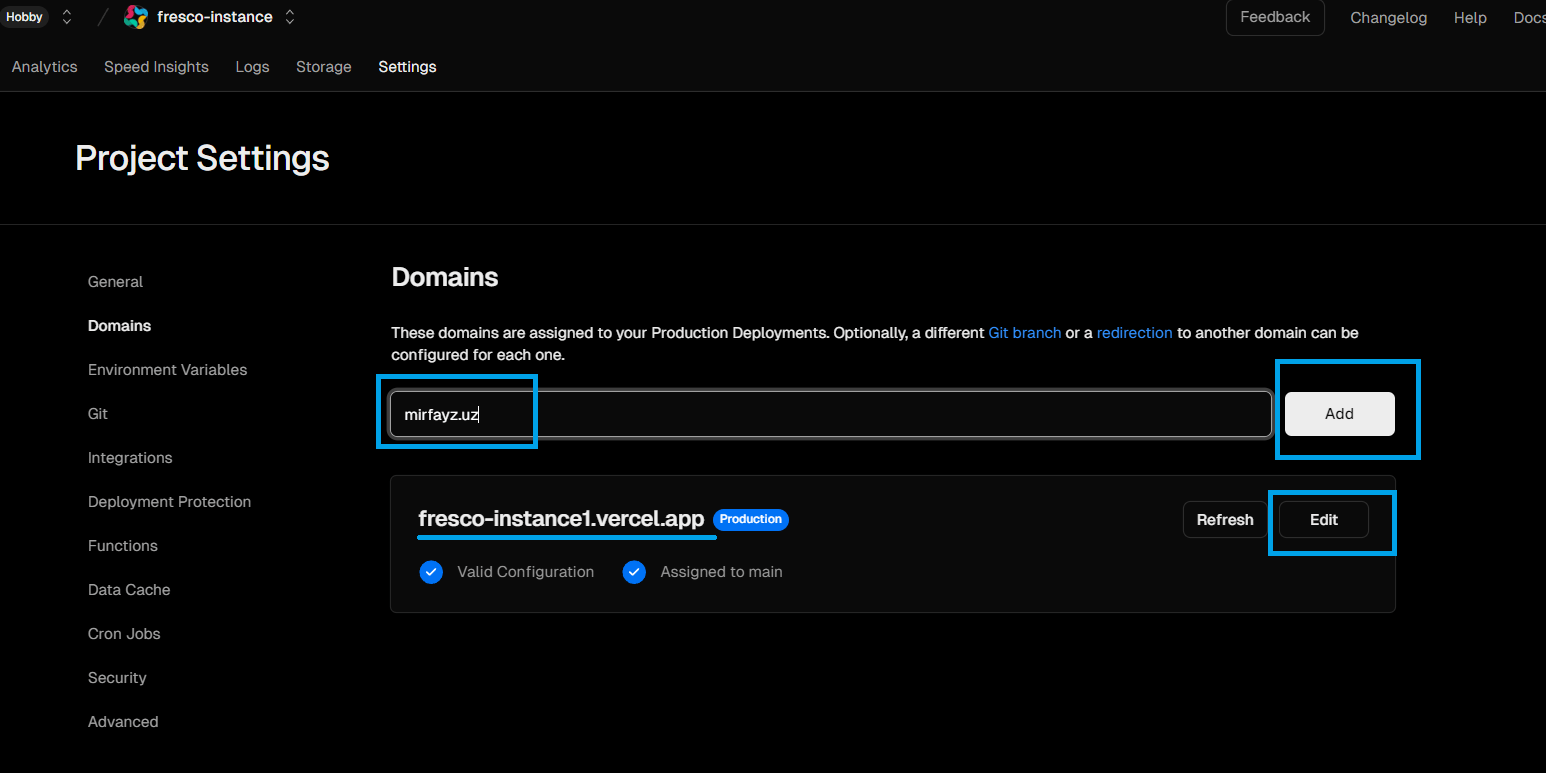
Domain setup options Warning:Take Care!
While editing the current domain, make sure not to remove the .vercel.app portion. Vercel requires this standard for all free domains.