Design Protocolsinterface documentation
Name Generator for Roster Data
- Type
- Name Generator
- Creates
- Creates nodes of a single type, based on data from a roster
- Uses prompts
- Yes
- Requires
- Roster data
- Configure in
- Architect Classic
- Architect
- Run in
- Interviewer Classic
- Interviewer
- Fresco
Requires protocol schema 6 or later.
Name Generators are one of the fundamental components of a network interview. They allow your participant to create alters, thereby describing one of the two main entities in your study's networks.
There are several name generator Interfaces in Network Canvas that can be added to your study, all of which can be configured within Architect.
Each of these Interfaces is designed for a specific type of alter elicitation, with several associated advantages and disadvantages. Although they have some configuration options that are shared with all other Network Canvas Interfaces, this article will focus on options specific to the Name Generator for Roster Data.
The Name Generator for Roster Data is useful when you have a known set of network members from which you want your participant to be able to nominate. The interface can accommodate rosters of varying size, but the method of nominating a member of the roster will differ depending on roster size in order to facilitate ease of searchability for the participant.
Defining a Roster
This interface requires you to have a datafile that represents your roster. See our article on working with roster data for more information about how to create such a file. Have this file, or a suitable mock file, ready before you attempt to configure this interface.
Roster size constraints
We have tested a 60,000 node roster with success, however, rosters of this size are not without problems. If your study requires such a roster, please be prepared for the loading and search functions to slow down considerably. The upper limit of this interface is largely dependent on both the device you use and your usability threshold, so a powerful laptop might be required particularly for larger datasets. For information on devices, please see our article on choosing a device for your study.
Alter Nomination
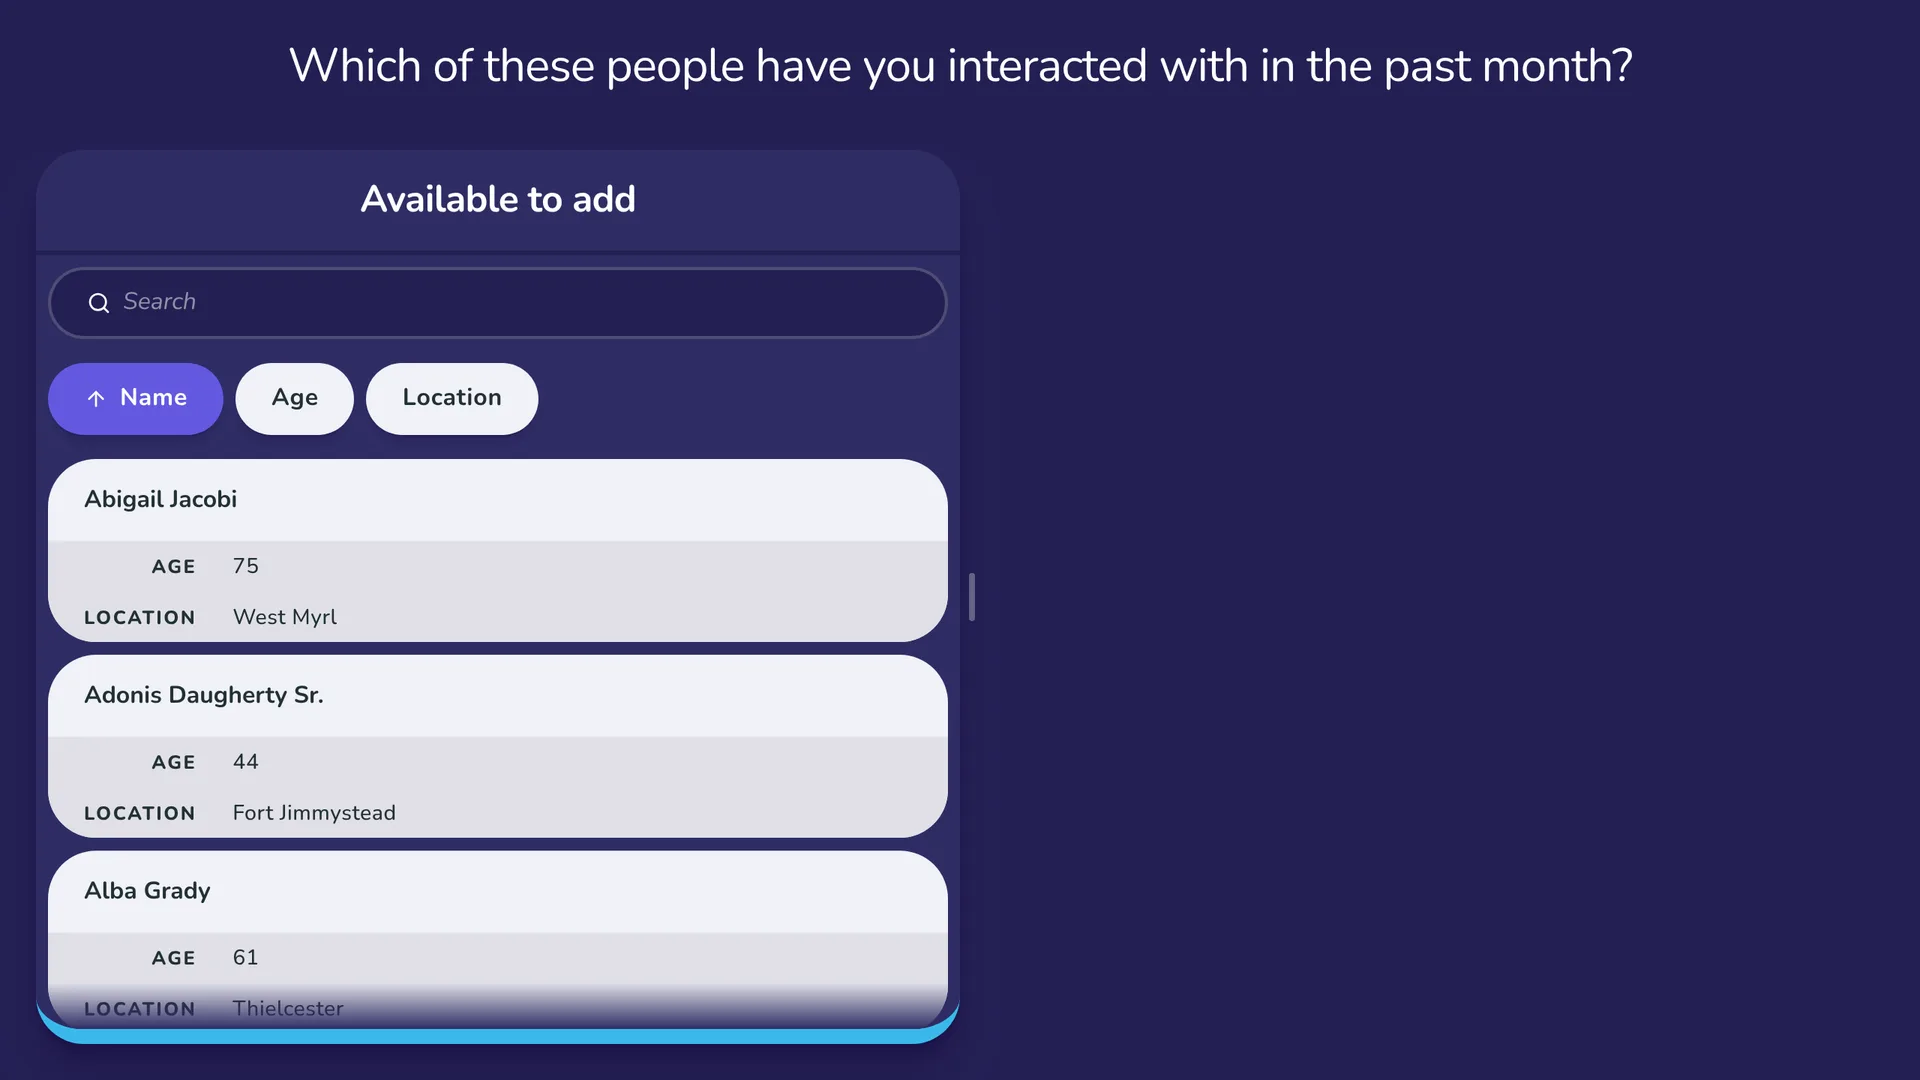
The roster interface is split into two panels. One panel displays ‘cards’ that represent each item in your roster. The other panel represents nodes in the interview, and will initially be empty. To nominate an alter, the participant must drag a card from the first panel on the left into the second panel on the right. The card will then be removed from the card list, and a node will be created representing the roster member in the interview network.
The panel of cards has a title, which you set in the Roster panel section of the stage editor. The title reads "Available to add", in each of your protocol's languages that Network Canvas has wording for, until you change or translate it like any other text. The interview always shows a panel title, so if Network Canvas has no wording in your default language, write the title in that language before you download the protocol. When you add a language that Network Canvas has wording for, the title reads as Network Canvas words it in that language, even if you have changed the title in your other languages (see Adding languages).
When using a small roster that contains less than 100 nodes, cards representing all members of the roster will be displayed on the interface according to the display and sort options you have configured. You can define both the default sort order of the cards and the properties that participants can use to sort the list themselves. Participants can scan the list displayed and select the appropriate card(s) to add to their network.
When using a large roster that contains more than 100 nodes, participants must use the search function before any cards are shown. Nominating an alter from a large roster uses the following process:
- The participant types into the search box to search for roster members, based on the search options you have configured.
- As the participant begins typing, all node data that meets the criteria will be displayed as cards above the search box.
- The participant drags a matching card into the node panel to nominate that roster member.
- The participant can then search again, repeating this process until they have nominated all the roster members that the prompt asks about.
By default, the cards will display the name attribute from the roster data as the card title. The display options of these cards are completely configurable. You should display all attributes that a participant might need to disambiguate roster nodes with similar names.
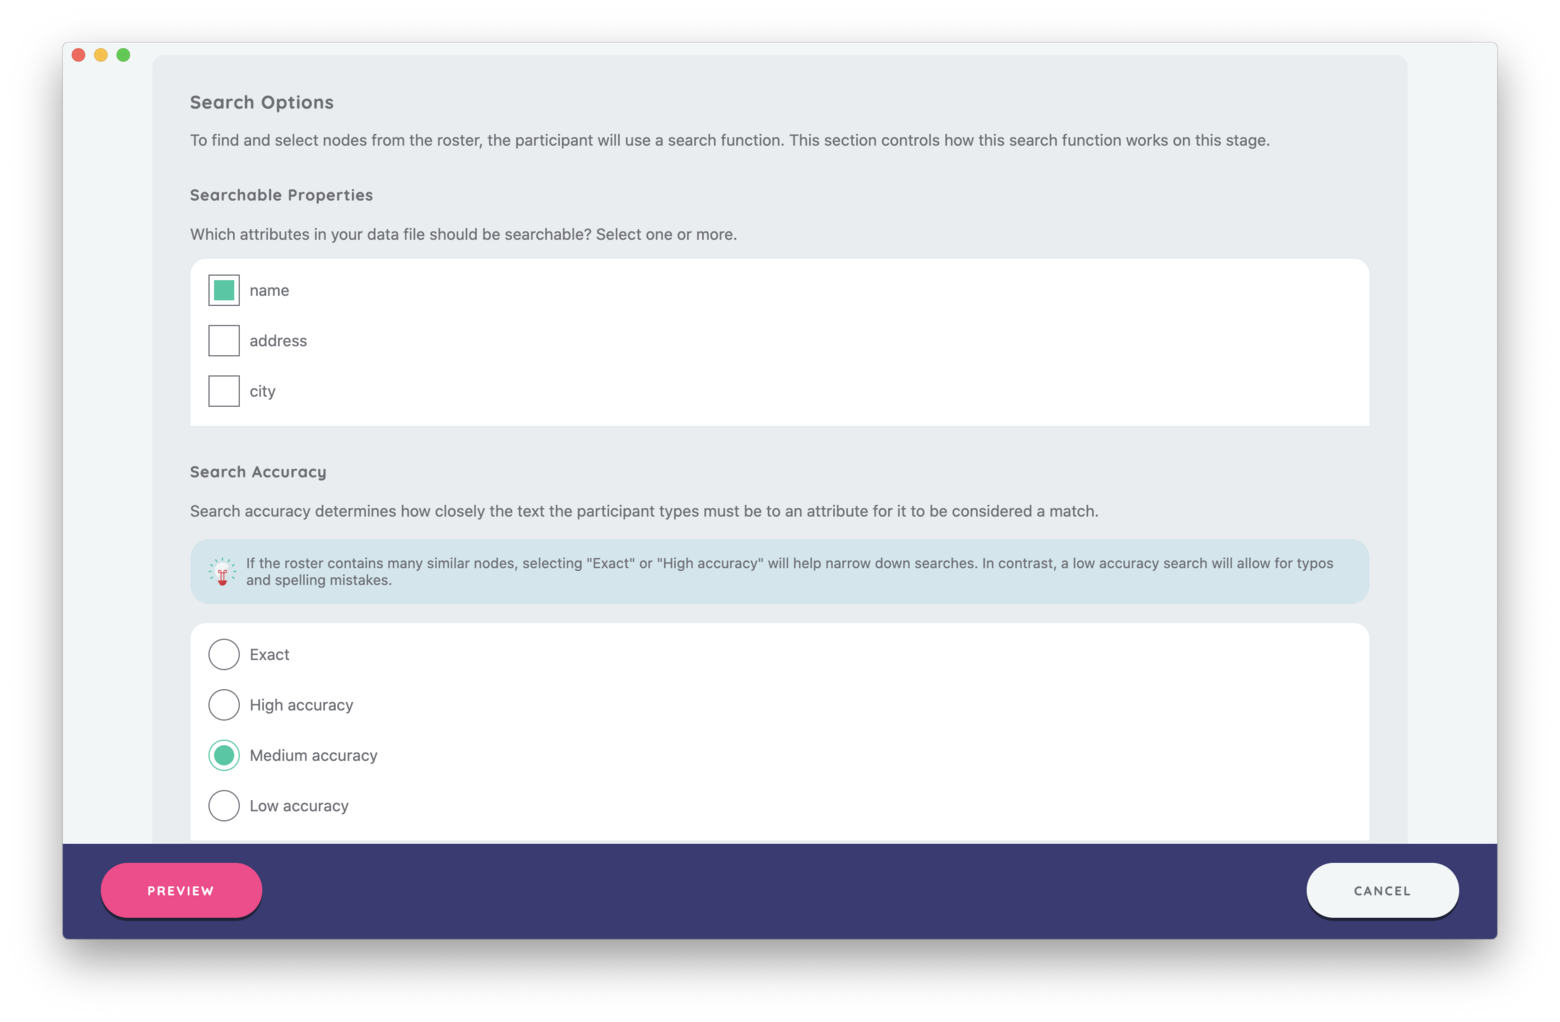
The search function is also heavily configurable, allowing you to choose which attributes from the roster are indexed, as well as the accuracy (or 'fuzziness') of the search matching. These options are powerful, and should be configured carefully. Each attribute added to the searchable properties list will decrease the performance of the search function, and may make matches less accurate. Similarly, using too stringent or too lax search accuracy will compromise the ability of participants to locate nodes in the roster.
As a general rule of thumb search accuracy should increase as roster size increases, and only attributes containing terms participants are likely to search by should be included as indexed attributes.
Customize built-in wording
The Customize built-in wording section of the stage editor holds the words participants read about this stage. Each starts as Network Canvas words it, in every language it has wording for, and you can change and translate it like any other text. Your protocol keeps only the wording you change (see Words Network Canvas supplies). A message is in the section only while the part of the stage it belongs to is set up.
Each message can show the name of the stage's node type, as the codebook names it, and the limits can also show their number. Insert either as a pill with the field's piped text button.
- Minimum not reached is shown when participants try to continue before they have added the fewest nodes the stage asks for. It is there only when the stage has a minimum.
- Maximum reached is shown once participants have added the most nodes the stage allows. It is there only when the stage has a maximum.
- Everything added is shown in the roster when every entry has already been added, or when the roster has no entries.
- Unnamed label is the label given to an entry added without a name. It shows a number, so that unnamed entries can be told apart.
The message shown when the roster's data file could not be loaded, and the placeholder and no-results message of its search, are interview text, under Messages and Search.
Best Practices
Ensure that the roster data file used has name attribute to avoid seeing "No
name variable!" on your cards. See our article on node
labeling for more information on this topic.
Configure the display and sorting options of the cards to help improve a participant's ability to locate nodes within the roster.
Try to Avoid
Avoid using this interface with a large roster (>100 nodes) on devices with a software keyboard, particularly where they also have a small (< 9") screen. The software keyboard will cover a substantial area of the screen, and make the process of searching and nominating more tedious.
When using a large roster, avoid setting all properties to be searchable. This will cause slow performance and less accurate search results. Ensure that you test your search feature thoroughly.
Avoid adding needless attributes to the sort options. This will confuse users and may potentially cause display issues on smaller screens. Aim for no more than 3 sortable properties.