Collect Datainterviewer
Using Interviewer
Summary:
This tutorial will introduce you to Interviewer by walking through an example based on our sample protocol. We will explore the participant-facing interview experience, as well as discuss some of the researcher-facing functionality of the app. The sample protocol we will be using demonstrates all the main data collection features of the tool, which we hope will encourage you to imagine the many types of study that can be created using Network Canvas.
Prerequisites:
To get the most from this tutorial, you should have first:
- Read and understood the project overview.
- To follow along using your own computer or device, open Interviewer in your web browser, or download and install Interviewer Classic.
Please note that a separate tutorial article covers how to create a protocol, called getting started with Architect. You should continue with the current tutorial before learning the more advanced concepts involved in protocol creation, but you can read these articles in any order you wish.
Duration:
30 minutes
Introducing Interviewer
Network Canvas Interviewer is an interview administration tool that is designed to be simple and intuitive for research participants, and to integrate with the rest of the Network Canvas suite of tools. It is the cornerstone of the Network Canvas project.
Interviewer runs on both tablet devices using touch screens, and desktop computers using either touch or conventional keyboard and mouse inputs. Its interfaces are optimized for the specific needs of network interviews, and are highly flexible and customizable. Interviewer uses Network Canvas protocol files to configure itself to show the screens and stages that you have designed for your study.
Once you have collected data with Interviewer, you can export network datafiles to your device or computer.
Interviewer comes in two supported versions. Choose the one you are using below — the screenshots and version-specific notes throughout this tutorial update to match.
Interviewer runs in your web browser — with nothing to install — and can be installed to a device you control as a Progressive Web App. It is built on the same web platform as Fresco 4.0. It supports schema 8 (so it can run protocols built in Architect) and is compatible with your existing protocols, while adding an improved interview experience, data export, and on-device security. Because some schema-8 interfaces (such as Geospatial) need an internet connection, fully offline collection isn't always possible. It's recommended for new studies.
The following introduction to the software describes some of its key features and concepts. To follow along, open Interviewer on your own computer or device.
Security and locking
Interviewer keeps everything it stores — protocols, interviews, and settings — on the device, with no cloud sync or server component. When you set up an app lock (a PIN, passphrase, or biometric), that on-device data is encrypted at rest with a key derived from your credential, and the same authentication that unlocks the app releases the key used to decrypt it.
Setting up security
The very first time you open Interviewer you are greeted with a welcome screen and guided through a short setup wizard before you reach the dashboard. Most of what it configures can be changed later from Settings (the exception is your security method — see below).
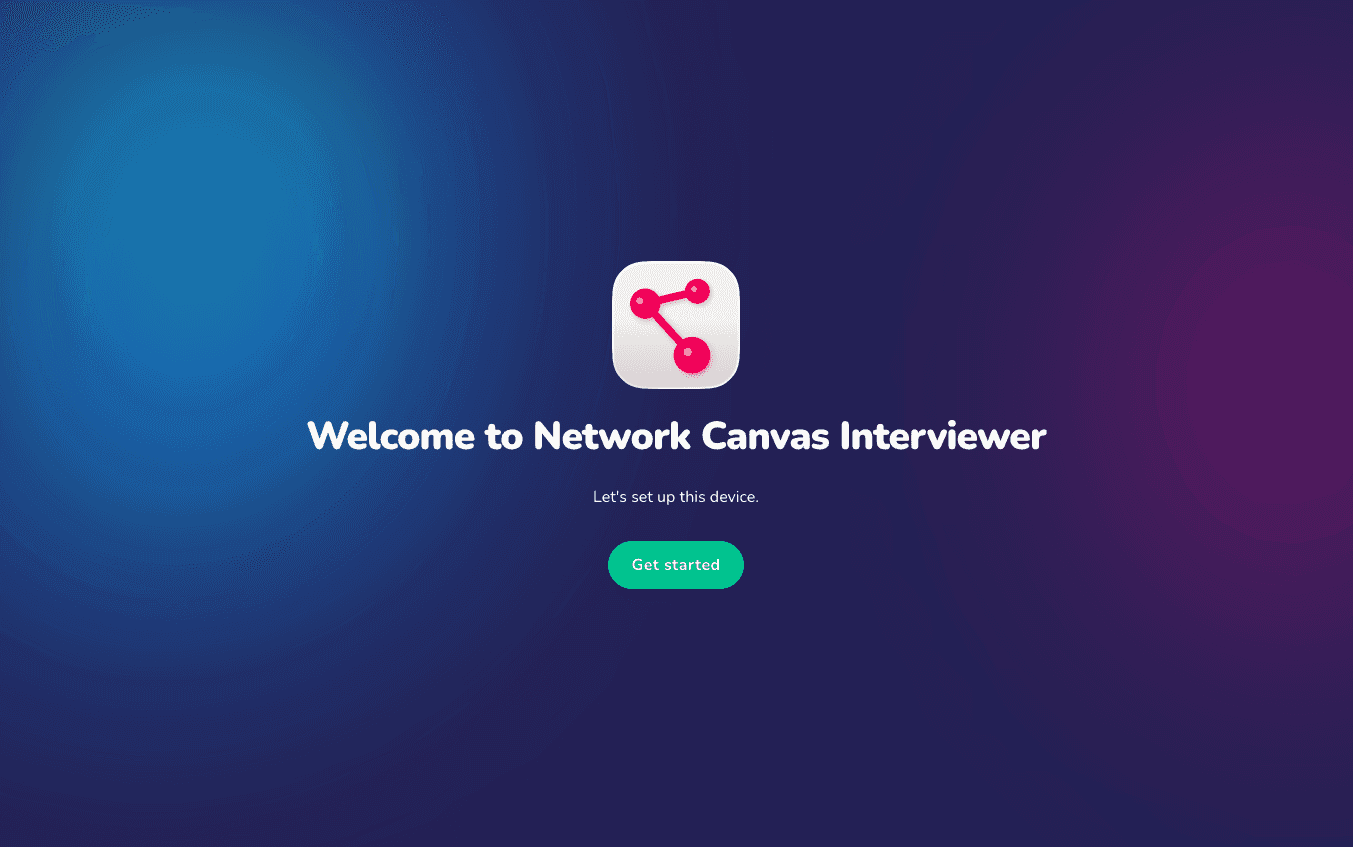
The welcome screen, and every step of the setup wizard, includes an App language select, so you can switch the interface language before going any further (see Interface language below).
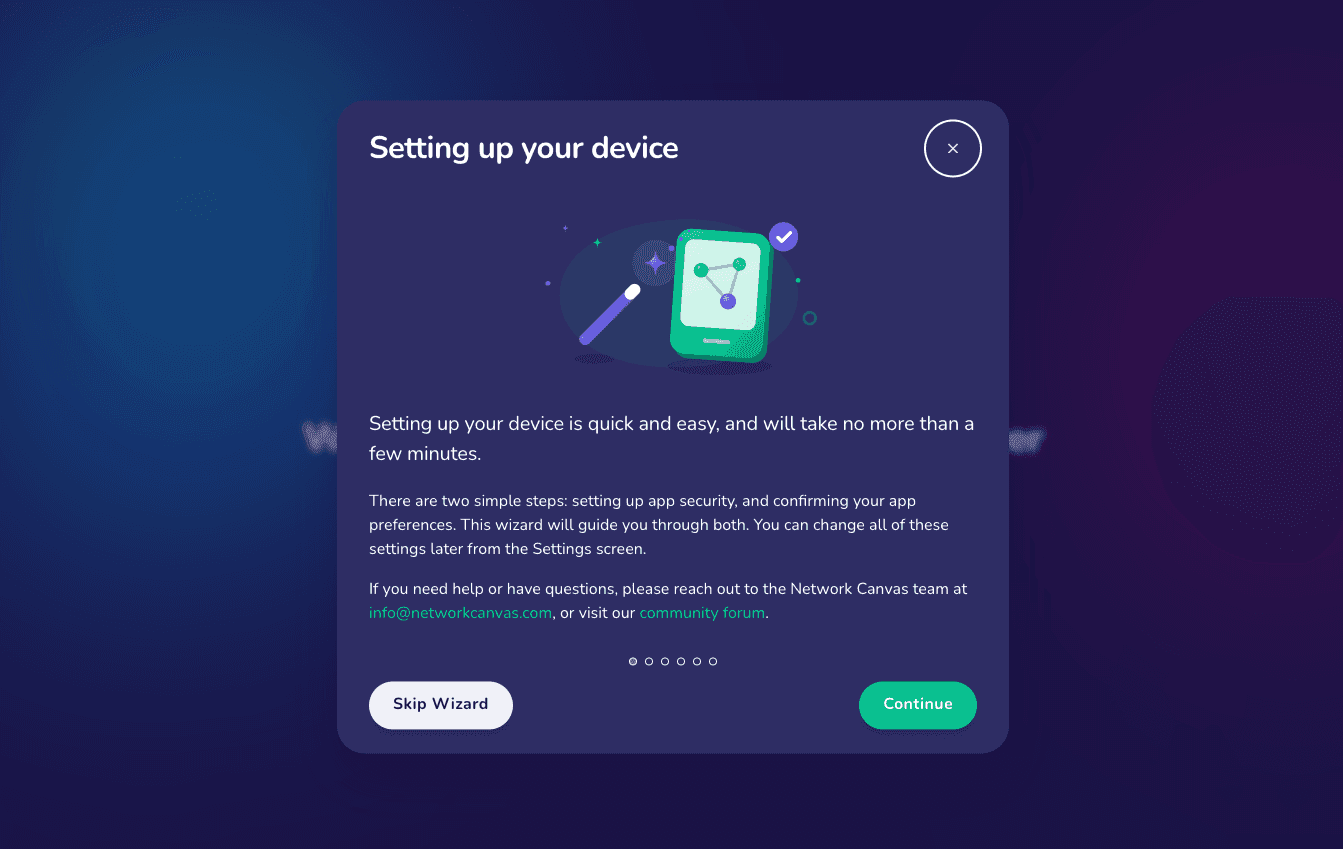
The wizard opens with a brief overview of what it will cover — securing your data, and setting your app preferences.
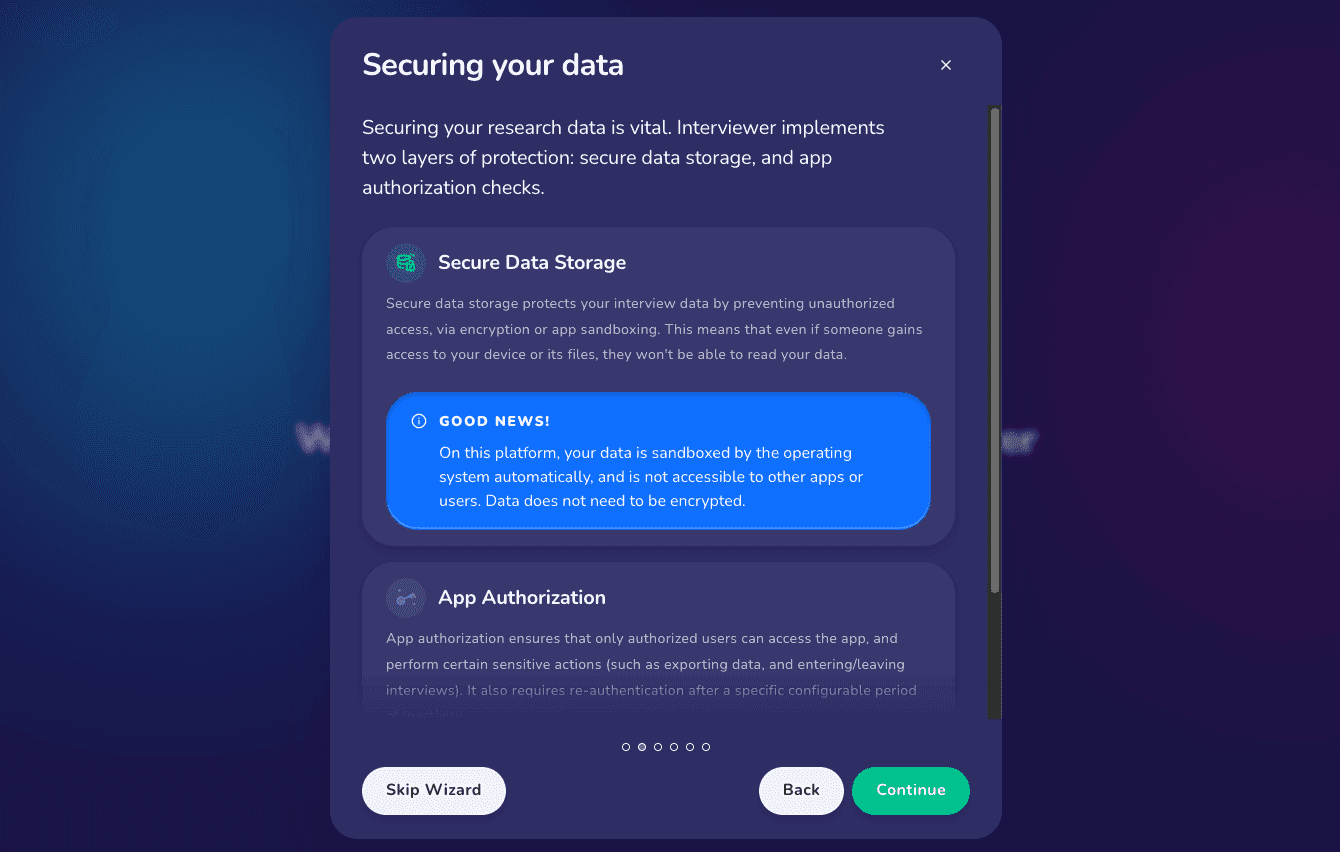
It then explains the two layers that protect your research data: secure data storage and app authorization — features to use in addition to device-level protections such as storage encryption and a strong device password.
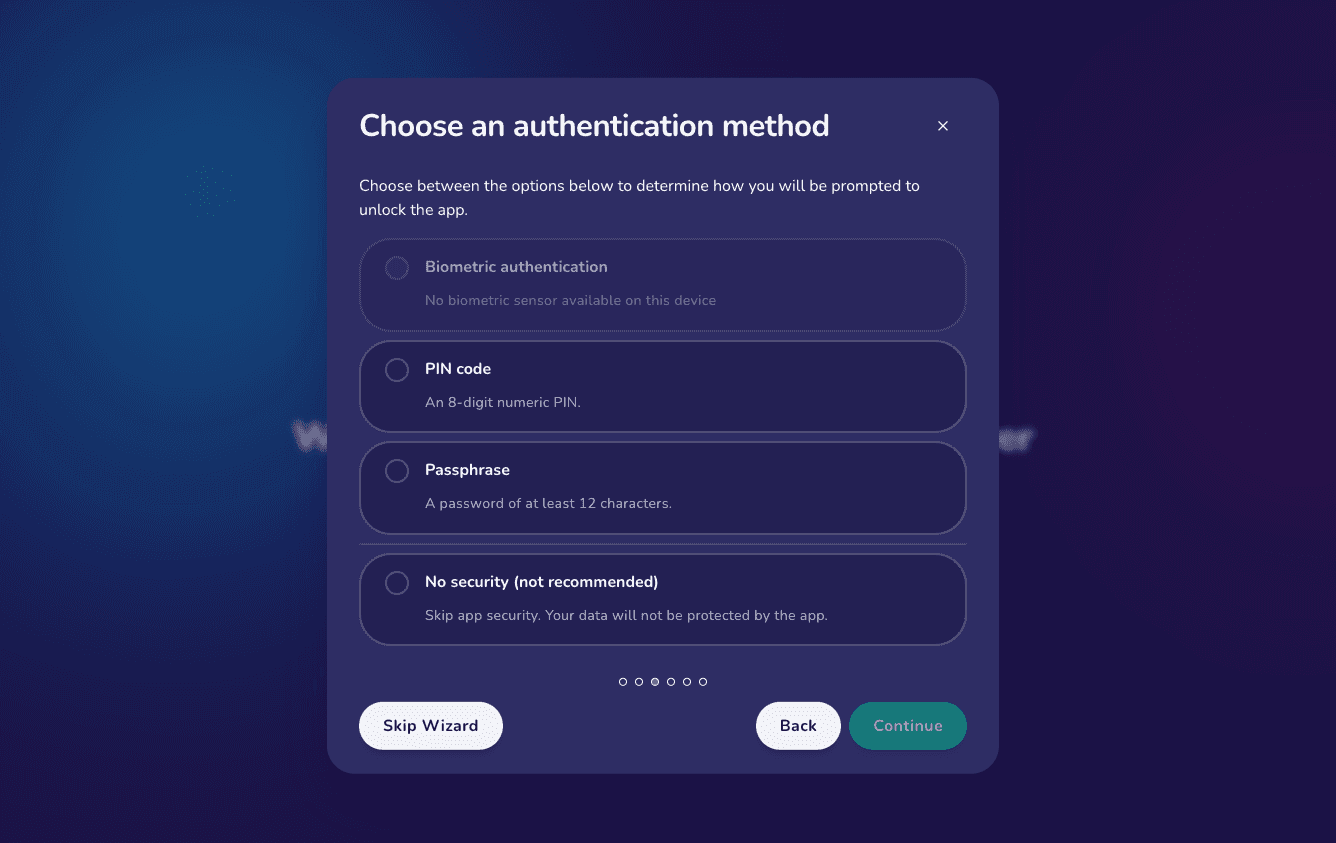
Next, you choose how you will unlock the app. Depending on your device, the options are:
- Biometric — Touch ID, Face ID, or your device's equivalent (offered only when the device has a sensor).
- PIN — an eight-digit code.
- Passphrase — a phrase of at least twelve characters.
- No security — no app-level protection (your data still relies on the device's own protections).
Take Care!
A forgotten PIN or passphrase cannot be recovered — the data it protects is permanently inaccessible on that device. Biometric setup also enrolls a mandatory recovery passphrase, so losing the authenticator alone falls back to it; losing both means the same permanent loss. Re-enrolling a replacement PIN or passphrase (after proving your current one) preserves access to your data, but changing to or from biometric requires revoking the device lock, which erases all protocols, sessions, and stored credentials on this device. Whichever method you use, export your interviews regularly so that losing — or re-securing — a device never means losing your data.
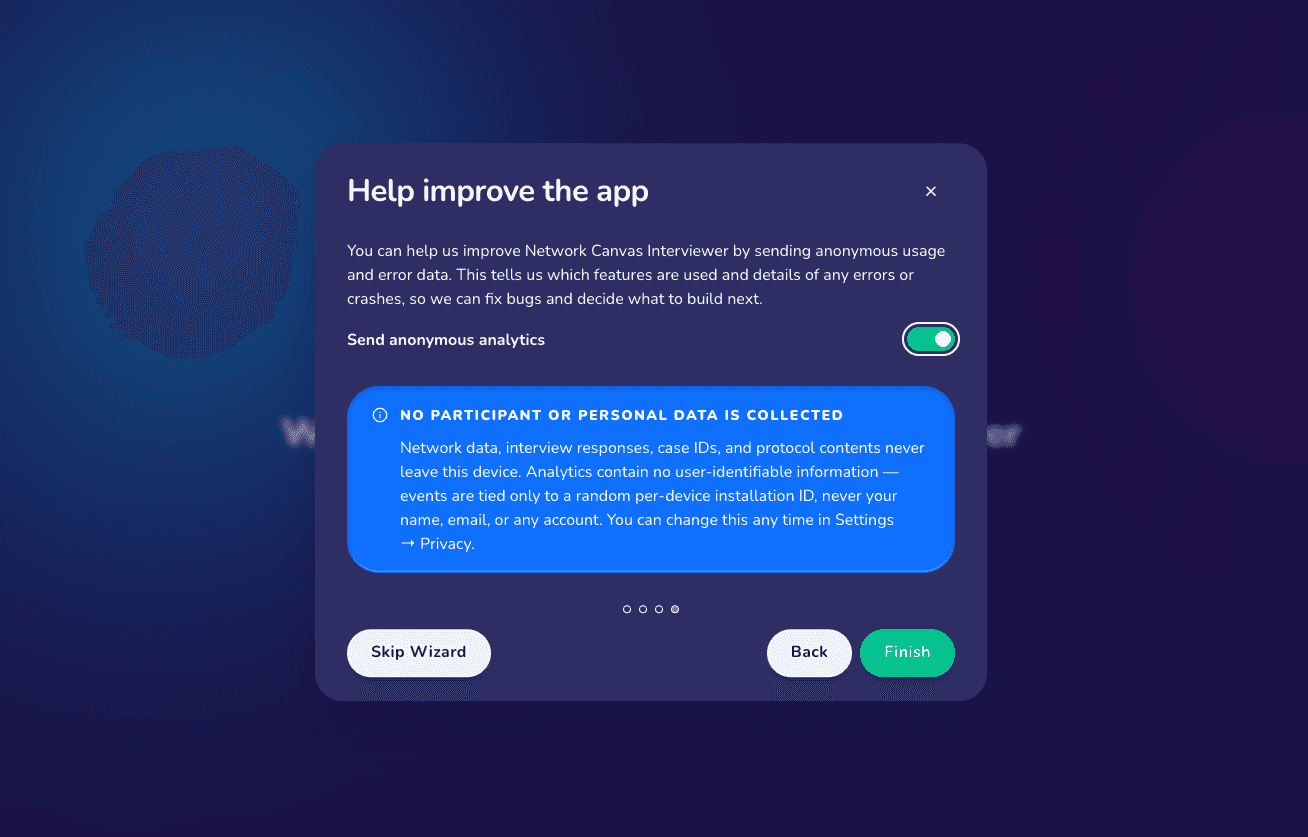
Finally, the wizard asks whether you would like to share anonymous usage data to help improve the app. No participant or personal data — network data, interview responses, case IDs, or protocol contents — ever leaves the device, and you can change this choice at any time in Settings → Privacy.
Locking and unlocking
When the app is locked you see only the lock screen — never any protocol names, session counts, or other details about what is stored.
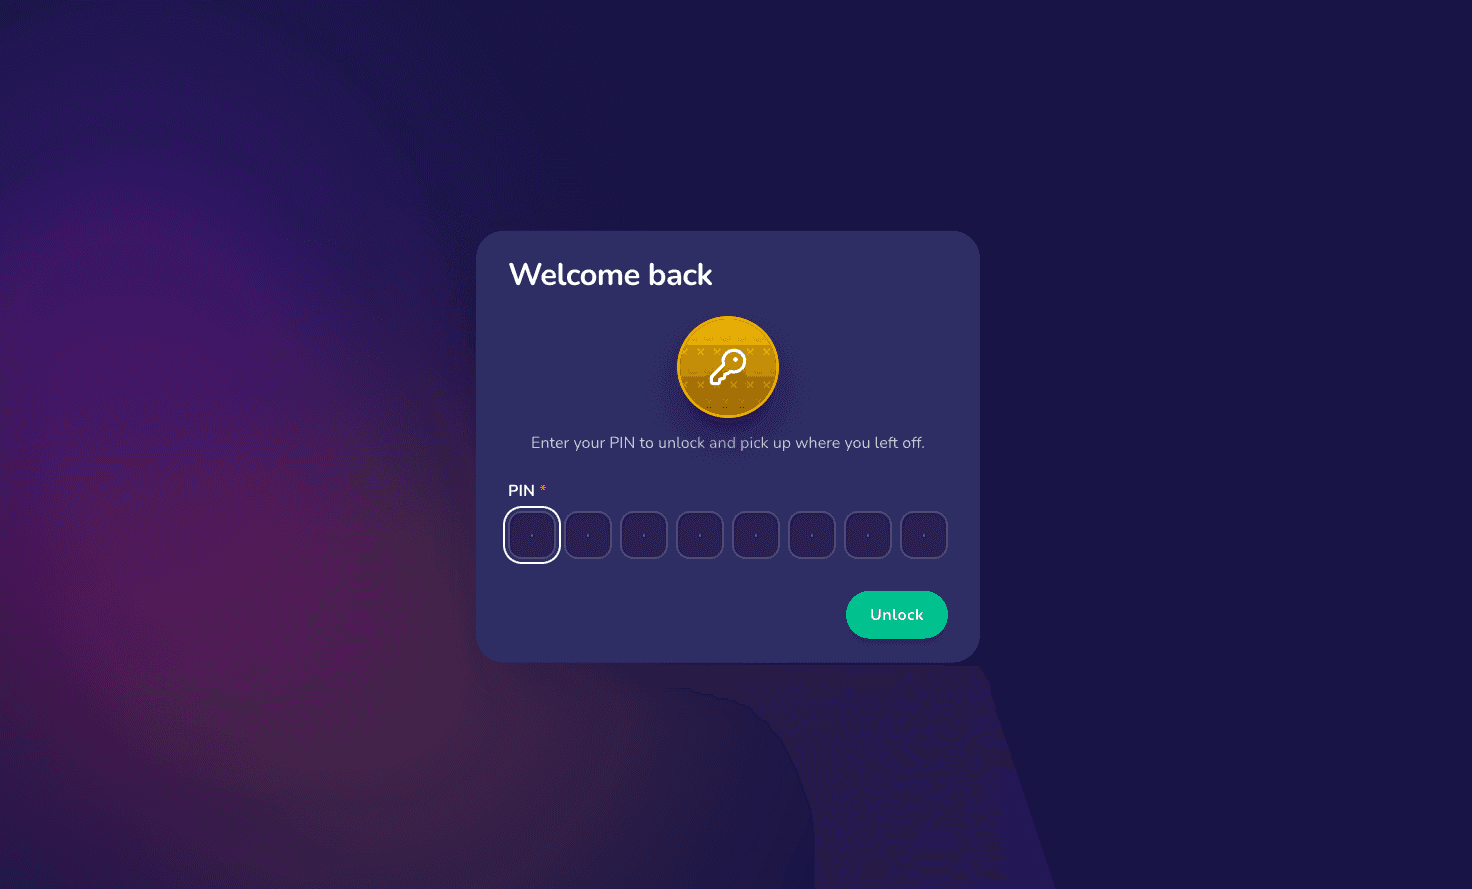
Interviewer locks itself automatically after a period of inactivity (configurable in Settings, from one minute up to an hour), as well as when the app is closed. You can also lock it immediately with the Lock app button (the padlock icon) in the dashboard's top bar.
For extra protection, you can require re-authentication at interview boundaries — entering an interview (on by default), exiting to the dashboard, and exporting data — each toggled independently in Settings.
Settings
Settings is where you manage app preferences, control what your exports contain, and check on the app itself. Open it from the gear icon on the dashboard. It is organized into seven areas: About, Language, Interview, Data export, Privacy, Security, and Synthetic data.
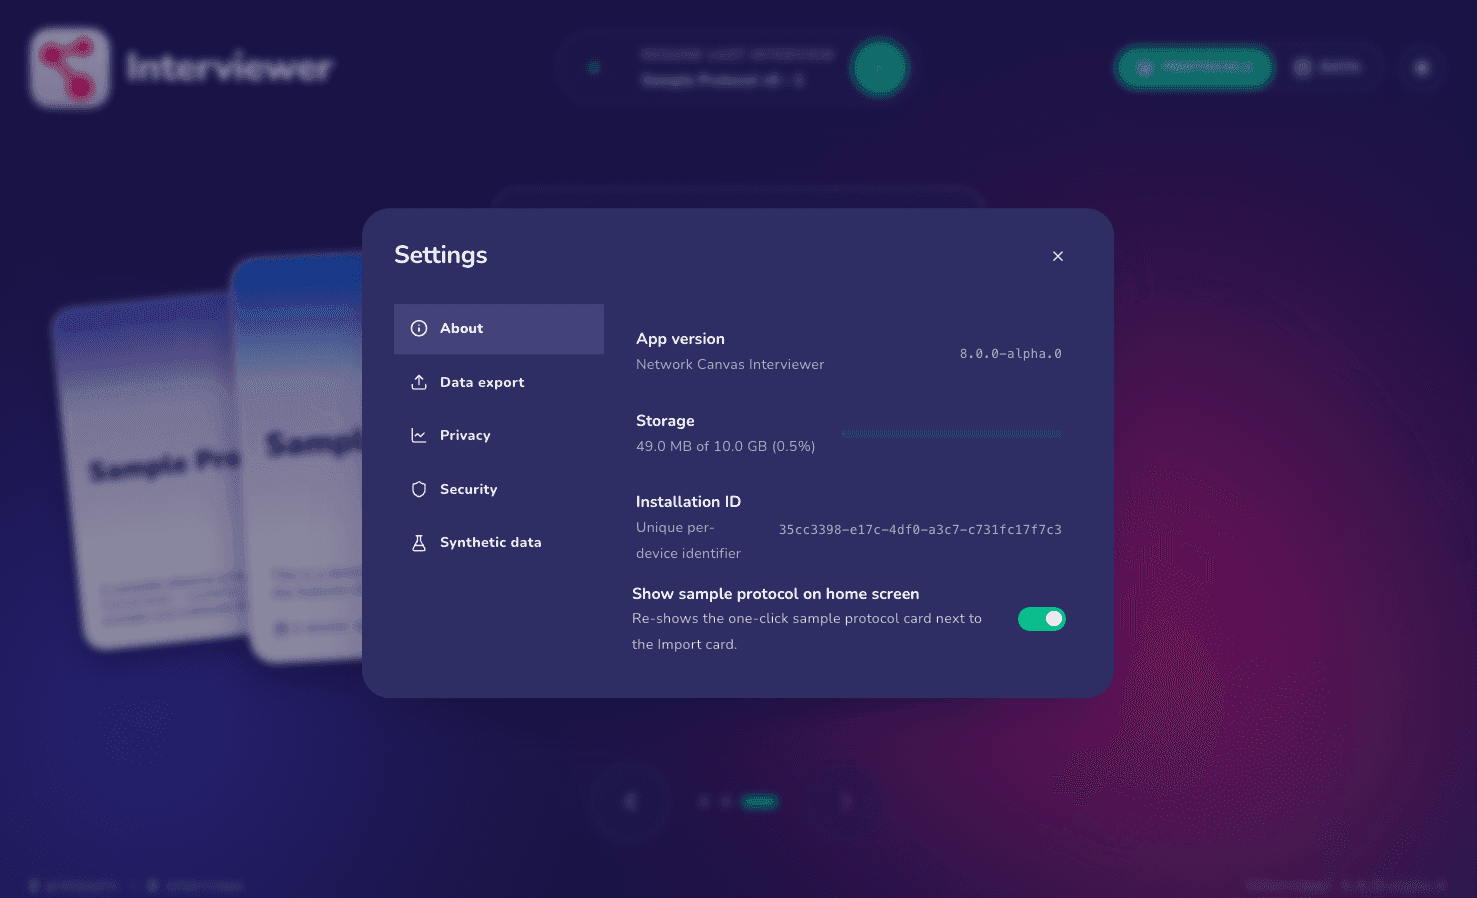
About reports basic information about the app and this device: the app version, how much of your storage is in use (shown as a usage bar — on desktop it also shows free disk space), and your installation ID, a unique per-device identifier. The version and installation ID are the details to quote when contacting us for support. This area also lets you re-show the one-click sample protocol card on the home screen if you previously dismissed it.
Language holds the App language select, which sets the language of Interviewer and its built-in interview controls on this device. Choose a language, or Automatic (browser) to follow your browser's language preferences. See Interface language below.
Interview has a single Allow stage navigation toggle, on by default. While it is on, tapping the progress bar during an interview opens a stages menu, from which you can jump directly to any stage. When it is off, the progress bar stops opening that menu; the up and down arrows still move one screen at a time, which on a stage with several prompts means one prompt rather than one whole stage. Jumping between stages is useful when piloting a protocol, but is usually turned off for real interviews.
Data export controls what every export contains, so you set it once here rather than choosing each time you export:
- Export GraphML and Export CSV choose which file formats are included in the export archive. Both are on by default, and you can include or exclude each one independently.
- Export node positions as screen-coordinate pixels is off by default, so sociogram positions export as normalized coordinates. Turn it on to export pixel coordinates instead, sized to the Screen layout width and Screen layout height you set (default 1920 × 1080 pixels) — useful when you want positions to line up with a specific screen size.
Privacy has a single Enable analytics toggle. When it is on (the default), the app sends a small amount of anonymous usage and error information — which interview stages and features are used, when protocols are imported or data is exported, and details of any crashes — to help us improve the app. No participant data ever leaves the device: network data, responses, case IDs, protocol contents, and asset files are never collected, and analytics contain nothing that identifies you. You can change this at any time.
Security is always listed. On a device used without a lock it offers Enable app security, which runs the Get started wizard so you can set a device lock. Adding that first lock keeps whatever is already on the device: the protocols and sessions stored there are re-encrypted with a key derived from your new credential, not erased. So a device that has been collecting data without a lock can be secured at any point. Once a security method is set, it shows your current method and when it was set and, for a PIN, lets you change your PIN without losing data. It also holds the auto-lock timeout and the re-authentication options described under Locking and unlocking above. Finally, it offers a Revoke / Reset device option: because your stored data is tied to your security method, using this wipes every protocol and session on the device and returns you to first-run setup.
Synthetic data generates fake interview sessions so you can rehearse and validate your export pipeline before collecting real data. Choose a protocol, set the number of sessions to create (1–1000, default 10), and optionally simulate participant drop-out (on by default, which leaves some sessions incomplete to mirror real-world data) or respect skip logic and filtering (off by default). Generated sessions appear in your Data view and export exactly like real ones; Delete All removes every synthetic session in one step. For how synthetic data fits into a full rehearsal of your study, see Piloting Your Study.
Interface language
Interviewer's interface — its menus, buttons and messages, and the built-in interview controls, help, validation messages and dialogs — is available in English, British English, and Spanish. Each language is listed in its own language: English, English (UK), and Español. An Automatic option, the default, follows the language preferences set in your browser.
You can change the language from any of these places:
- The globe button in the dashboard's top bar, which opens a list of every language. The Automatic entry names the language your browser currently resolves to, and choosing any entry applies it at once.
- The App language select on the welcome screen and on each step of the setup wizard.
- Settings → Language.
- The Interface language option in the interview settings menu (see Key navigation elements). Switching language mid-interview keeps the answers already entered, any open form, and your place in the interview.
The choice is stored in the browser on each device, so every interview device keeps its own language. If the browser blocks device storage, the language you chose still applies for the current session but is not remembered: the globe button's list reports that it couldn't save, with a Try again button, and Settings → Language reports that the preference could not be saved. Every language remains available offline in the installed app.
Good to know:
The interface language never changes your protocol or your data. Everything written in Architect — prompts, form labels, response options, and Information screens — appears exactly as the researcher wrote it, and collected data and exported values are unchanged. To run interviews in Spanish, author the protocol in Spanish.
The start screen
After opening Interviewer, the first thing you will see is the 'start screen'. This is a 'back-stage' area of Interviewer, designed to be used by the person conducting the study (not the participant). It allows you to configure the software, launch a new interview, resume an existing interview, and manage your data.
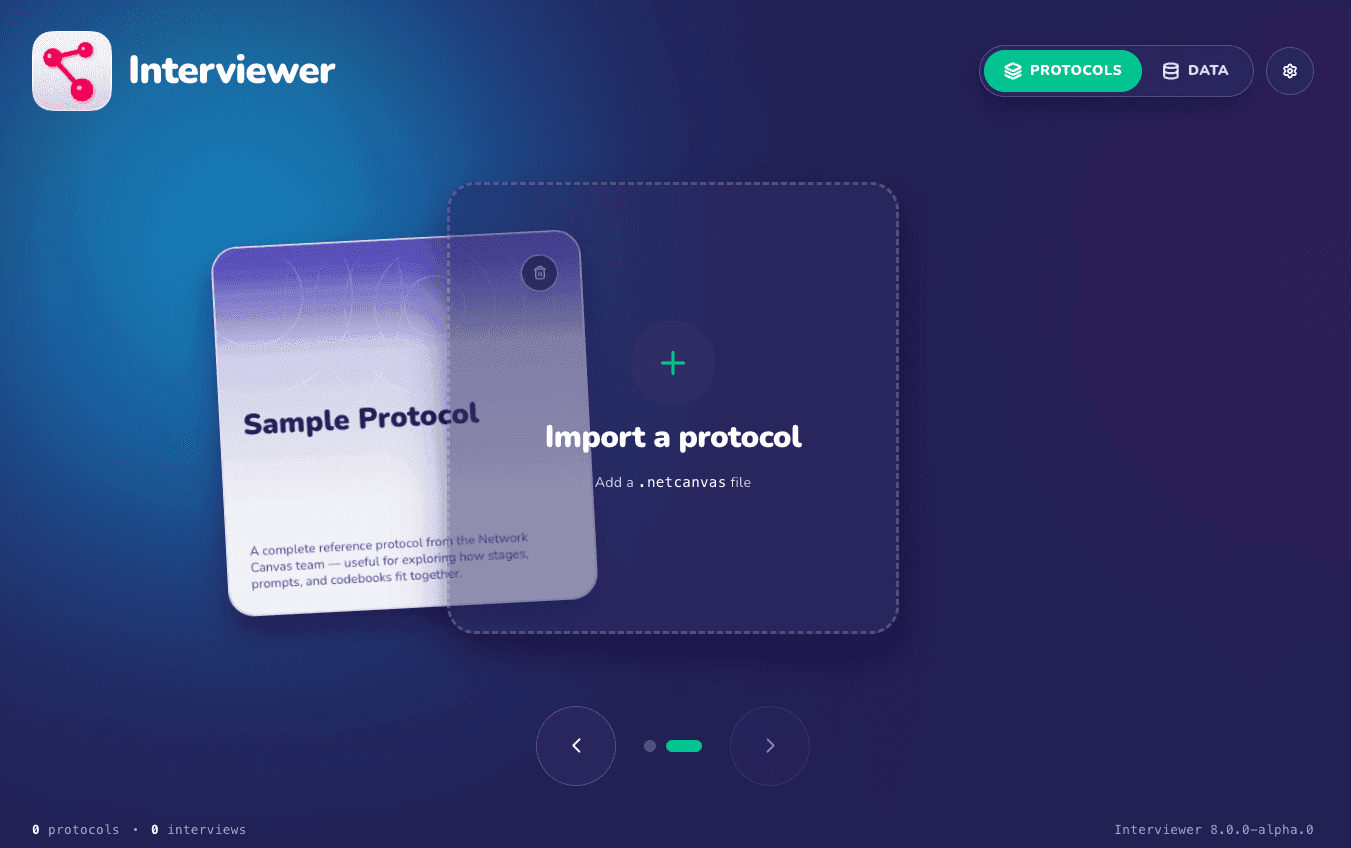
Interviewer presents this as a dashboard. You switch between two views from the toggle at the top of the screen — Protocols and Data — with a row of buttons alongside them:
- Protocols — your installed protocols, shown as a deck you can flip through, alongside a card for importing a new protocol.
- Data — every collected session, ready to resume, review, or export (covered under Resuming, exporting, and managing interview sessions below).
- Interface language (the globe icon) — switches the interface language (see Interface language above).
- Lock app (the padlock icon) — locks Interviewer immediately. It appears only once you have set up an app lock.
- Settings (the gear icon) — app preferences and diagnostics, grouped into About, Language, Interview, Data export, Privacy, Security, and Synthetic data (see Settings above).
Installing and managing protocols
Interviewer must be configured using one or more Network Canvas interview protocols before it can be used to collect data.
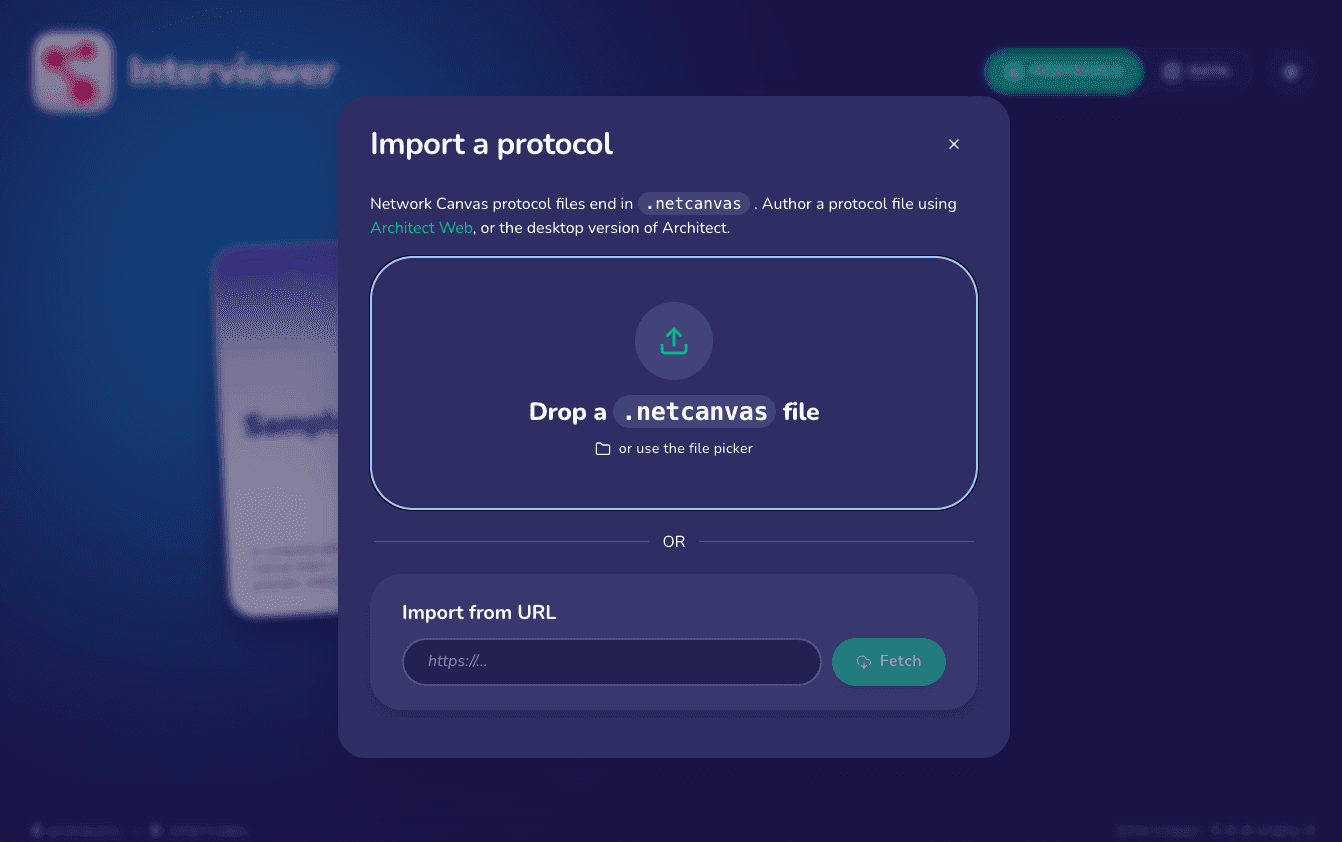
Protocols are imported into Interviewer from a .netcanvas file on the device. Each protocol is validated on import, and any protocol built against an older schema is migrated to schema 8 automatically, with a notification telling you the migration occurred.
Good to know:
Interviewer refuses a .netcanvas file that is missing any of its resource files, and the message names the missing resource. A file whose contents are damaged is reported as damaged. To repair a protocol with missing resources, open it in Architect (which can open it despite the missing files), add the files again from Resources, and download a fresh copy of the protocol. See Resources.
Importing a file directly
This option provides a simple means to import a protocol file that is already stored on your device.
Click the Import a protocol card at the end of the protocol carousel on the start screen to open a file picker, or drag a .netcanvas file onto it.
Good to know:
We recommend this method for smaller studies, and situations where the device running Interviewer is also the device used to author protocols in Architect.
Import the Sample Protocol
For the purposes of this tutorial, we will proceed using the built-in sample protocol.
The sample protocol is built into Interviewer — select it from the protocol deck on the Home screen to follow along. Alternatively, click here to download the file, and import it from the Protocols area.
Once a protocol is installed it appears as a card in the Home deck, representing the protocol you imported.
Anatomy of a protocol card
The protocol card is a visual device representing a Network Canvas interview protocol. It is used throughout Architect and Interviewer, whenever a protocol is used.
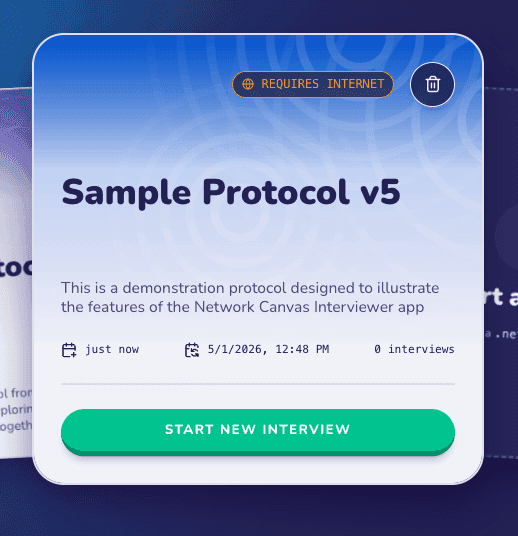
The protocol card can often be clicked, tapped, or dragged in order to perform an action related to the protocol. The card itself has three main visual elements:
- The protocol name, which is defined by the original file name of the protocol file itself
- The protocol description, which can contain any descriptive information you like, and is set in Architect
- The protocol metadata, which summarizes when a protocol was installed and modified, along with the number of interviews collected against it
It also contains a Start new interview button, a Requires internet indicator (shown when the protocol uses internet-dependent interfaces such as Geospatial), and a trash icon for removing the protocol from the device.
Removing or managing installed protocols
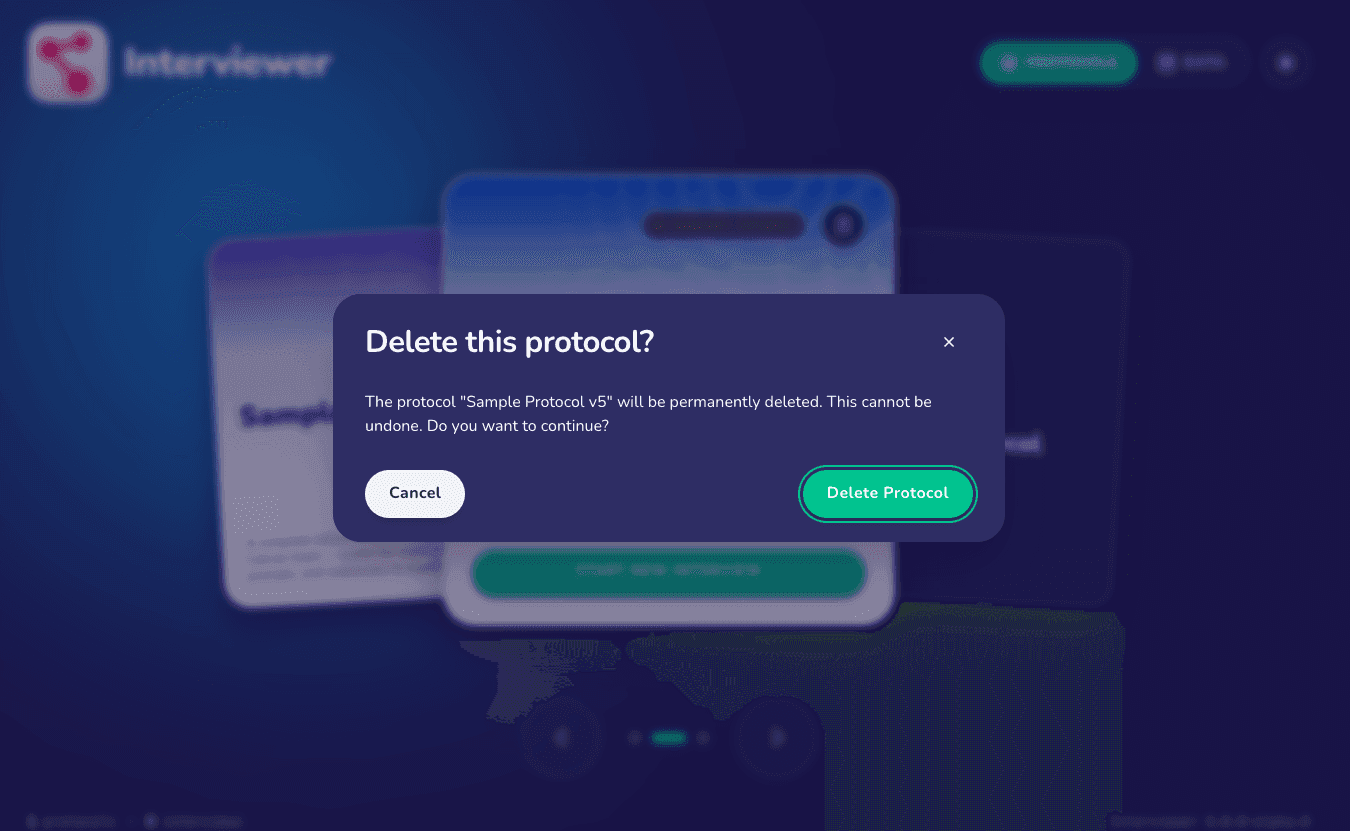
Open the Protocols area to manage everything installed on the device. Each protocol lists its schema version, import date, and the number of interviews collected against it. Deleting a protocol asks you to confirm first, since it cannot be undone — and any interviews recorded against that protocol are removed along with it.
Starting a new interview
To begin an interview, find the protocol in the Home deck and click Start new interview on its card (shown in the card anatomy above). The card you most recently used sits at the front of the deck for quick access; if you have several protocols installed, flip through the deck or open the Protocols area to search the full list.
Entering a case ID
When initiating a new interview, you will immediately be presented with a dialog that asks you to enter a 'case ID'. This is a simple mechanism designed to help you keep track of and identify interview sessions in a way that is meaningful to you and your study. The case ID will be visible in Interviewer anywhere that you see interview sessions, and will also be included in all exported data.
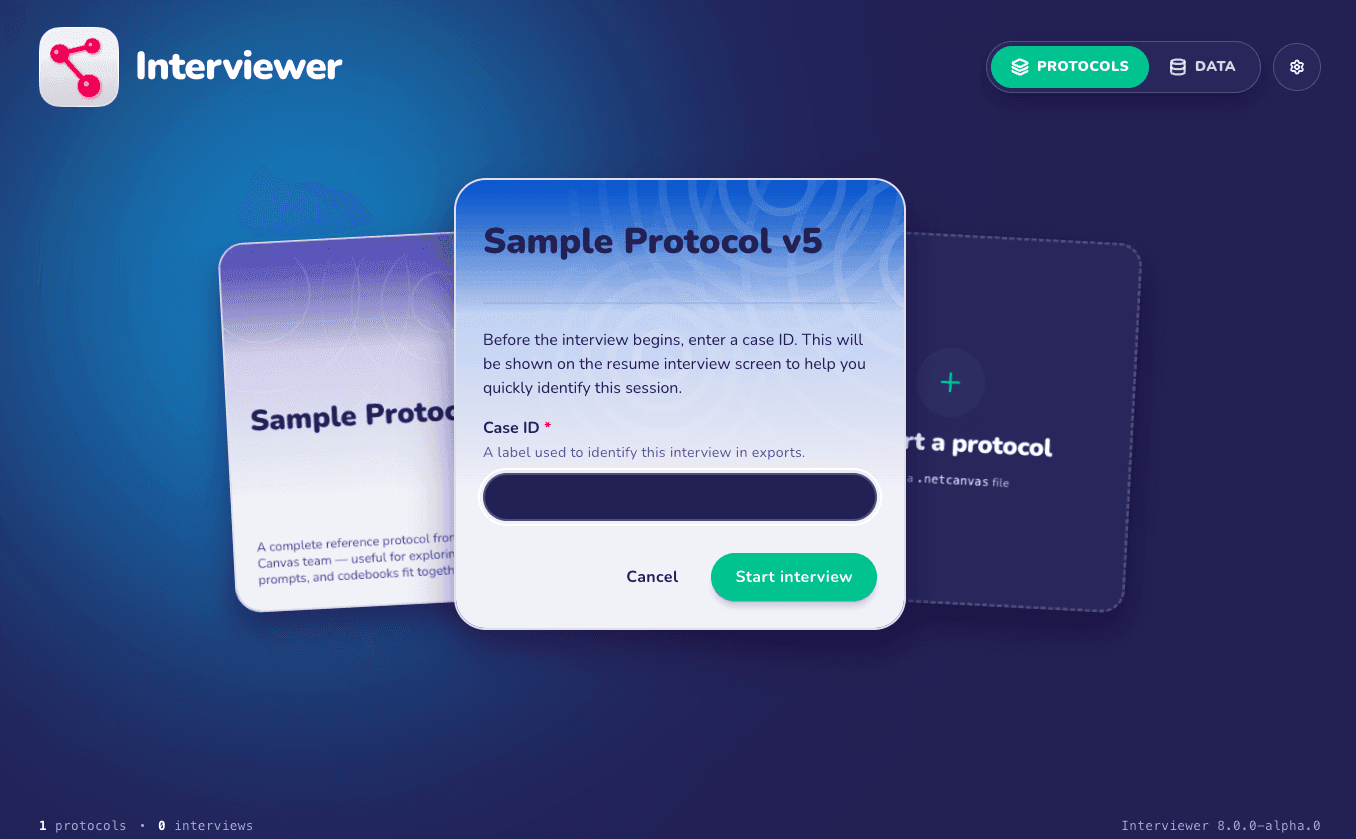
A case ID can contain any combination of numbers and letters (including spaces) up to 30 characters. There is no requirement that a case ID be unique, since this would not be possible to enforce across multiple devices. Nevertheless, you should strongly consider a consistent system for naming cases that allows you to uniquely identify them.
For example, you might consider:
INTERVIEWER_INITIALS PARTICIPANT_ID DATE(e.gJRM 12345 December 5th)STUDY_ID-PARTICIPANT_NAME-VISIT_NUMBER(e.gNetCanvas-Joshua-4)- ...or simply
PARTICIPANT_NAME(e.gJames Montgomery Williams)
Sample interview walkthrough
The remainder of this tutorial will consist of a walkthrough of the sample interview protocol, in order to demonstrate the participant experience of Interviewer.
If you are following along on your own device, make sure you have installed the sample protocol, started a new interview, entered a case ID, and are looking at the first screen.
Interviewer user-interface
The main interview user interface within Interviewer is designed to be simple, unobtrusive, and intuitive for participants. This has two consequences that you should be aware of from the outset:
- Much of the functionality researchers may wish to access is somewhat less discoverable than you might be used to. You should expect to spend time learning and training interviewers so that they understand how to navigate the various functions of the software.
- Very little space is devoted to user interface elements that provide explanations about how to complete a task. This is because we assume that the researcher will be present in the interview, and will therefore be able to guide the participant through the interview process.
Key navigation elements
In terms of the user interface elements that are always visible when within the interview, there are several features of note.
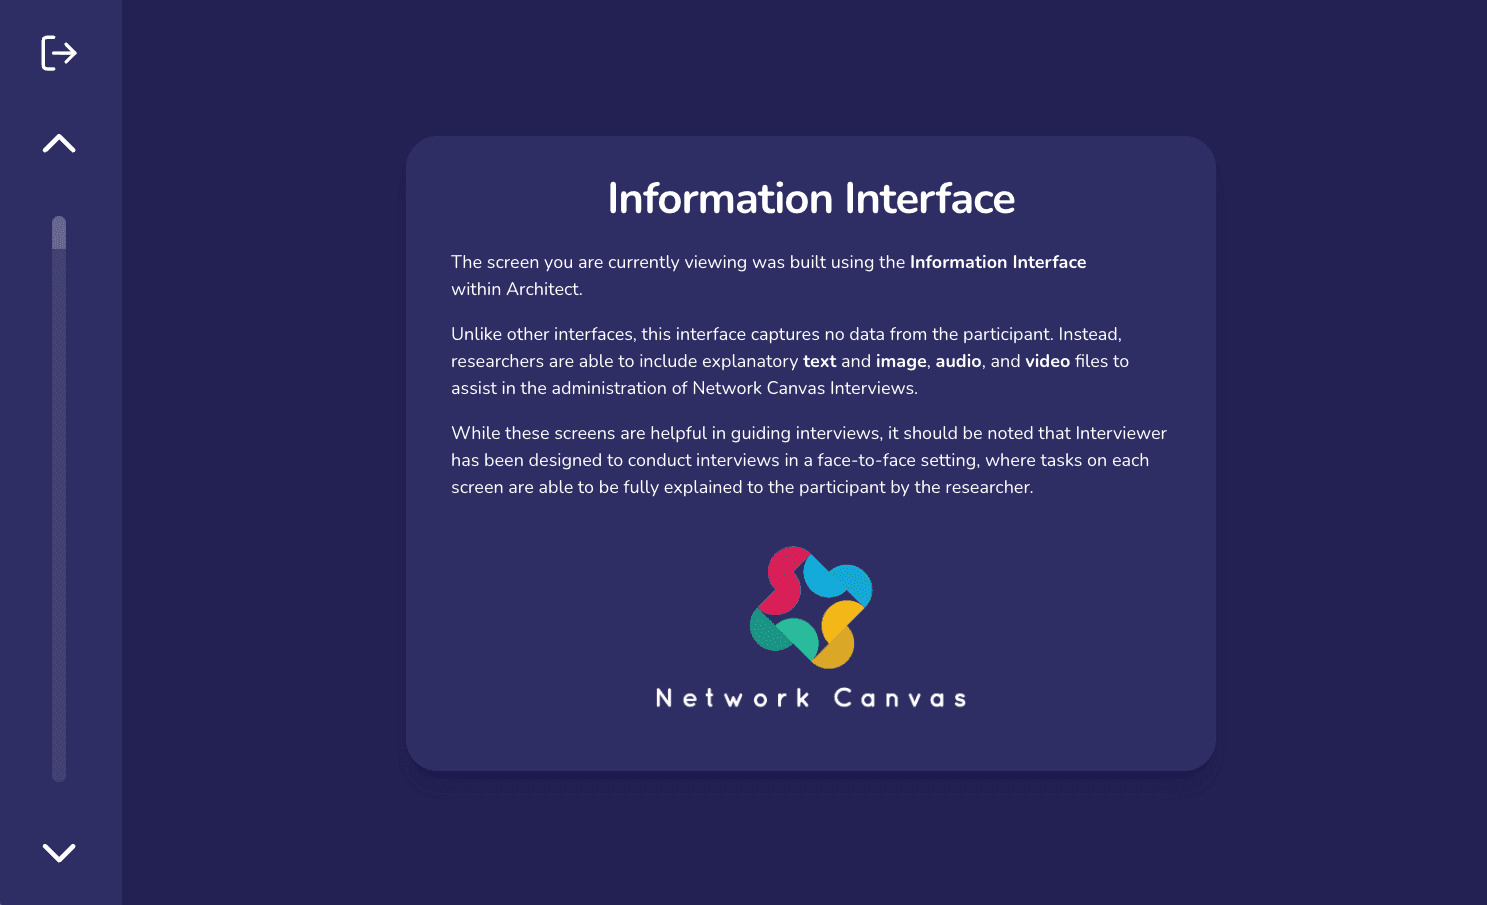
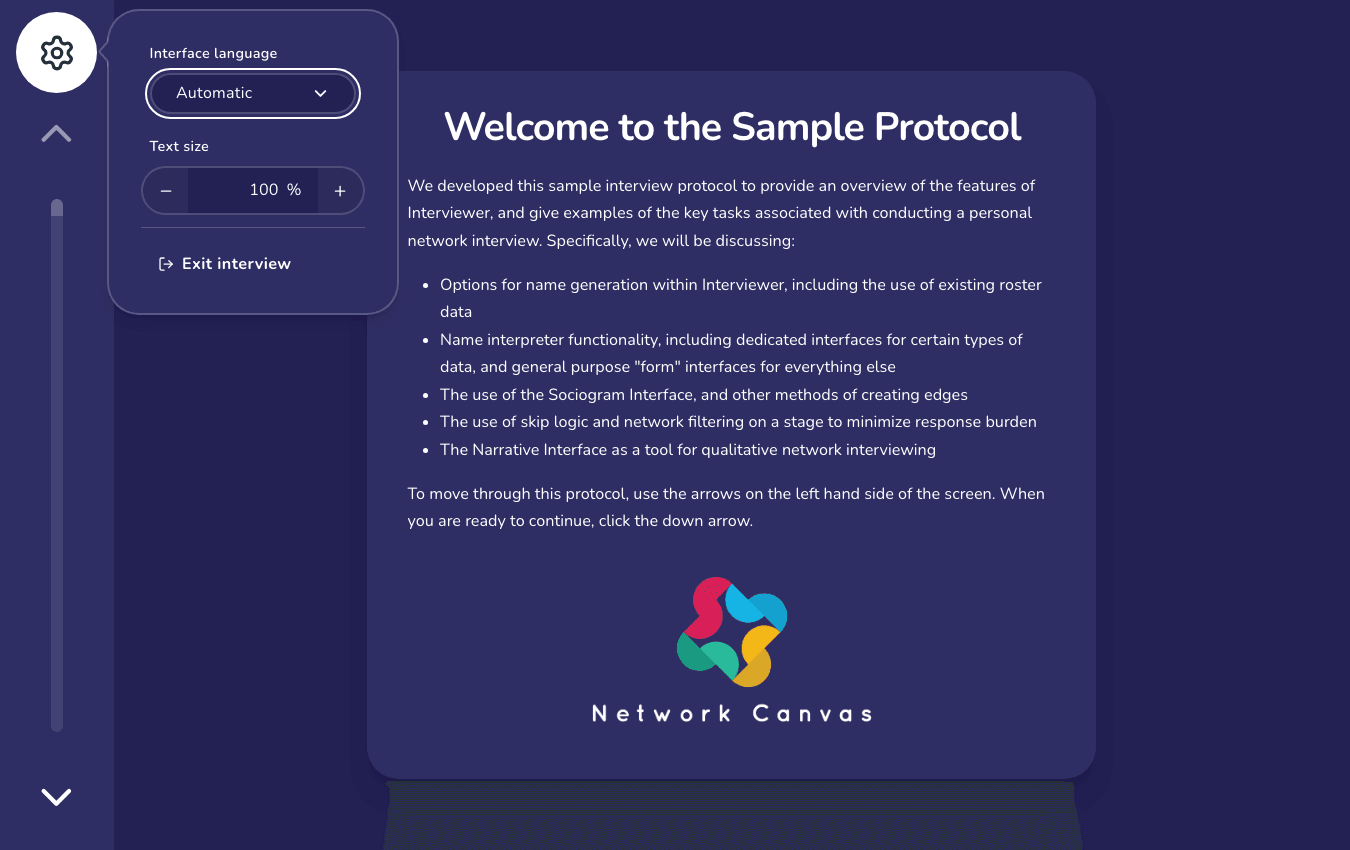
Interviewer keeps the interview chrome deliberately minimal. The navigation adapts to the device — a rail down the side on wider, landscape displays, and a bar along the bottom on tall, portrait ones — and contains only a few controls:
- A settings control (the gear icon) that opens a small menu containing:
- Interface language, which switches the language of the interview's built-in controls, help, and messages without losing the answers already entered, any open form, or the current position in the interview. The choice is remembered on the device, like the other language controls (see Interface language).
- Text size, letting the participant enlarge or reduce the whole interview — useful on tablets.
- Exit interview, which leaves the interview and returns to the dashboard after a confirmation.
- An up arrow to move to the previous stage or prompt.
- A down arrow to advance to the next stage or prompt.
Between the up and down arrows, a progress bar fills as the participant moves through the interview. While Allow stage navigation is on in Settings → Interview (the default), the progress bar is also a button (announced to screen readers as Go to another screen) that opens a stages menu for jumping directly to any stage. Progress is saved continuously, so you can exit an interview and resume it later from the Interviews list without losing data.
The settings menu holds only these participant-facing options; every other app setting lives in the dashboard Settings area, reached after exiting the interview.
Take Care!
If you hand the device to the participant during an interview, first turn on require authentication when exiting an interview in Settings. Otherwise a participant who chooses Exit interview from the settings menu reaches the dashboard, where they could see other participants' data.
Stages and interfaces
With a Network Canvas interview protocol, each interview is made up of a series of screens called "stages", where a specific task is completed. You can have as many stages in your interview as you need, and as you will see in other tutorials, there are many ways to structure your interview using different combinations of screens and different front or back loadings of tasks.
Each stage is an instance of a specialized task-based screen called an "Interface". An Interface is the broad "category" of task, and a stage is the specifically configured version of that task in your interview. Each Interface is designed for a specific data collection task, such as generating names, collecting ordinal data, or showing a form. Each Interface has dedicated documentation (see the "Interface Documentation" section on the left) that explains its features and provides guidance on when and where to use it.
The Information interface
The first screens within the sample interview protocol all use the Information interface, with the very first being the welcome stage.
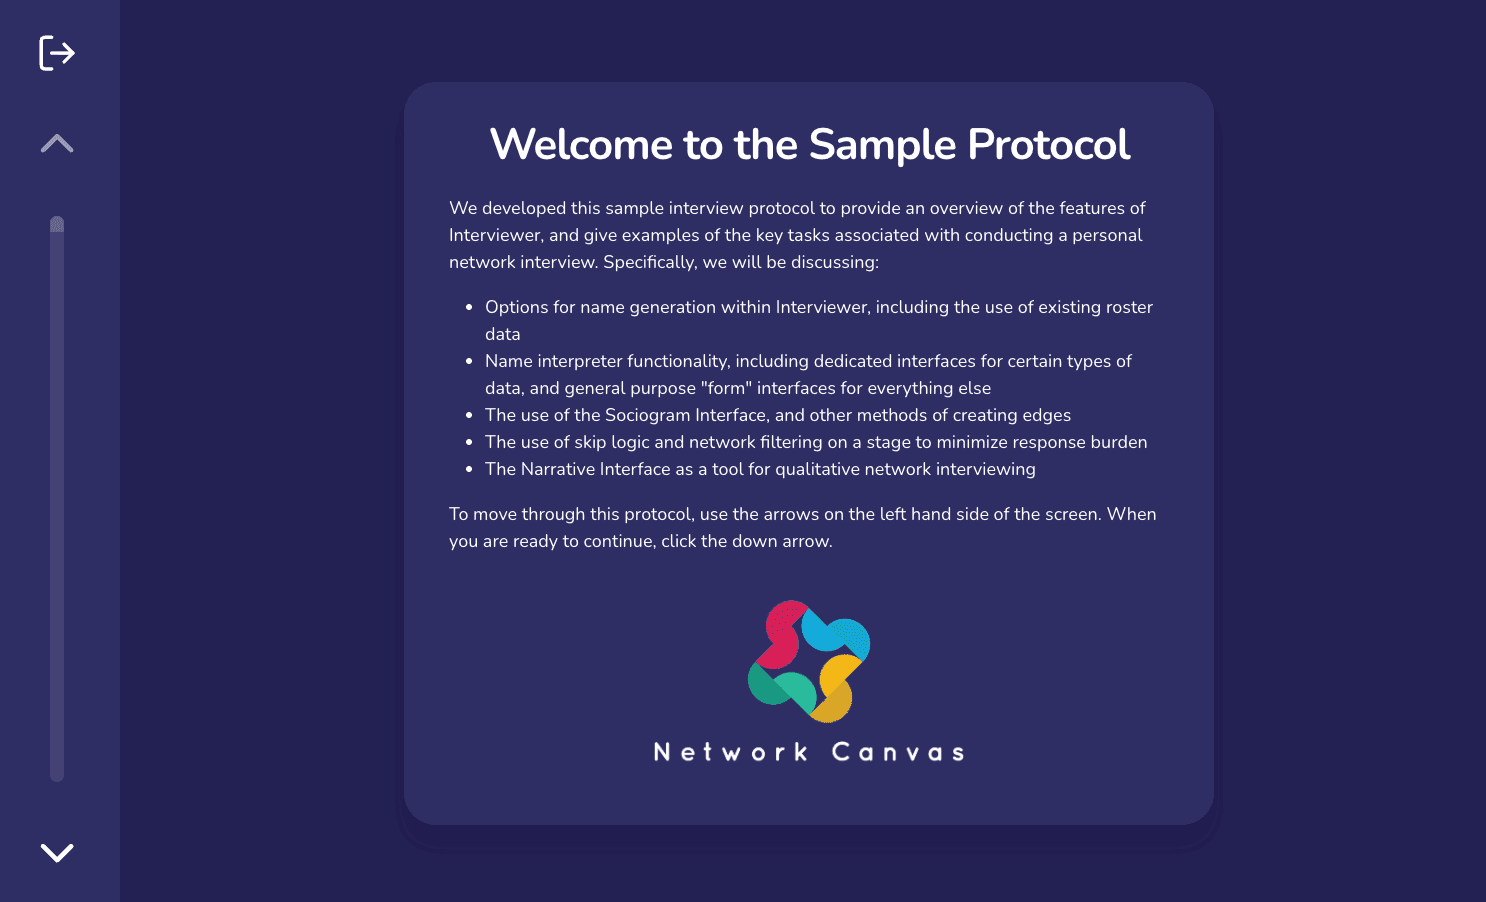
You can use the Information interface to build stages that communicate information to a participant, such as providing a study description or instructions for completing a task on a subsequent screen. It can also contain media, such as audio, images, or video. This sample protocol uses numerous Information interfaces to clarify the primary tasks performed in Interviewer, but this article will not describe them to avoid redundancy.
Ego data collection
After clicking next to pass through two additional Information stages, you will arrive at the first data collection stage in the sample protocol.
While Interviewer is optimized for collecting data about network members from an ego-centric perspective, it also provides the ability for researchers to capture data about the participant (ego) through the Ego Form interface. This interface allows the researcher to show an arbitrary form to the participant, where responses are stored in a dedicated section of the interview data model devoted to ego data.
The first use-case for ego data collection demonstrated is an example of a participant consent form.
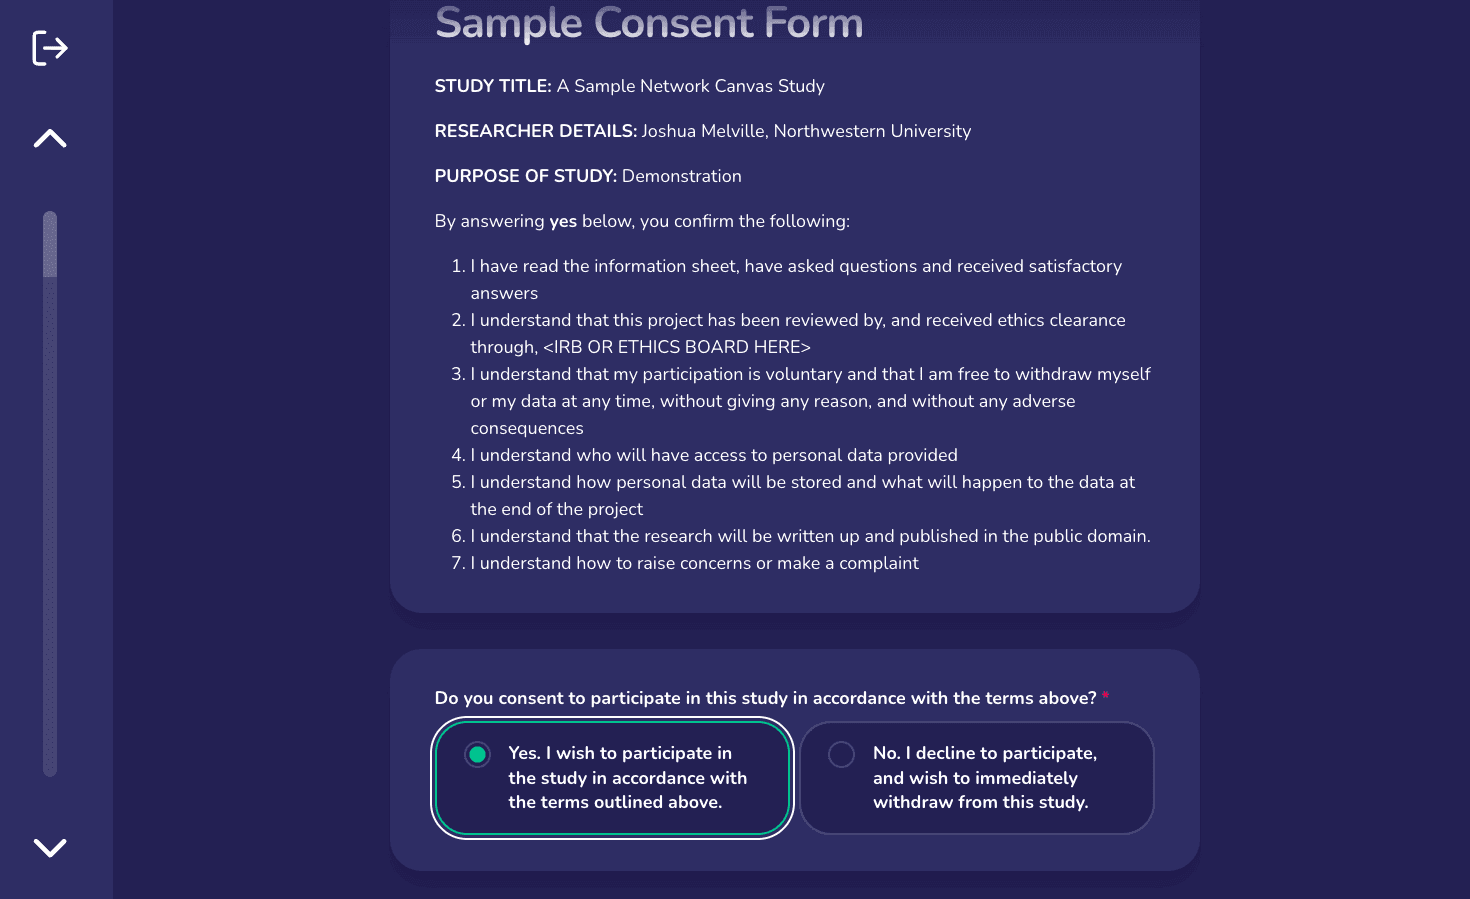
It shows a single form field that represents a boolean attribute corresponding to the consent status of the participant. Once the question is answered, the attribute is included in the network data model and exported along with the interview data. You can use it to direct the flow of the interview using skip logic.
The next Ego Form interface shows a more full-featured example of this interface. In this particular stage, the form asks for a variety of individual level data using numerous input control types.
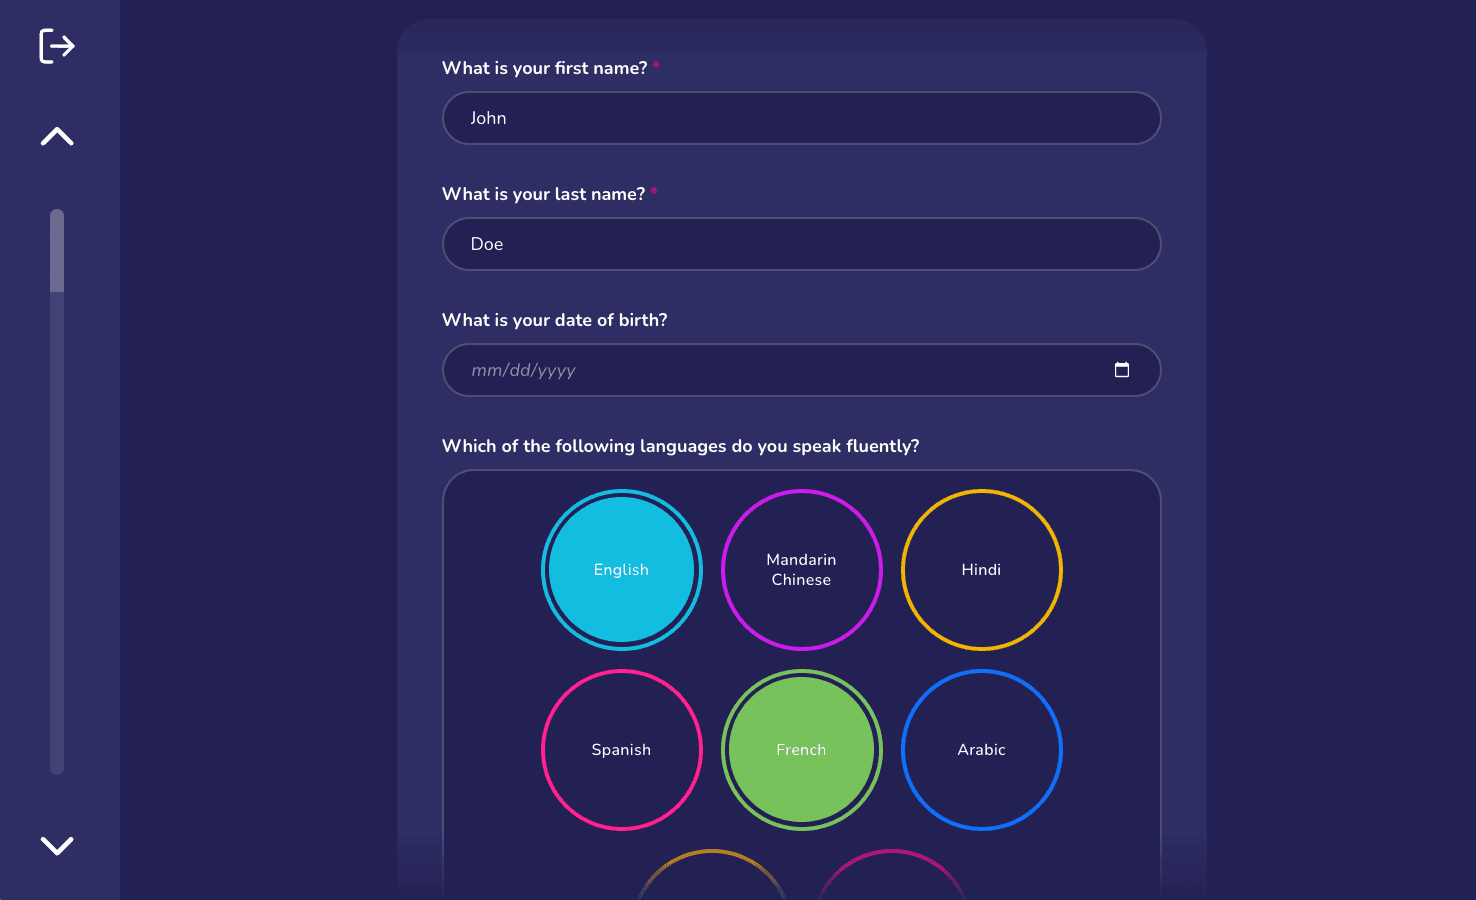
The form includes validation, which requires you to enter the first and last name before proceeding to the next screen.
Name generators
After clicking through a further Information screen, you encounter the first name generator stage of the sample interview. Name generation is a fundamental task in all network interviewing, and the Network Canvas software offers configurable and customizable behaviors to suit different research designs. This section briefly discusses these in turn, in the context of the sample protocol.
Quick Add
The first name generator stage uses the Quick Add Name Generator interface. It is designed to be ultra-low response burden and only requires that a participant provide a name or label to create a node.
To add nodes, click the add button in the bottom right, which reveals the label input. Enter a name and press enter (or click the node icon), and notice that a node appears in the main node list. When you are finished, either click the button again or click away to close the input.
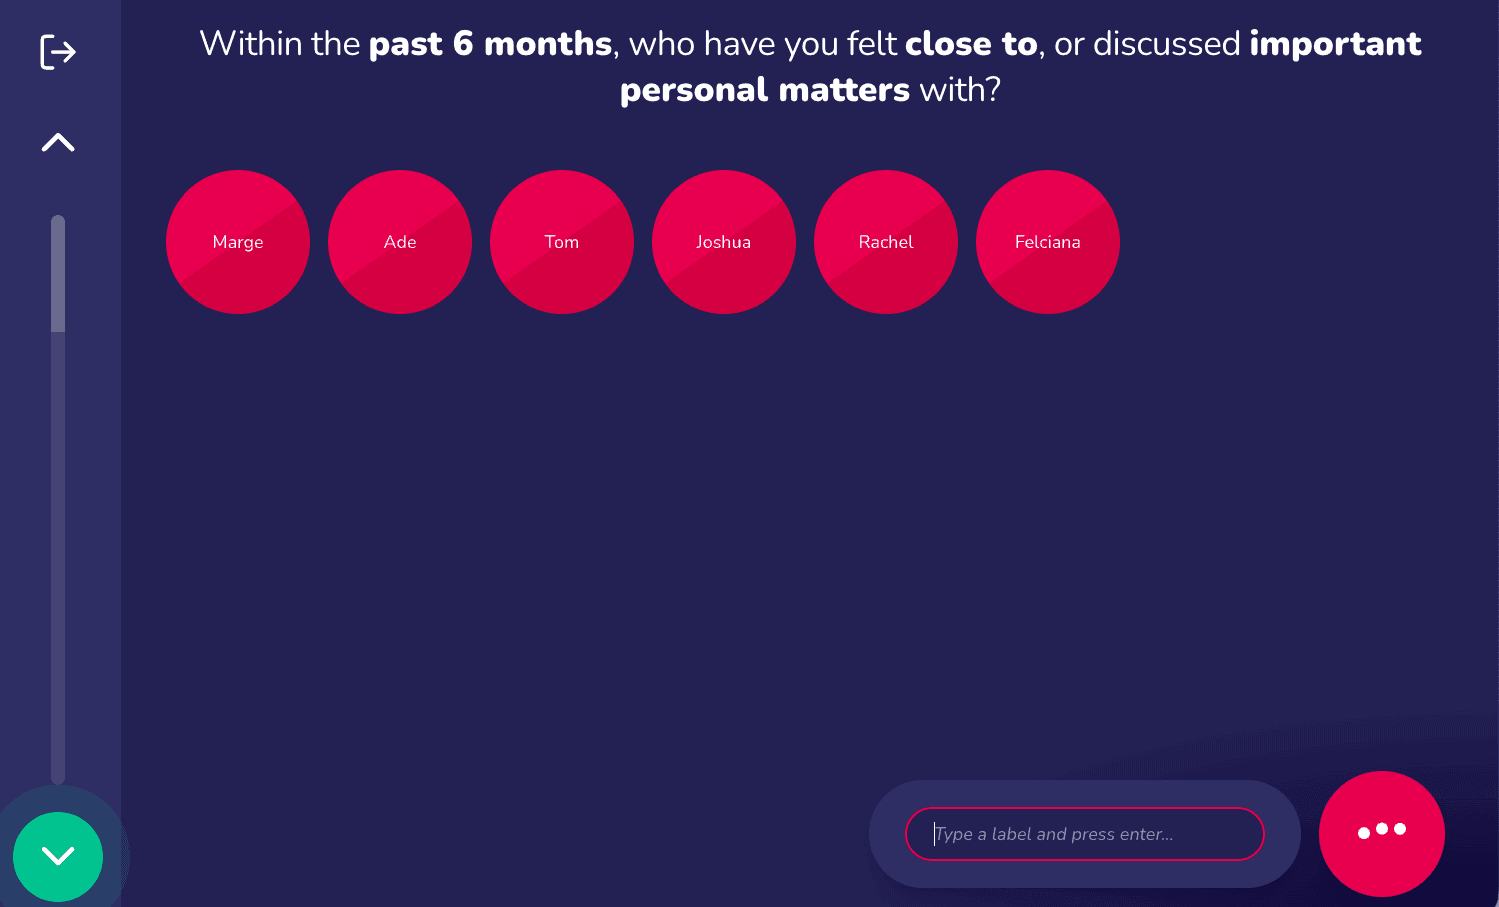
This stage is configured with a single prompt:
Within the past 6 months, who have you felt close to, or discussed important personal matters with?
Prompts are defined by the researcher, and frame the data collection task. Many Interfaces support the use of multiple prompts on a stage. If a stage is configured with multiple prompts, the "next" and "previous" buttons will move between them automatically.
Side panels
Clicking forwards through an information stage and into the next name generator stage, a side panel will appear that contains all of the nodes named on the first stage. We can drag and drop nodes from this side panel into the node list area, or we can create new nodes by clicking on the add button in the bottom right right corner as we did previously.
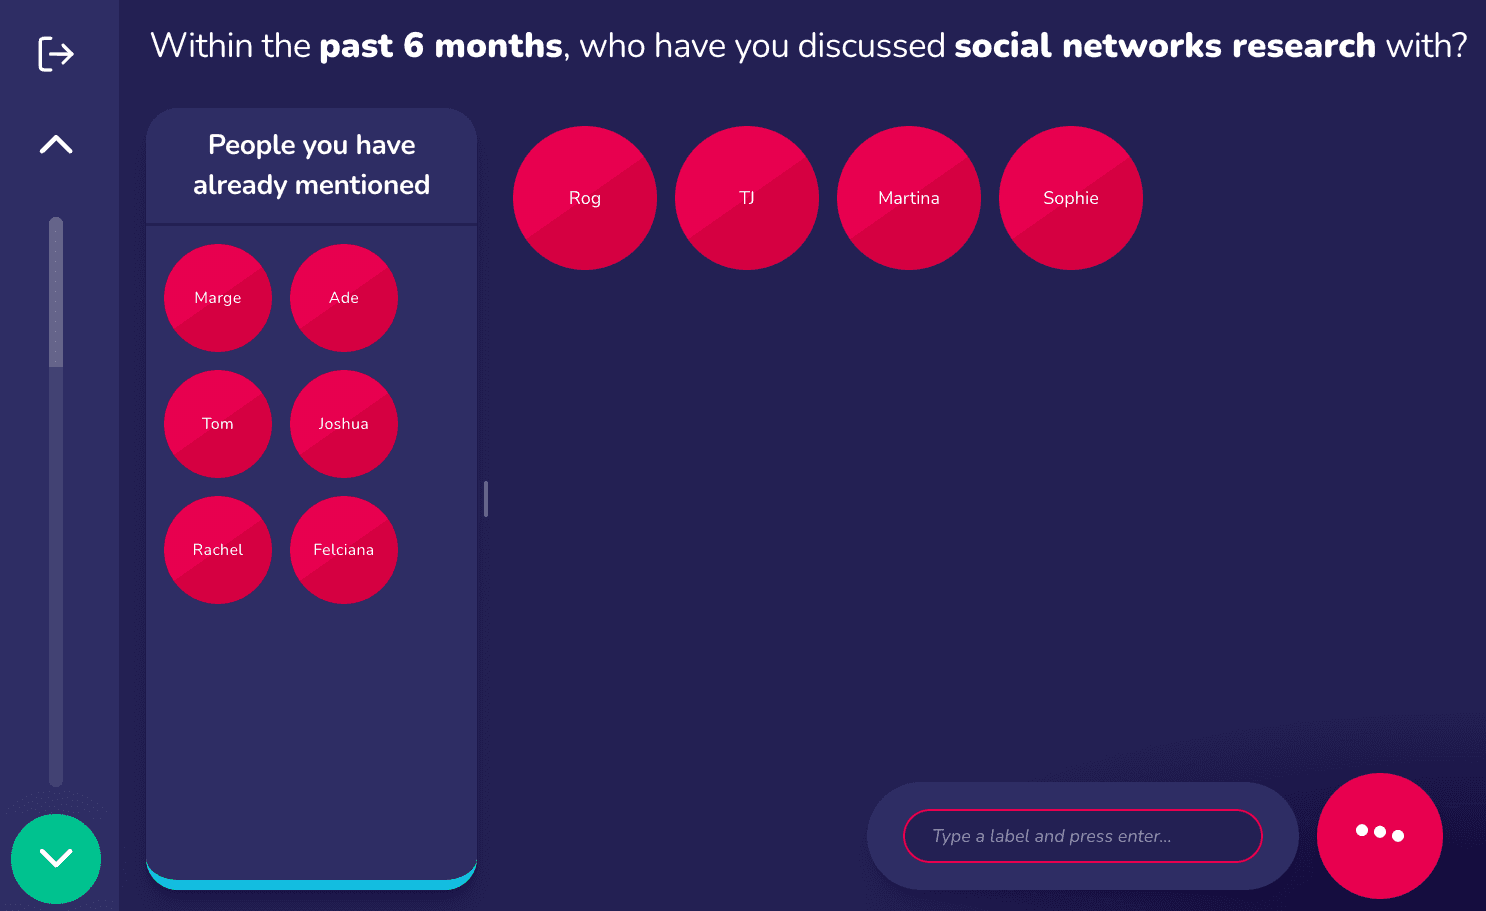
The side panel functionality is available in both of our non-roster specific name generator Interfaces. It is designed for two specific scenarios:
-
To allow participants to nominate alters they have already mentioned again in response to later prompts. For example, if a first prompt asks "Who are you close to?", and second prompt asks "Who are your family members?", the participant may wish to nominate existing close alters as also being family members. This is especially powerful when used in combination with the assign additional variables feature, since it allows you to combine name generation and name interpreting in a single step.
-
As a container for displaying small amounts of roster data, where you still need to retain the ability for the participant to add network members not listed in the roster.
You can display up to two panels on a name generator, with different content in each.
Forms
Moving forwards through an additional information screen, you will arrive at the next name generator, which begins with the following prompt:
Within the past 12 months, which clinics or healthcare providers have you visited?
Although this stage is also a name generator, it uses a separate interface which makes it behave differently. This time, when clicking the add button in the bottom right, you will see that a dialog is triggered. Network Canvas can be configured to collect more in-depth node information at the time of elicitation, using the concept of "forms". In this example, clicking the "add" button shows a form with three fields (name, visit date, and treatment summary).
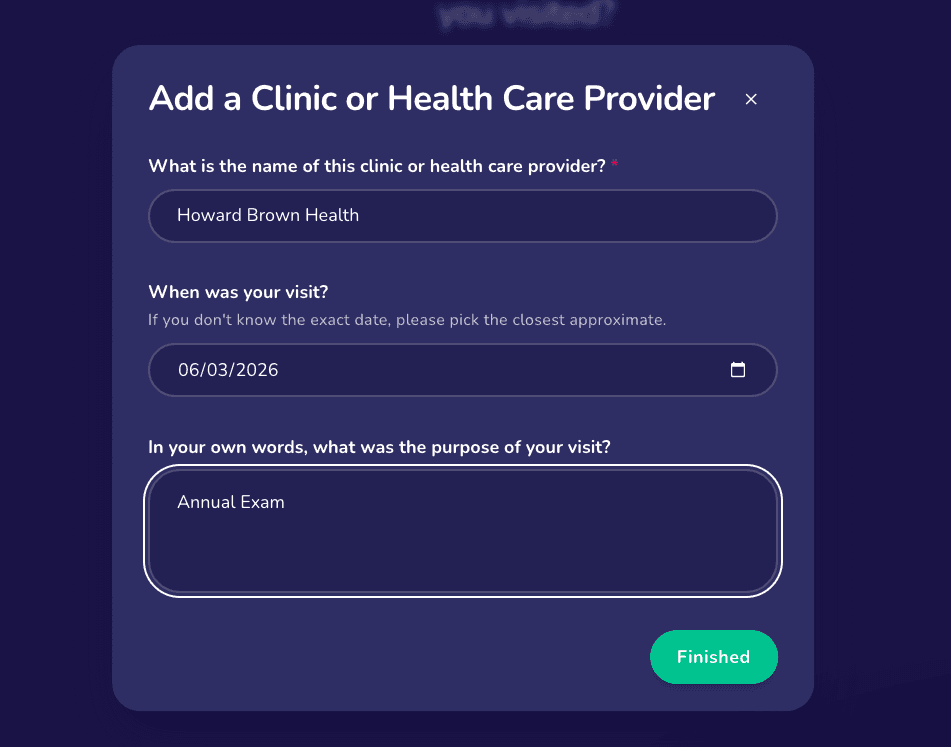
The forms you design can collect whichever attributes you wish. This is one of the key ways that a researcher can vary the front-facing response burden of naming alters. Collecting a large number of attributes as the node is created can allow for fewer overall stages in your interview, but can also condition the participant against naming large numbers of alters.
Experiment with adding alters on this stage, and notice that these nodes are a different color from the ones we created previously. This is because Network Canvas interviews can collect data on as many node types as the researcher desires.
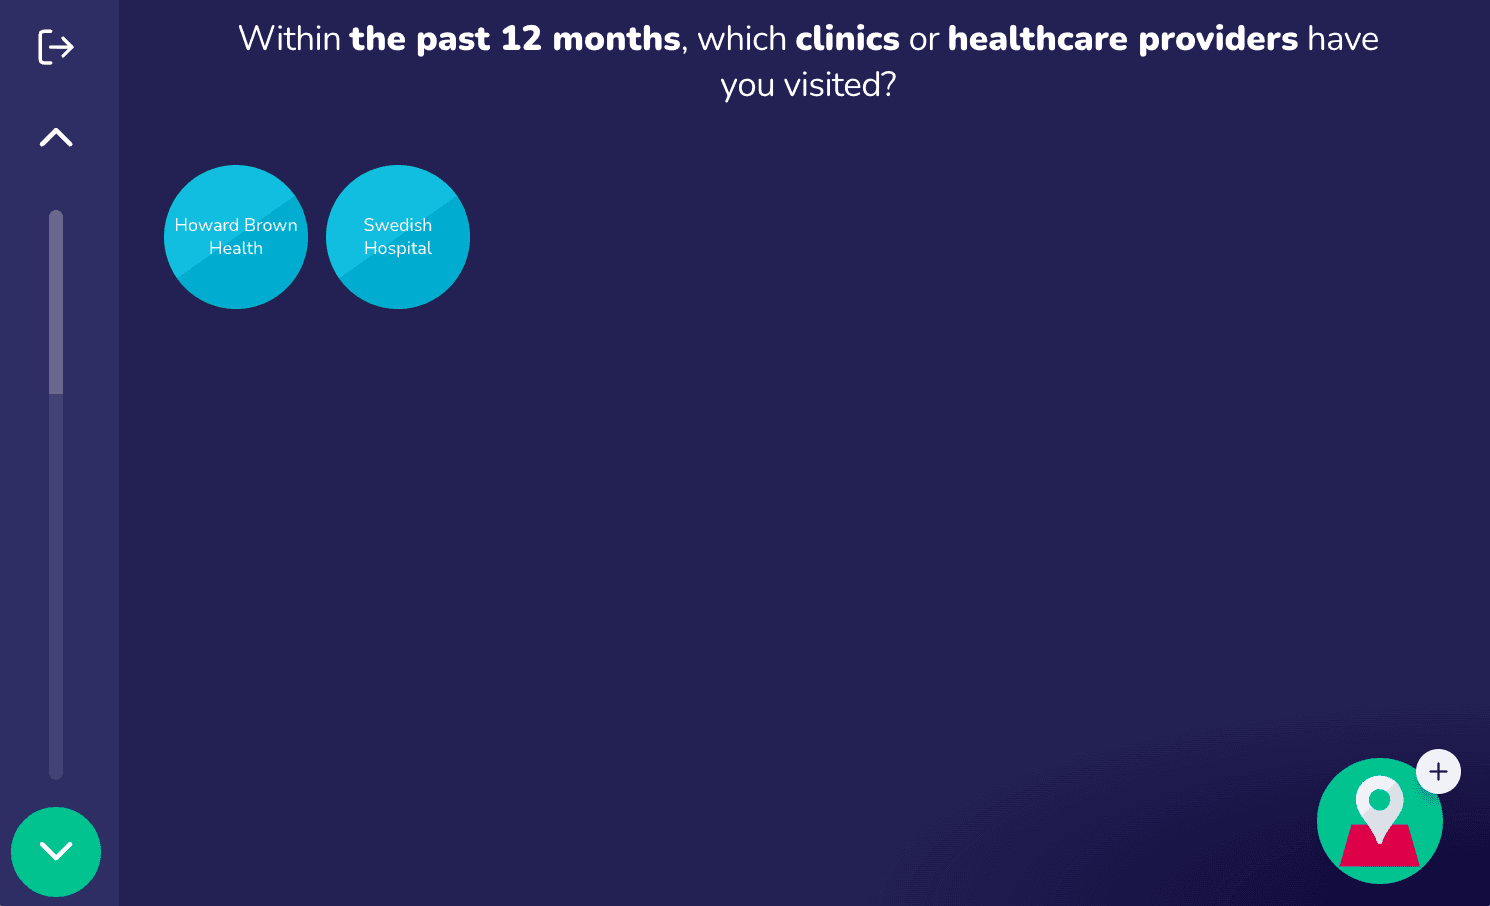
In this case, our name generator will create "clinic" nodes, which are displayed in blue, as opposed to the red "person" nodes we saw previously. This is an element of the ontological flexibility discussed in our project overview, and allows for powerful research designs that model networks in sophisticated ways.
Using roster data
Continue forwards through the sample protocol, until you arrive at a name generator stage with the prompt:
Please indicate any members of your class that you spend time with other than when studying. Drag a card from the side panel to add it to the network, and press the down arrow when you are finished.
This stage once again behaves differently from the previous name generators due to being based on a different interface. It allows a participant to nominate alters from a predetermined list (i.e. a roster). In this case, "classmate" nodes are added by selecting the appropriate "display card" on the scrollable roster. Multiple alters can be added at one time. Note that you are able to filter and sort the list, which helps when trying to locate a specific roster member. The sortable properties, as well as the information to be displayed on the cards, are all fully customizable within Architect.
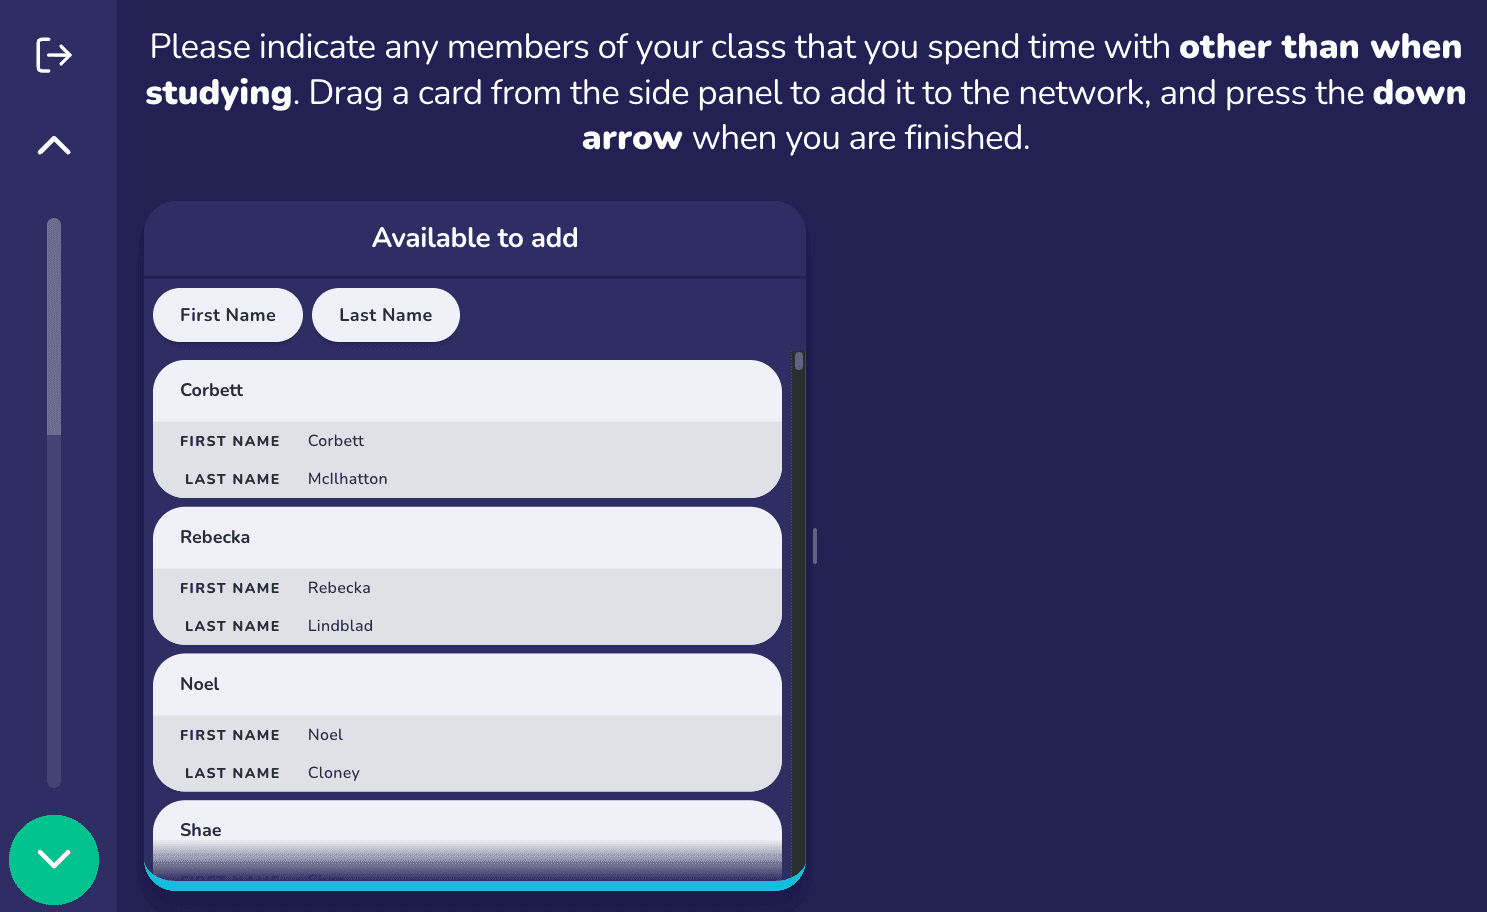
Once a member of the roster has been nominated by selecting its card, Interviewer creates a node in the network model using data from the roster. This results in data files that contain only the nodes that the participant nominated. This stage is an example of the Name Generator for Roster Data interface.
Clicking next again will take you to a second roster-based name generator stage — this time using the same interface with an extremely large roster. Here, we ask about universities visited or studied at. Our CSV roster data file contains approximately 9,300 nodes.
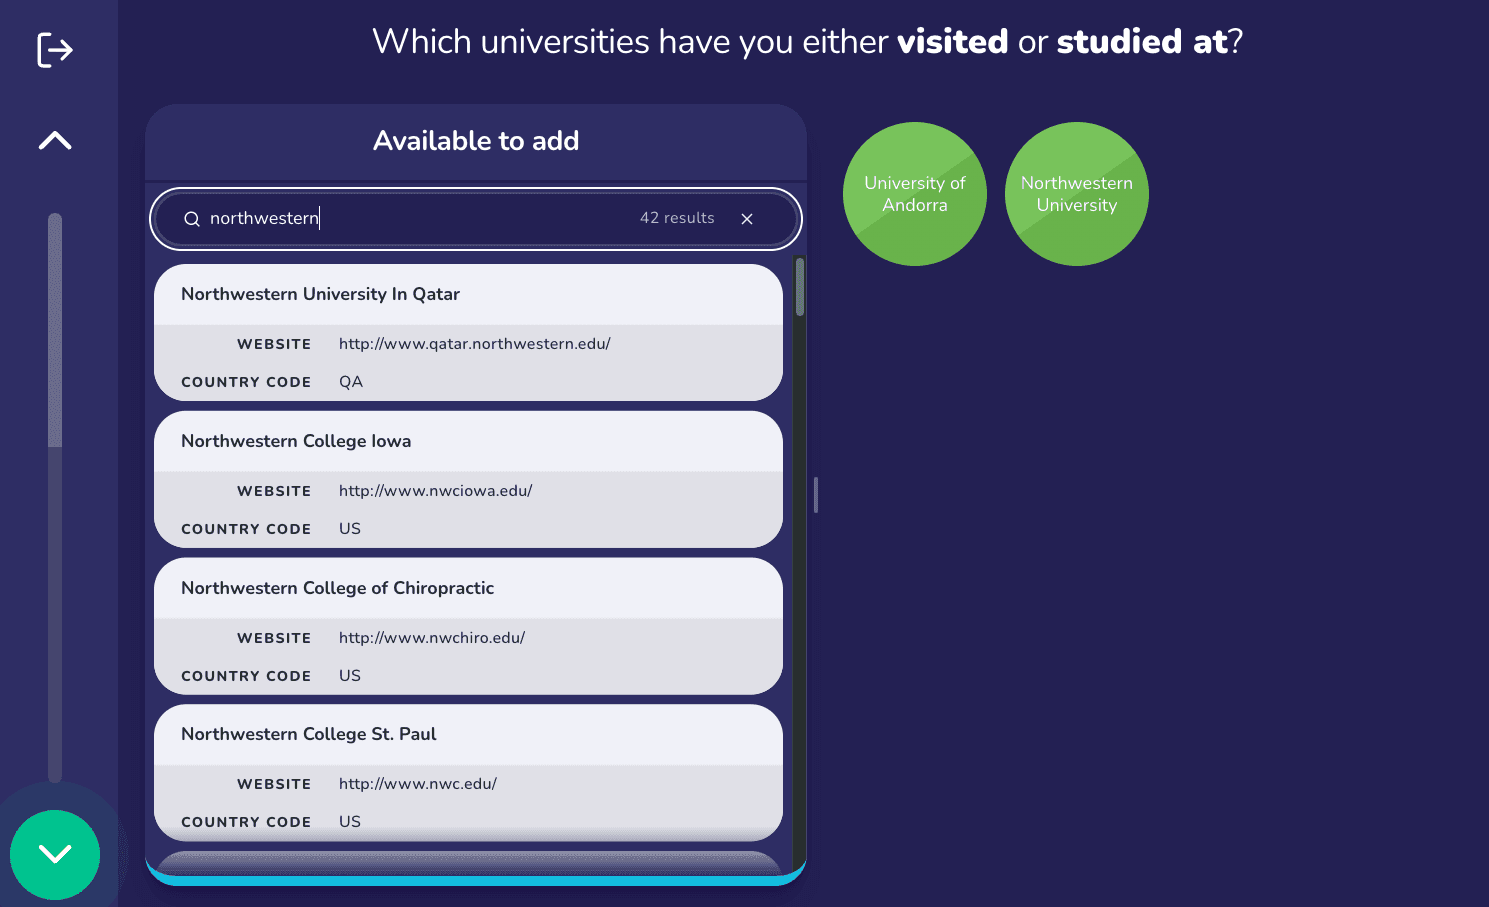
Since this roster is so large, the interface does not display the roster in its entirety. Instead, it offers a search box, and customizable levels of fuzzy matching, in order to help the participant quickly locate the nodes they wish to nominate. This is an example of how the Name Generator for Roster Data adapts its presentation to the size of the roster.
General purpose form interfaces
For situations where general purpose data collection is required, form-based interfaces show a form on a per-alter or per-edge basis.
Clicking next from the university roster stage, you will immediately arrive on a stage that uses the Per-Alter Form interface to ask follow-up name interpreter questions about all alters that were named on the previous screen.
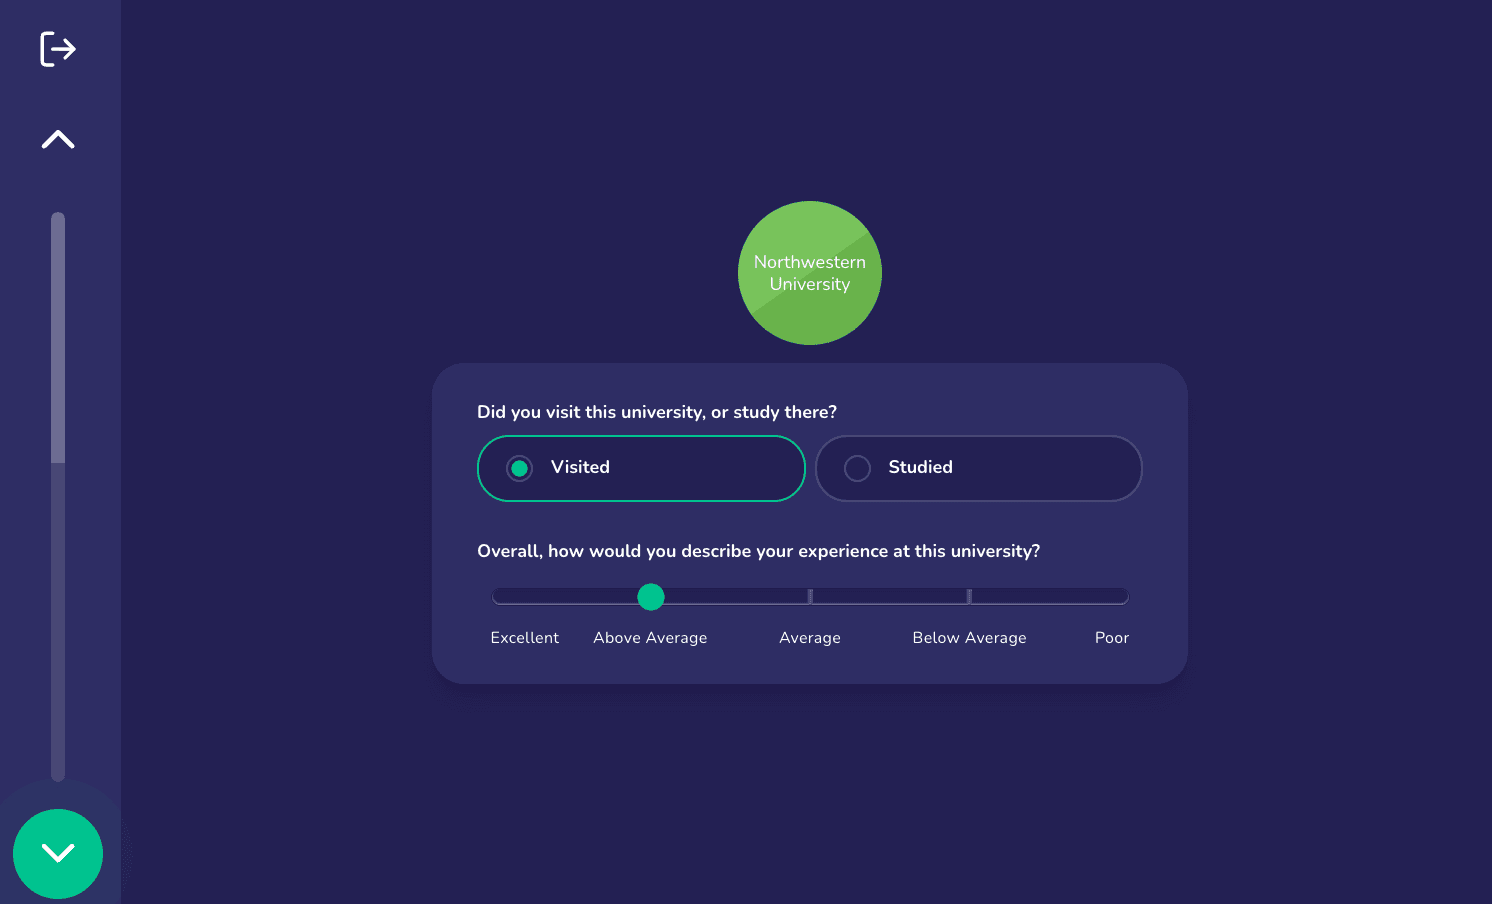
As with all forms used by Interviewer, the Per-Alter Form allows you to capture different types of data in a series of fields utilizing a variety of input controls. Any data in these forms is stored directly on the alter as attributes. The Per-Alter Form stage cycles through all alters of a given type in the interview network, presenting the form for each.
There is also a per-alter edge version of this interface, which is identical except for dealing with edges between alters rather than alters themselves. You can use it to ask edge interpreter questions about the quality of a given relation.
The sociogram interface
After clicking through an information stage, you will next arrive at an example of the sociogram interface.
Network Canvas has been heavily inspired by the long tradition of using visual methods in social networks research, which often feature the sociogram as a means of presenting the network in a way that is intuitive to participants.
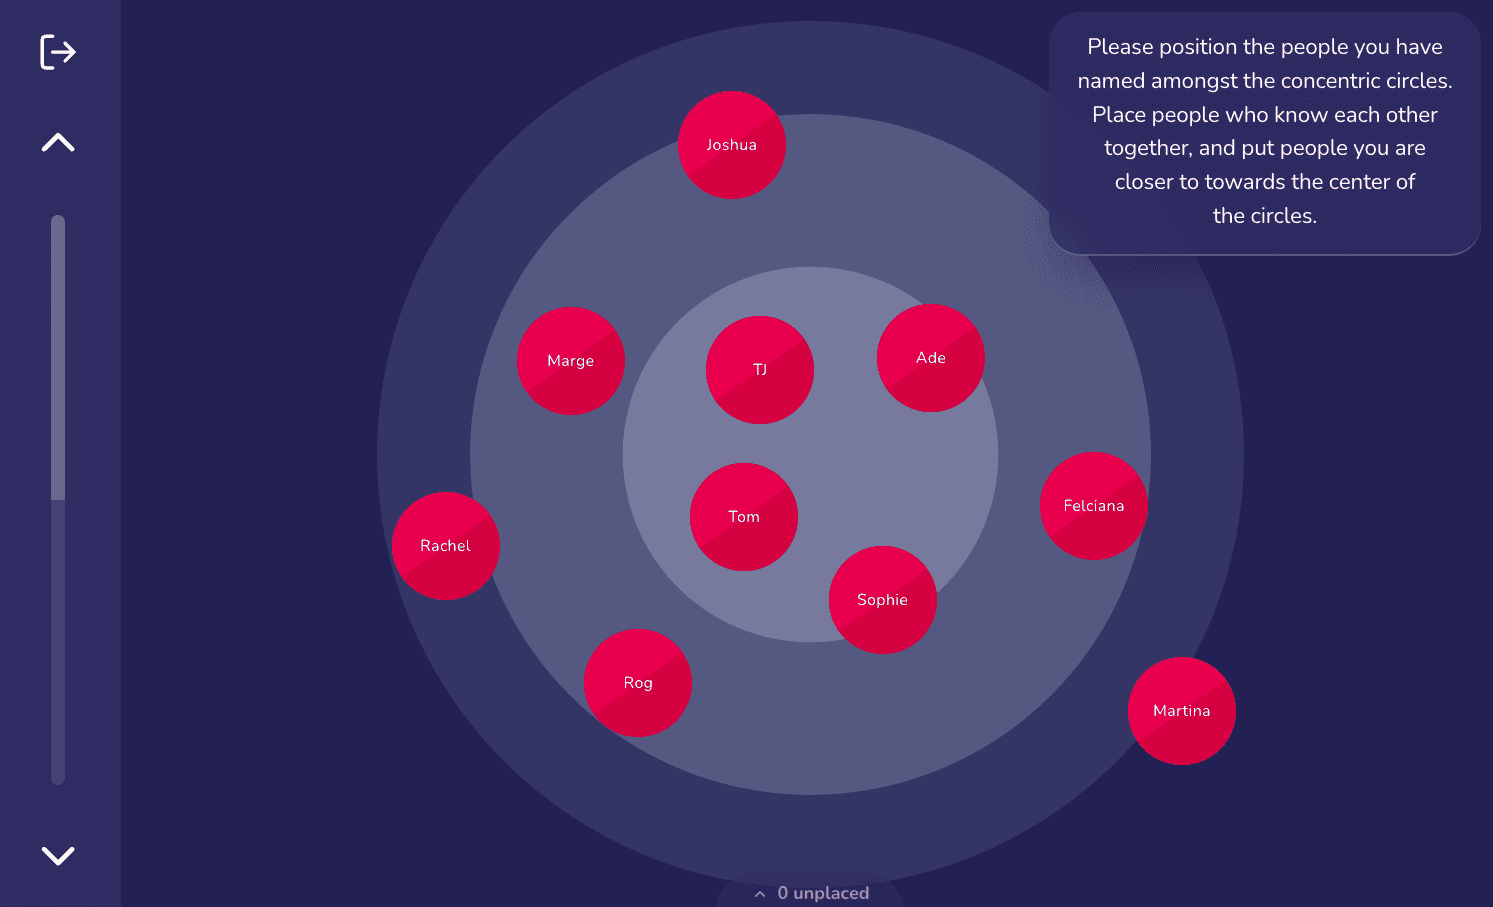
The sociogram interface in Interviewer is capable of three main tasks:
- Positioning nodes spatially - this means allowing the participant to drag (with touch or using a mouse) nodes around the screen, and place them according to some criteria. The sample protocol demonstrates the use of different background types, with the first stage showing concentric circles, and the second using an image of the "political compass".
- Creating edges or links between nodes - by tapping consecutively on one node followed by another, a visual link representing an edge can be created. The sociogram can create and display multiple edge types.
- Nominating nodes as having an attribute - when not in edge creation mode, the sociogram can be configured so that tapping a node toggles the value of a boolean variable. This powerful feature allows you to use the participant-defined spatial and structural dimensions of the network to reduce the response burden of finding and nominating members of the network.
As with other Interfaces, every aspect of these three behaviors is customized by the researcher in Architect when creating the stage.
Conducting a dyad census
Some research has preferred more systematic approaches to evaluating the presence of alter-alter ties in ego networks. Immediately following the edge creation sociogram stage in the sample protocol is an illustration of the dyad census interface, which has been designed to accommodate these methods.
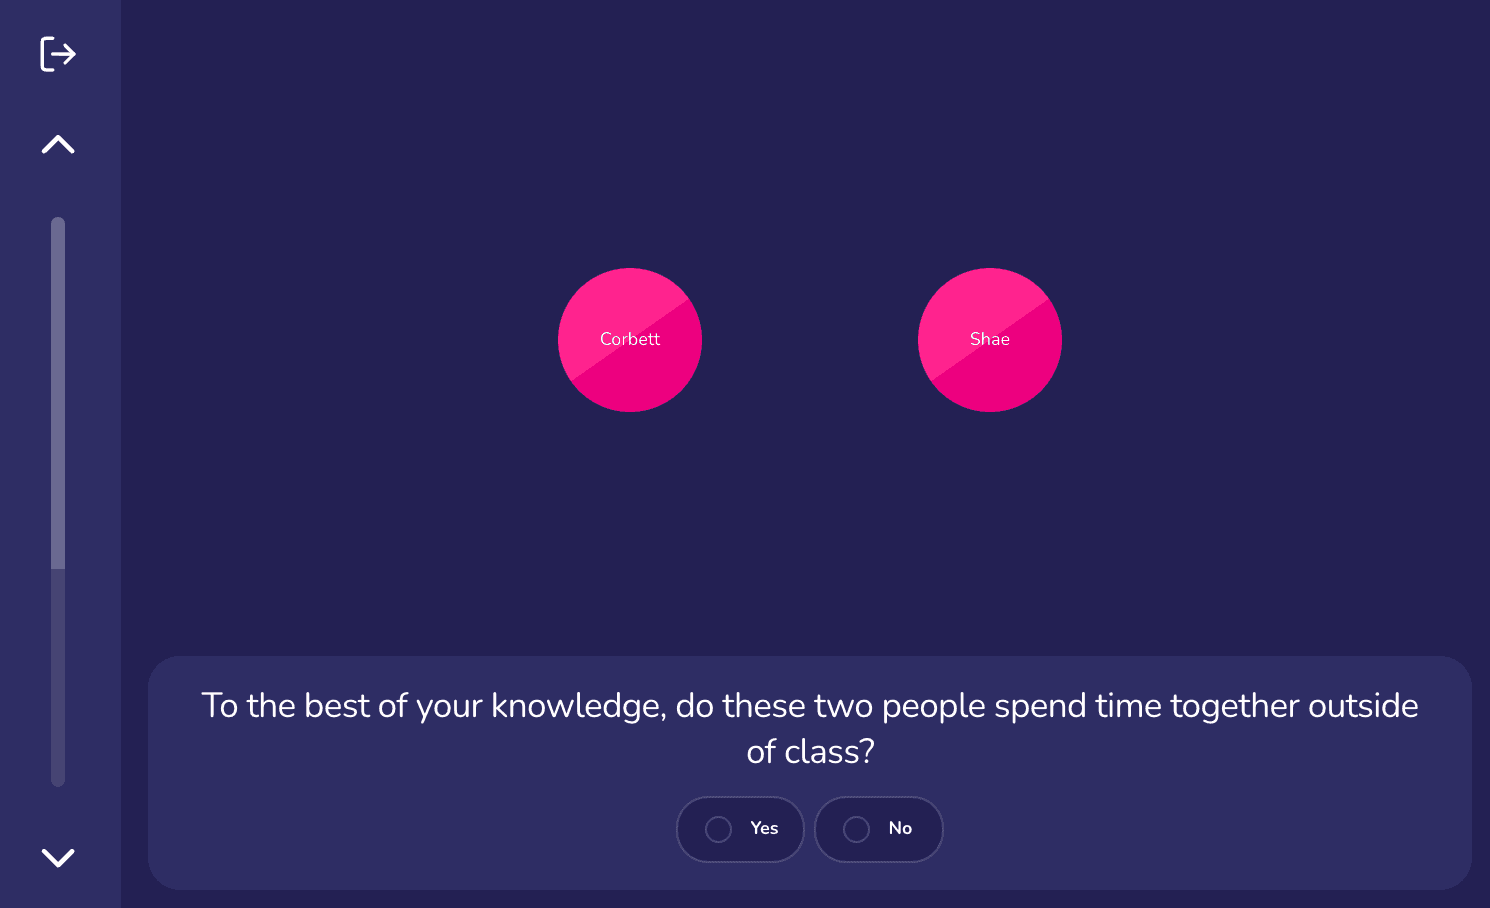
On this stage, all previously named alters are presented under a researcher-defined prompt and a simple "yes"/"no" user interface. By clicking the 'yes' button, a tie between the alters is created. By clicking the 'no' button, no edge is created. All possible pairs within the network for a particular node type will appear. Note that providing an answer immediately advances to the next pair, significantly speeding up the process.
Ordinal and categorical data
Apart from general purpose form interfaces, Interviewer also contains a variety of dedicated name-interpreter interfaces that are designed to improve the experience of collecting a single type of variable on a per-alter basis.
Continuing through the sample protocol to the "contact frequency" stage, you will find an example of the ordinal bin interface, which as the name suggests deals specifically with ordinal variables.
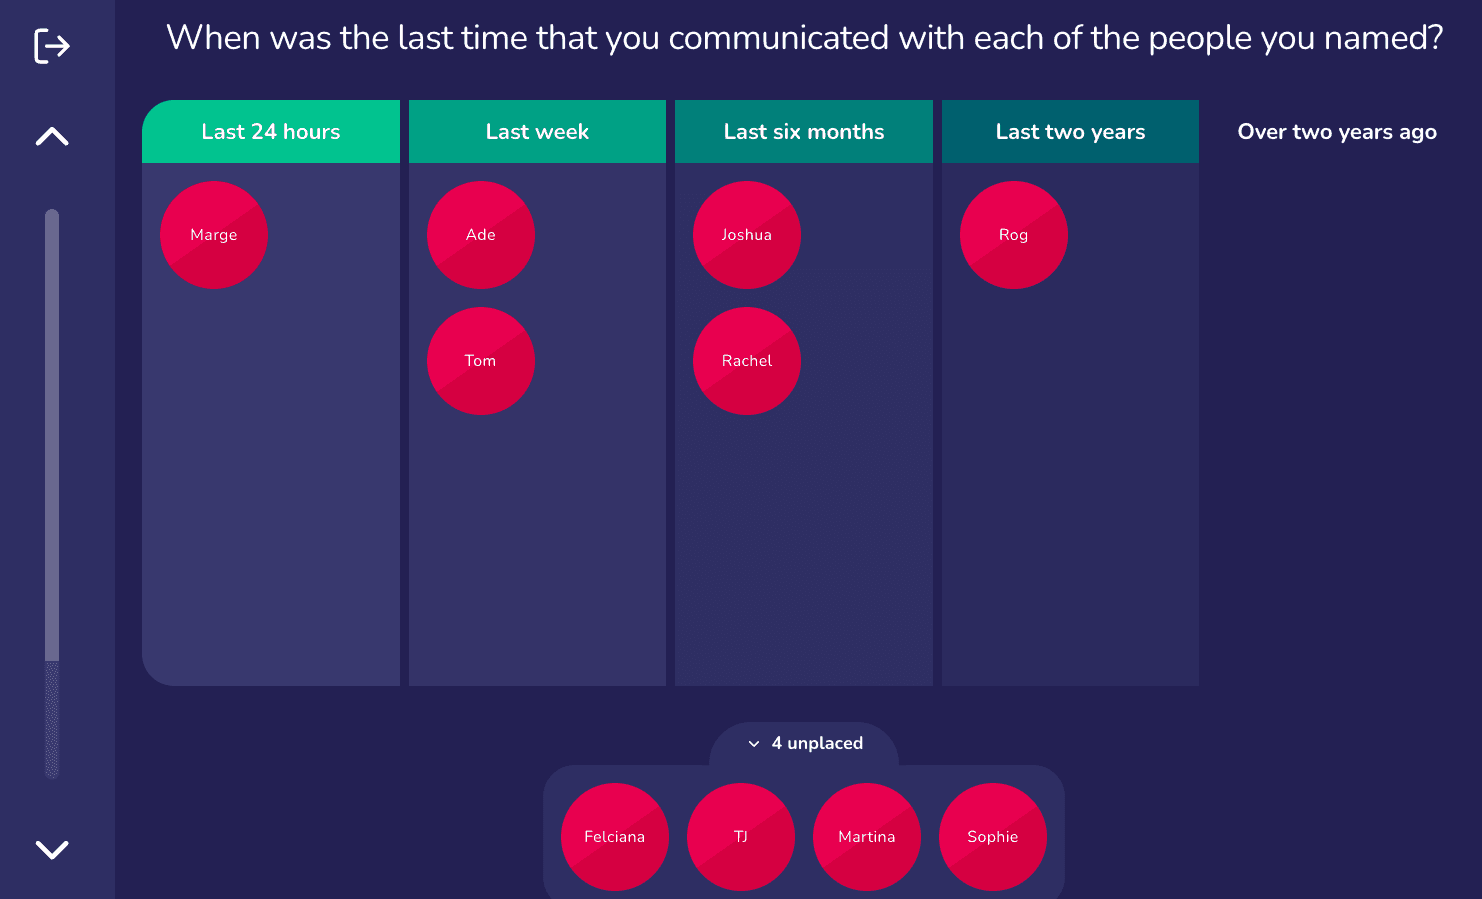
The ordinal bin interface allows you to drag nodes into a "bin" representing an ordinal variable value, thereby assigning that value to the alter. Here, we ask:
When was the last time that you communicated with each of the people you named?
This greatly improves response burden of "matrix type" questions, where the same question is asked for each alter that has been nominated. The visual nature of the user interface also allows the participant to reflect on prior answers, and potentially to improve the quality of answers. If the participant decides that a node was placed incorrectly in a particular bin, they can move it to the appropriate bin with minimal cost.
Once again, the key elements of the Interface are configurable by the researcher, including the alter type, the ordinal variable (and its categories), the color scheme of the bins, and the text for the prompt(s).
The following stage uses the categorical bin interface, which follows a similar pattern but for unordered data.
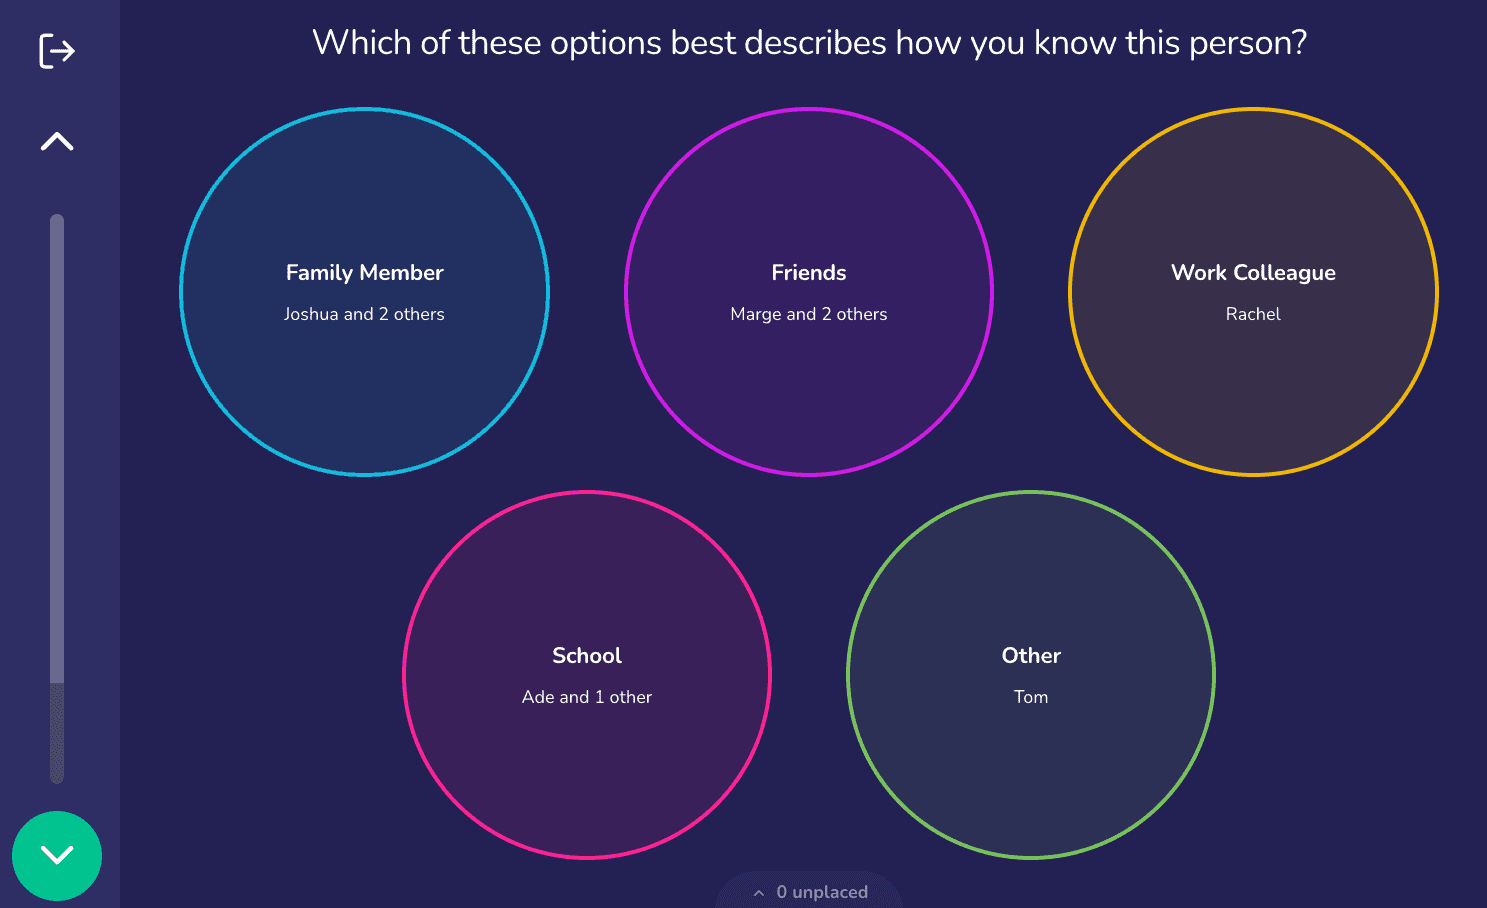
It allows you to drag nodes into colorful circles, each representing a categorical variable value. When a node is placed within a circle the variable value is assigned to that alter. You can view which nodes were placed in which circle by selecting the circle. This action allows you to move nodes from one circle to another, which may be necessary to correct an error.
Managing interview flow with skip logic and network filtering
One of the simplest ways to reduce response burden in an interview is to avoid showing the participant questions that are not applicable (or redundant) based on earlier answers. In conventional survey software, sections of an interview can be skipped based on responses. Interviewer extends this concept and allows the researcher to construct powerful queries built on the structure of the interview network itself, which can then be used to determine the flow of the interview as well as which interview network members should be shown on a stage. You can apply these queries to both skip logic and stage-level network filtering.
Following the Categorical Bin stage above, there is a further Categorical Bin. However, skip logic rules have been defined which direct that the stage should only be shown if a participant has named any alters of type "Person" with whom they discuss social network research. Recall the Quick Add Name Generator earlier in the interview, which asked participants to list any people with whom they have discussed social networks research: nodes nominated on that stage were given an attribute which has been used to create this skip logic query. If no alters were generated on that screen, the next Categorical Bin will be skipped.
Similarly, network filtering is configured using a rule which filters out all alters on this stage except those with whom the participant has discussed social networks research. This minimizes the scope of the task and removes the need to add a "not applicable" category.
Good to know:
For more information on network filtering, see the network filtering guide.
You may wish to navigate back and forth between the quick add name generator and this stage to see the skip logic and network filtering in action.
The Narrative interface
The final stage of the sample protocol demonstrates an interface that is designed for qualitative personal networks research. The Narrative interface does not collect any additional data but rather maps data collected elsewhere in the interview to aspects of the visual representation of the network. It aims to represent aspects of the participant's network back to them with the intent to facilitate narrative interrogation of the data in an interview setting.
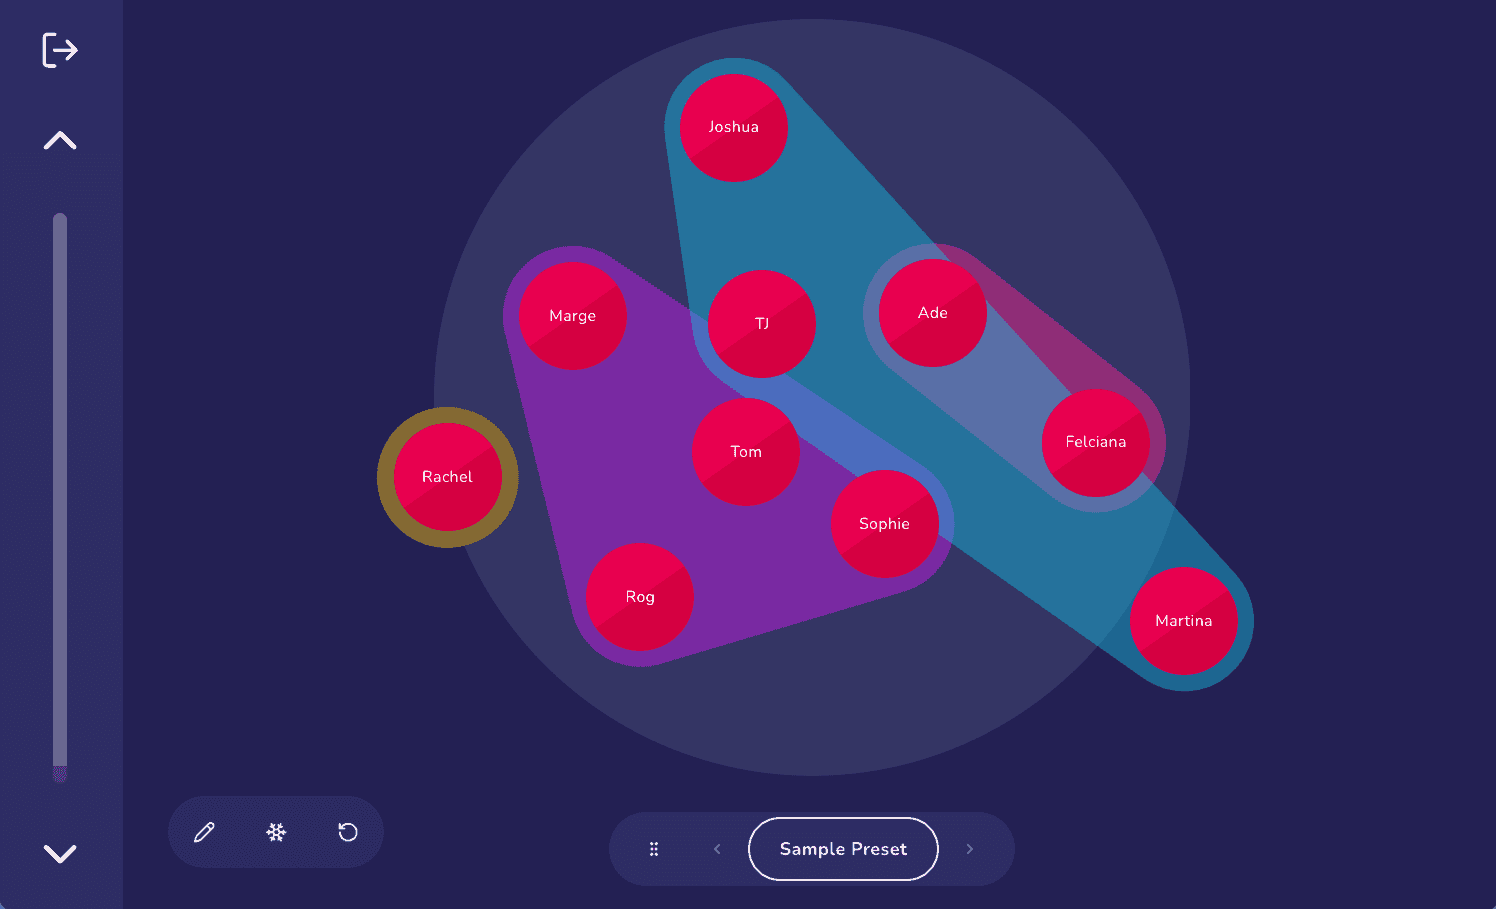
The preset menu in the bottom right allows the researcher or the participant to switch between different predefined visual styles. In this example, you can see the two edge types created previously ("know" and "conflict") and the boolean attributes assigned during the variable toggling task on the Sociogram interface. You can also see the categorical groupings collected on the Categorical Bin interface. Each preset can be toggled on or off by tapping on the attribute or edge in the menu.
The Narrative interface also supports free-form annotation using the mouse, a finger, or a stylus. The annotation will disappear in five seconds unless you click the freeze icon to the left of the preset menu. With the freeze button engaged, all annotations will remain until you disable the freeze function or use the reset annotation button. Although these annotations are not yet recorded by the software, you can optionally use additional screen recording and audio recording software to keep a record of the interactions on this interface.
The Finish Screen
Each interview protocol has a "finish" screen automatically inserted by Interviewer. This screen presents a single button that will exit the interview. Clicking this button will also set, or update, the "finished at" property of the interview session. This property is exported along with your interview data, and can be used to calculate interview duration.
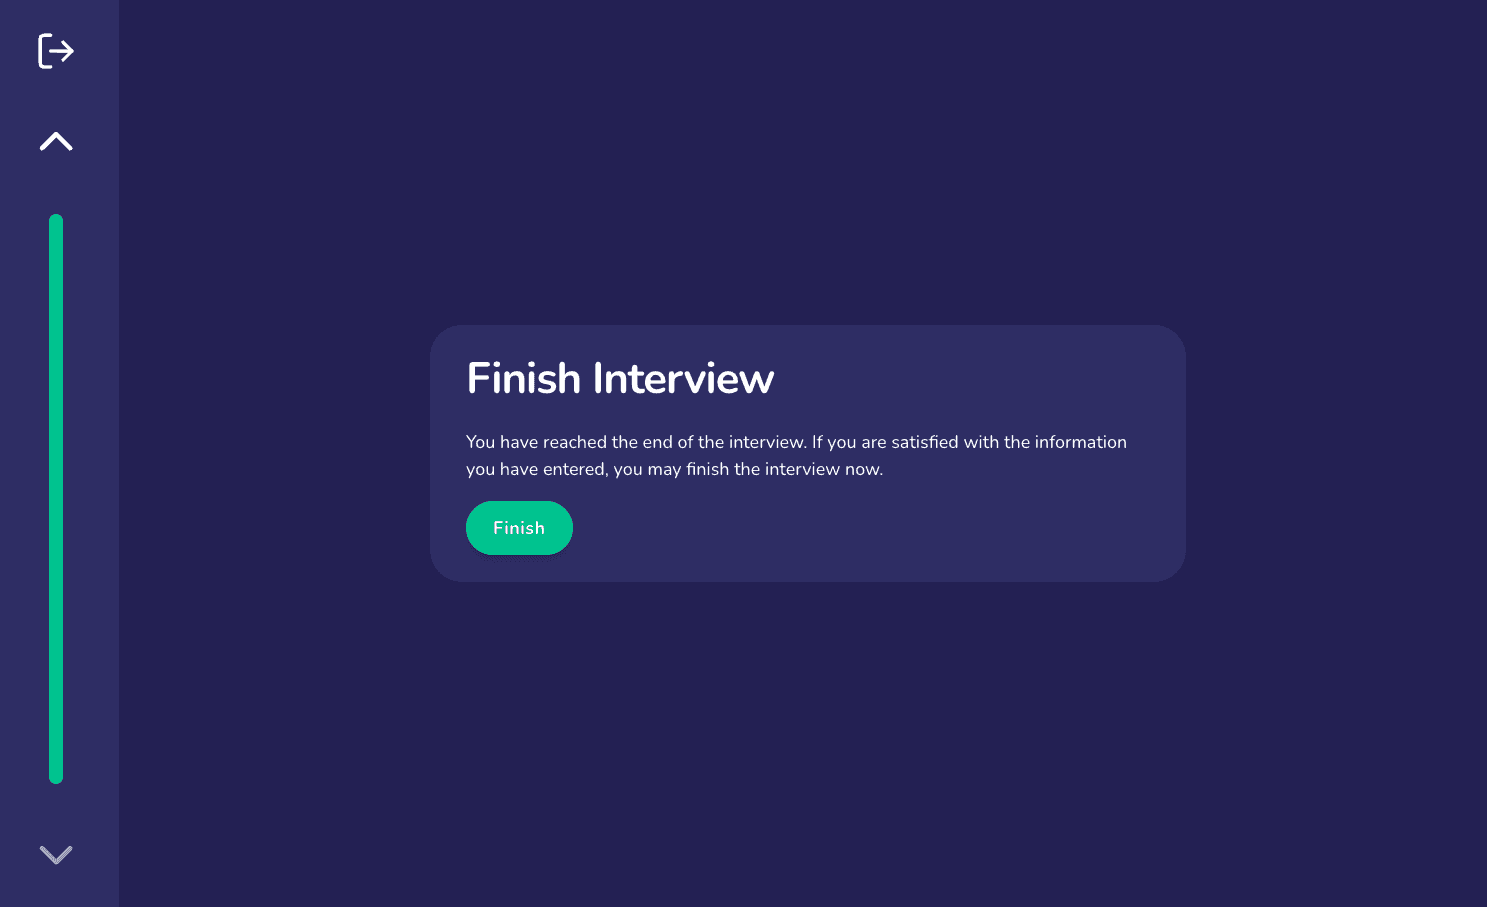
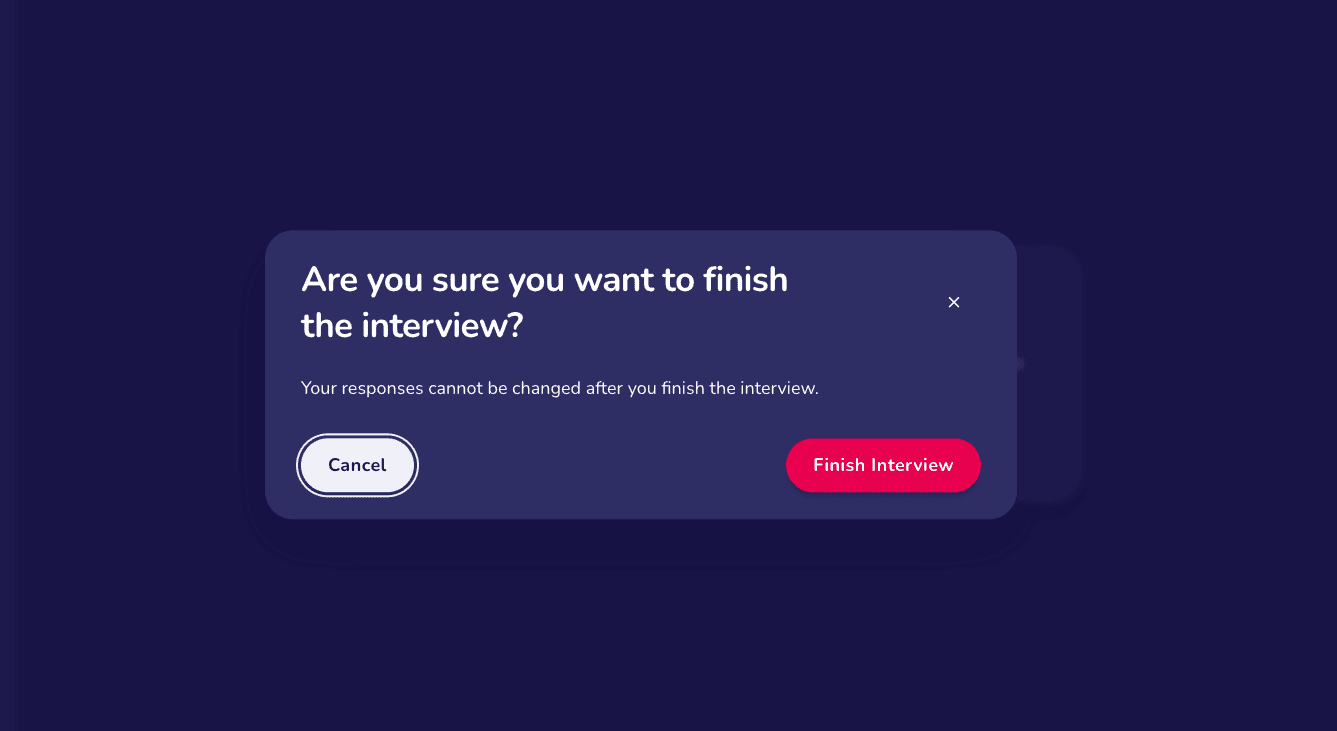
Interviewer asks you to confirm before finishing, since responses can't be changed once an interview is marked complete.
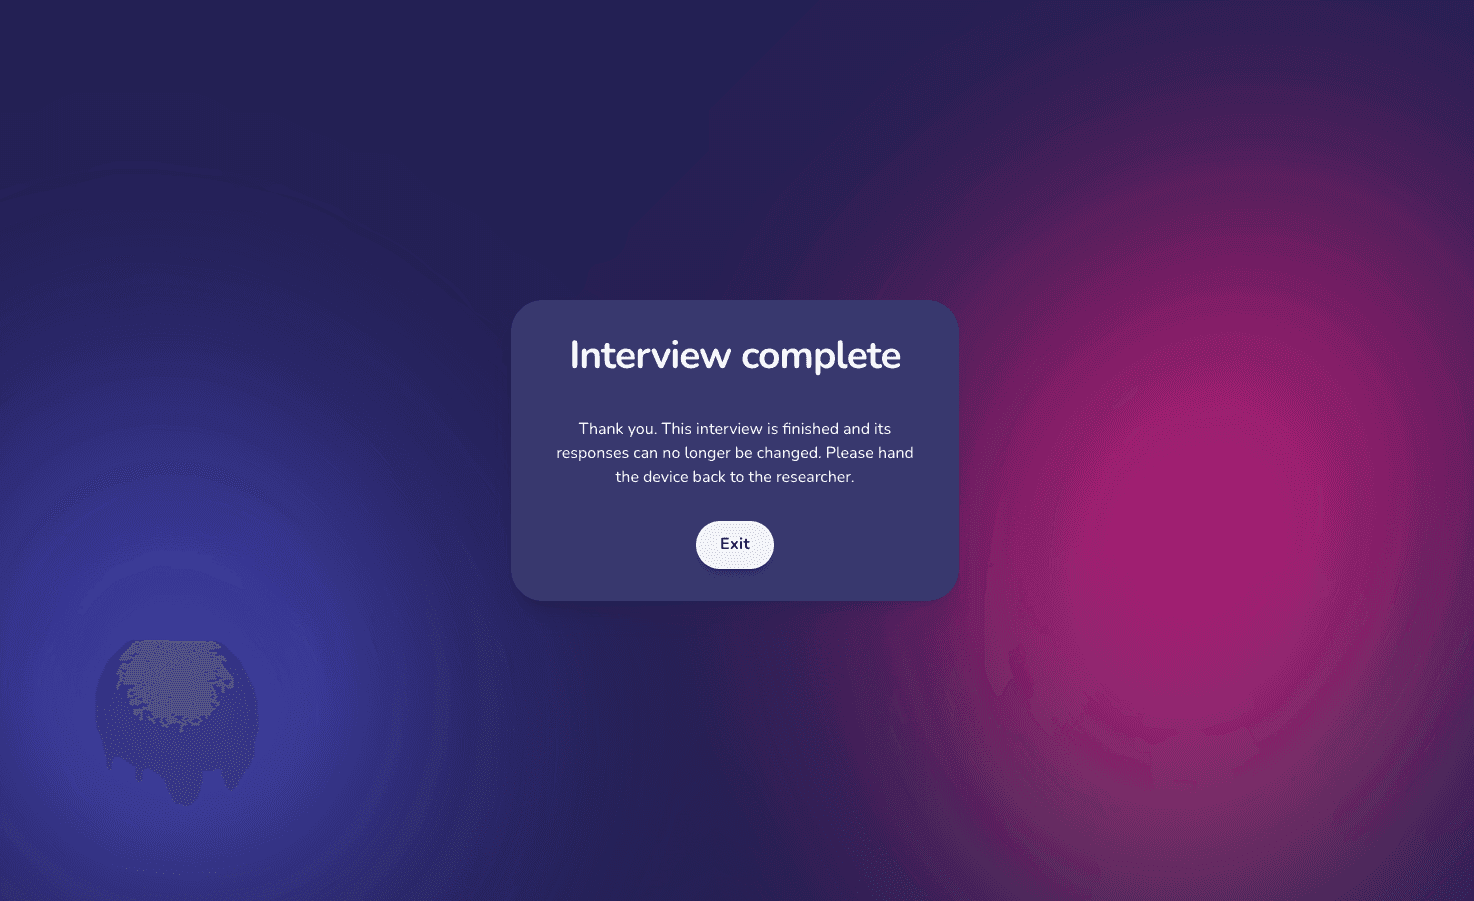
After confirming, you arrive at a short completion screen, and from there return to the dashboard.
For now click "Finish" to finish the interview.
Resuming, exporting, and managing interview sessions
Every session you collect — whether in progress, finished, or already exported — is listed in the Interviews area. Each row shows the case ID, the protocol used, when the interview started, and its status.
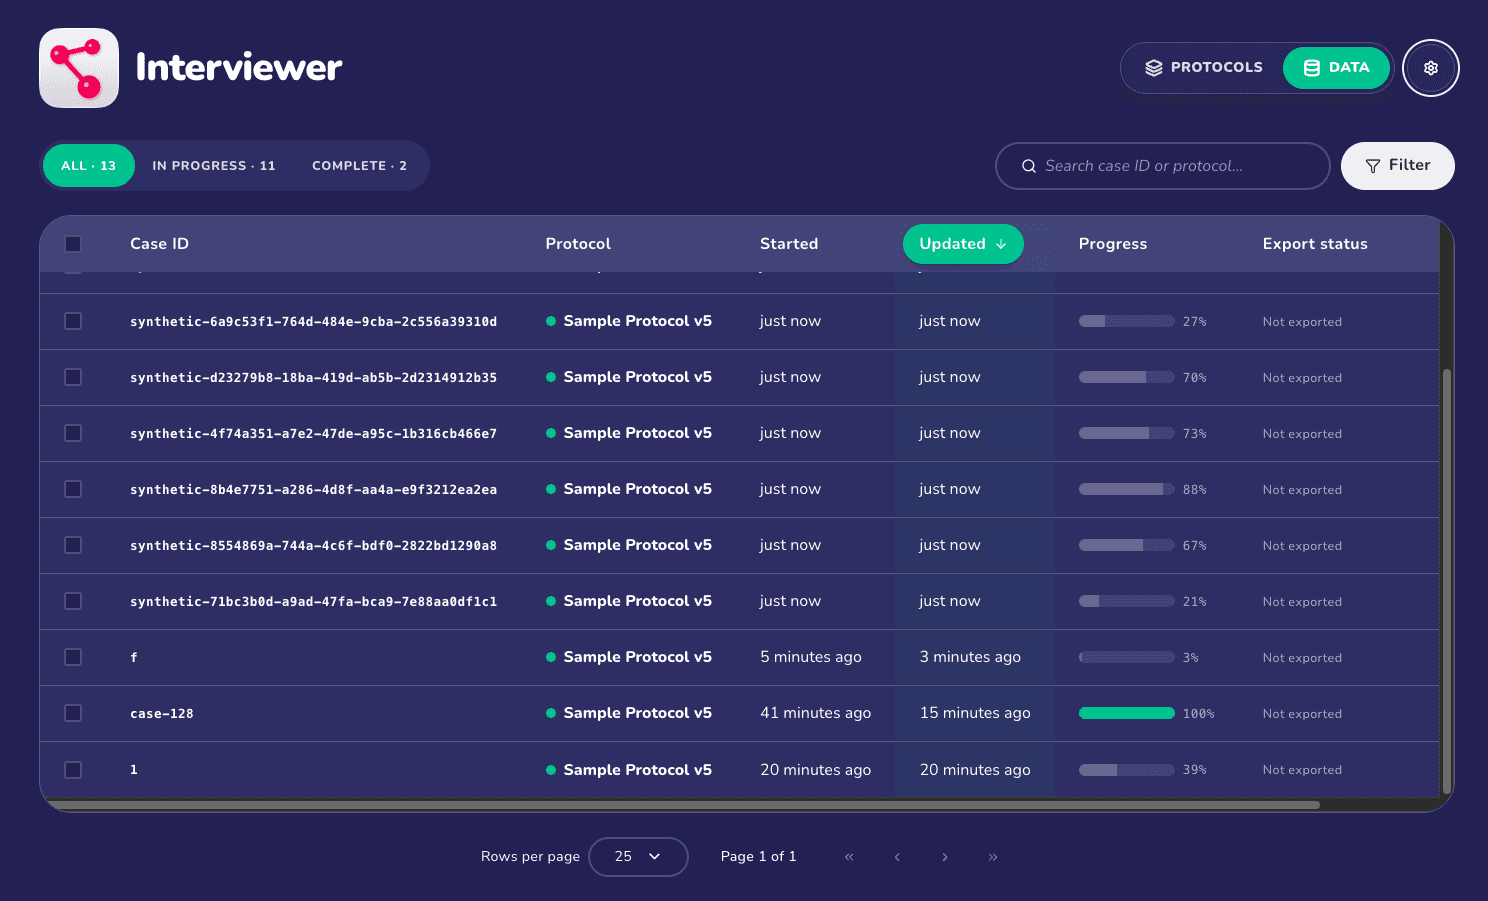
Select a session to resume an in-progress interview or review a finished one. You can also select several sessions at once to export or delete them in bulk. The data export process is covered below; export formats are configured in Settings rather than chosen at export time.
The export process
Interviewer packages the sessions you select into a single .zip archive, reporting progress as it goes and flagging each session as exported once it completes. Nothing is chosen at export time: the file formats included (CSV, GraphML, or both) and the screen-coordinate options are configured ahead of time in Settings → Data export (see Settings above).
To learn what the exported CSV and GraphML files contain — the entity files and their columns, the identifiers used to link them, and what each export option does — see the Data Export guide.
Next Steps
Now that you have experienced the general flow of an interview in Network Canvas Interviewer from the participant perspective, you may wish to:
- Learn how to create your own protocol in getting started with Architect
- Export your interview data using the Data Export guide
- Explore the full Protocol and Data Workflows for conducting research
- Plan how protocols and data will move on and off your devices with Interviewer Online and Offline Workflows